Outputs
Program is what Studio puts on air. Outputs are the ways Program leaves Studio. Each one has its own switch, its own settings and its own status, so you can run any mix of them at the same time.
Where the controls are
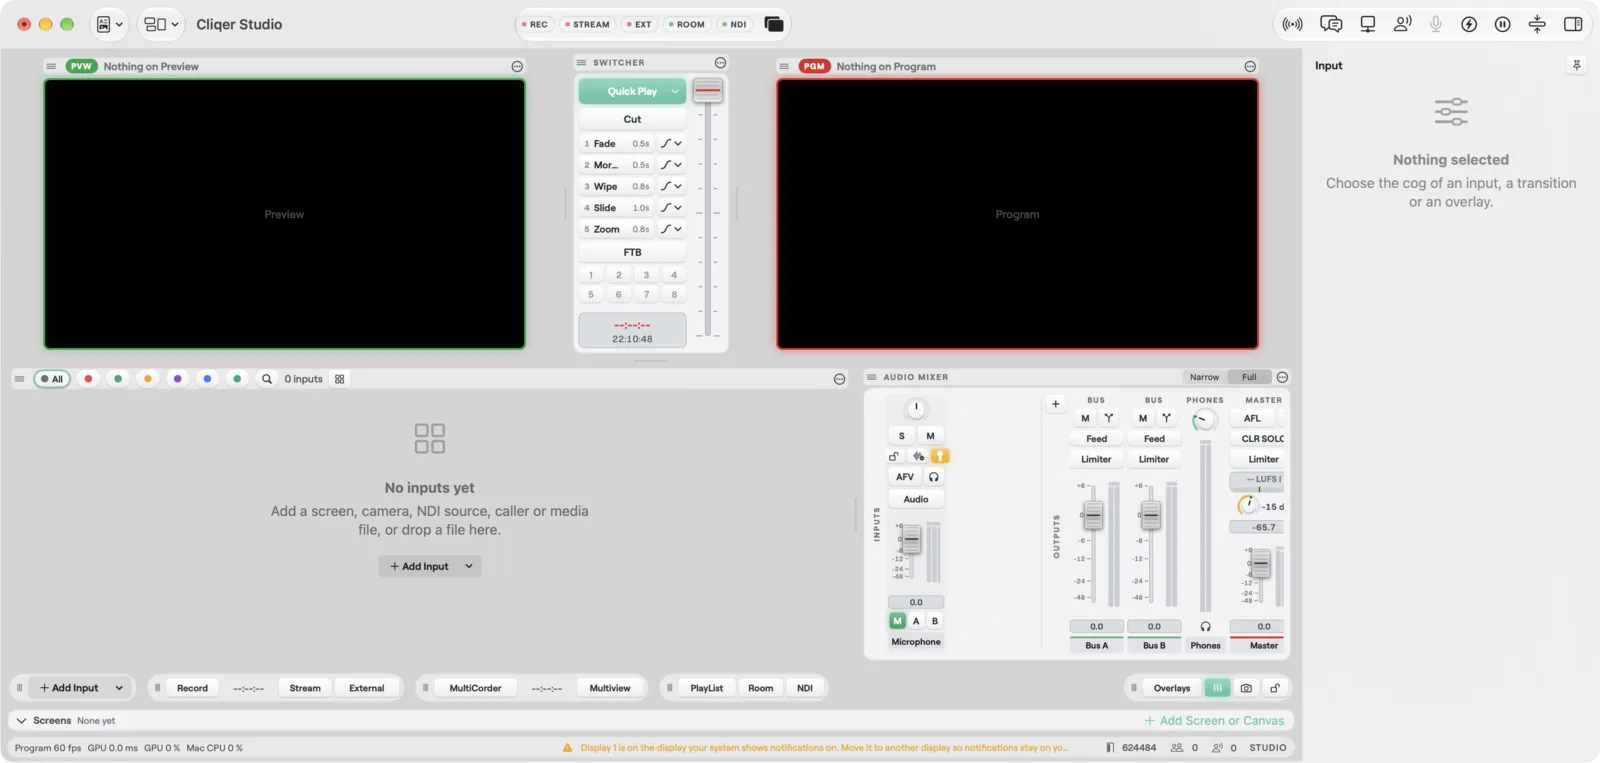
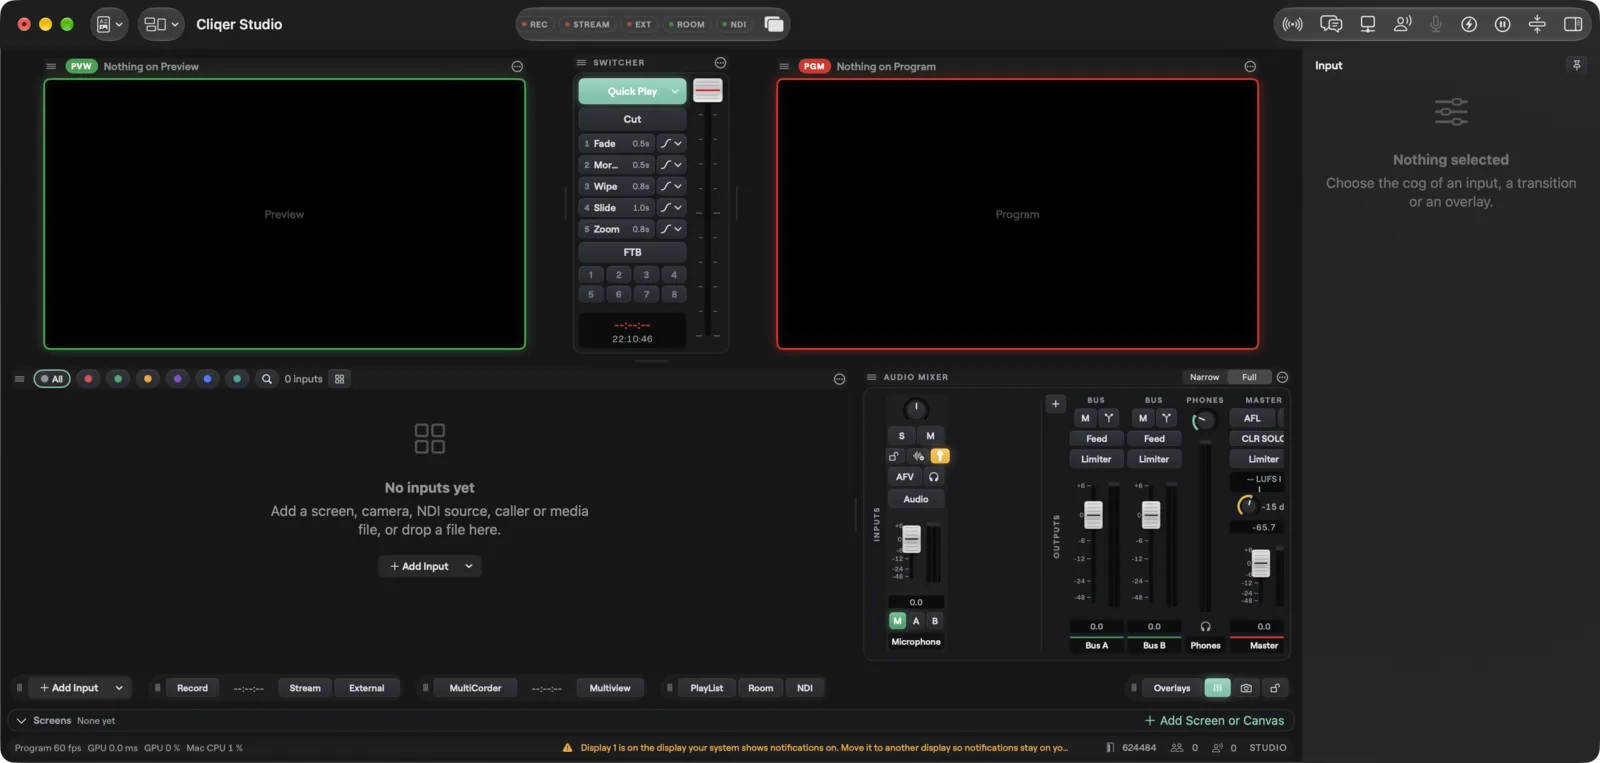
- Toolbar lamps in the middle of the Studio toolbar:
REC,STREAM,EXT,ROOMandNDI, then a Display menu. Click a lamp to start or stop that output. The tooltips read Record, Stream, Virtual camera, Program to the room and Program as NDI, followed by the key you bound to it, if any. Right-click theNDIlamp for Set Up Outputs.... - Outputs button on the right of the toolbar, or Studio, Outputs...: opens the Outputs window.
- Bottom bar of the Studio window, in groups you can move and close (see Multiview and layouts):
- Record, Stream and External: the keys Record, Stream and External, with a recording clock beside Record.
- Replay: the keys Replay, In, Out, Save and Play, see Replay. It is not in the default Classic layout; add it from Panels.
- MultiCorder and Multiview: the MultiCorder key with its own clock, and the Multiview key.
- PlayList, Room and NDI: PlayList, Room and NDI.
- Overlays and Tools: Overlays, the audio mixer key, the snapshot key and the lock key.
- Settings cogs next to each output key. They are hidden when the Studio window is narrower than 1420 points; right-click an output key to open the same settings.
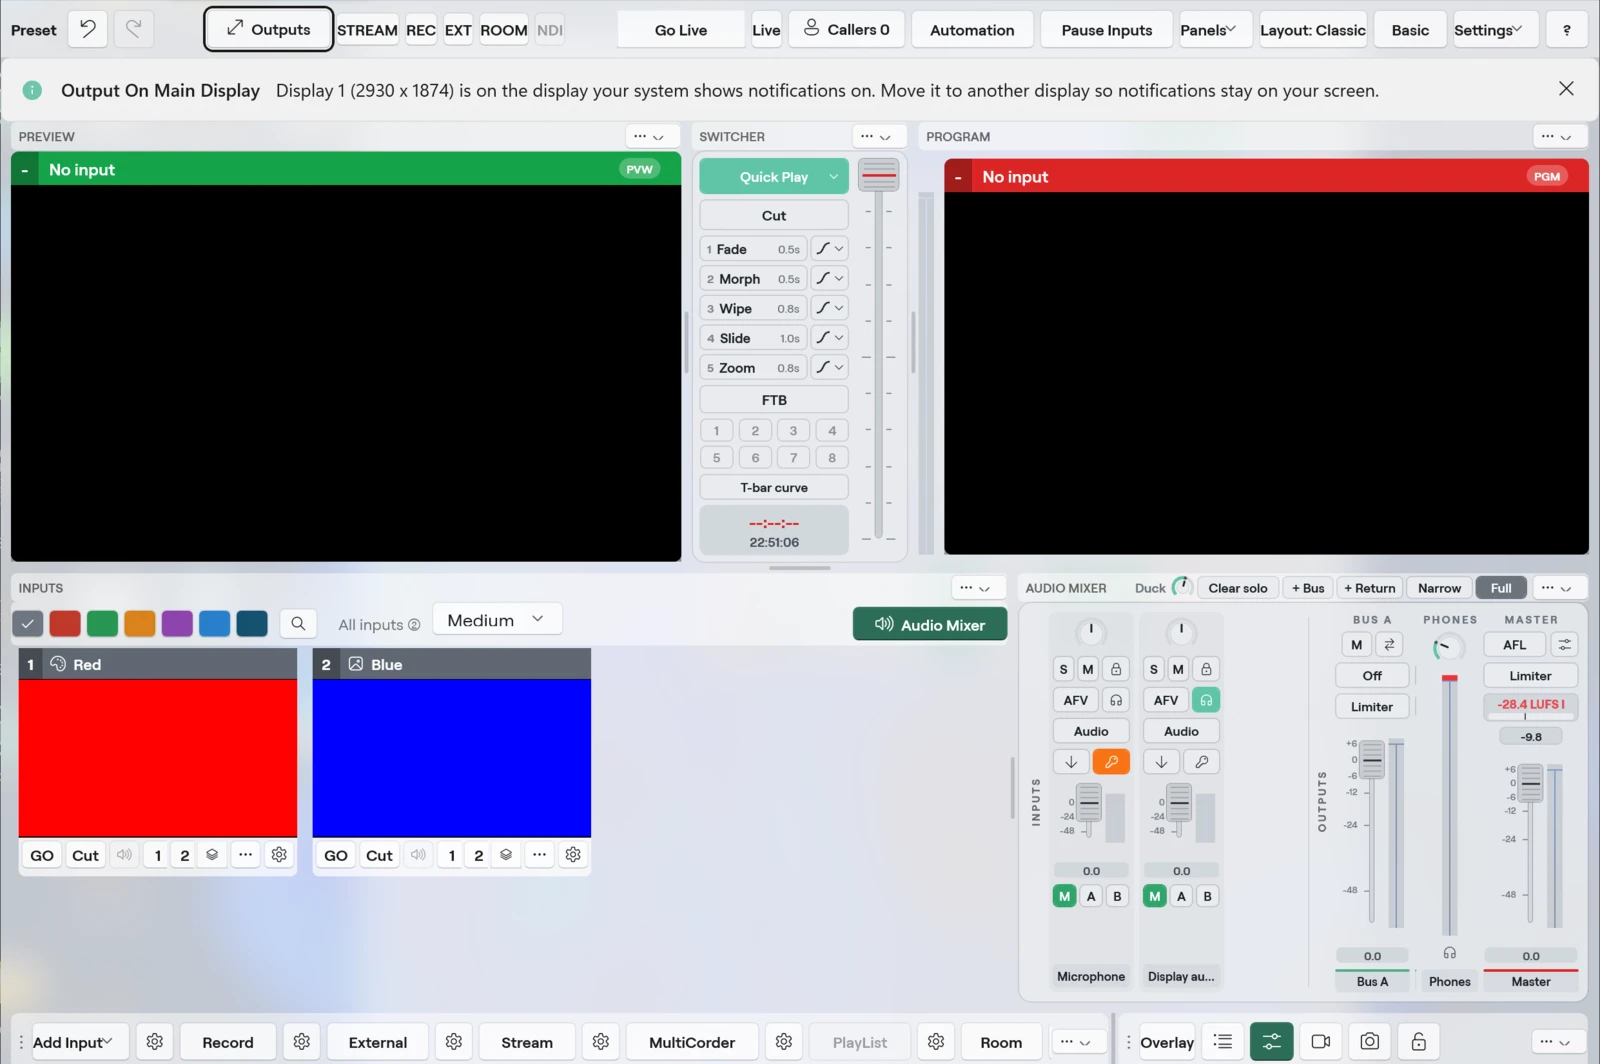
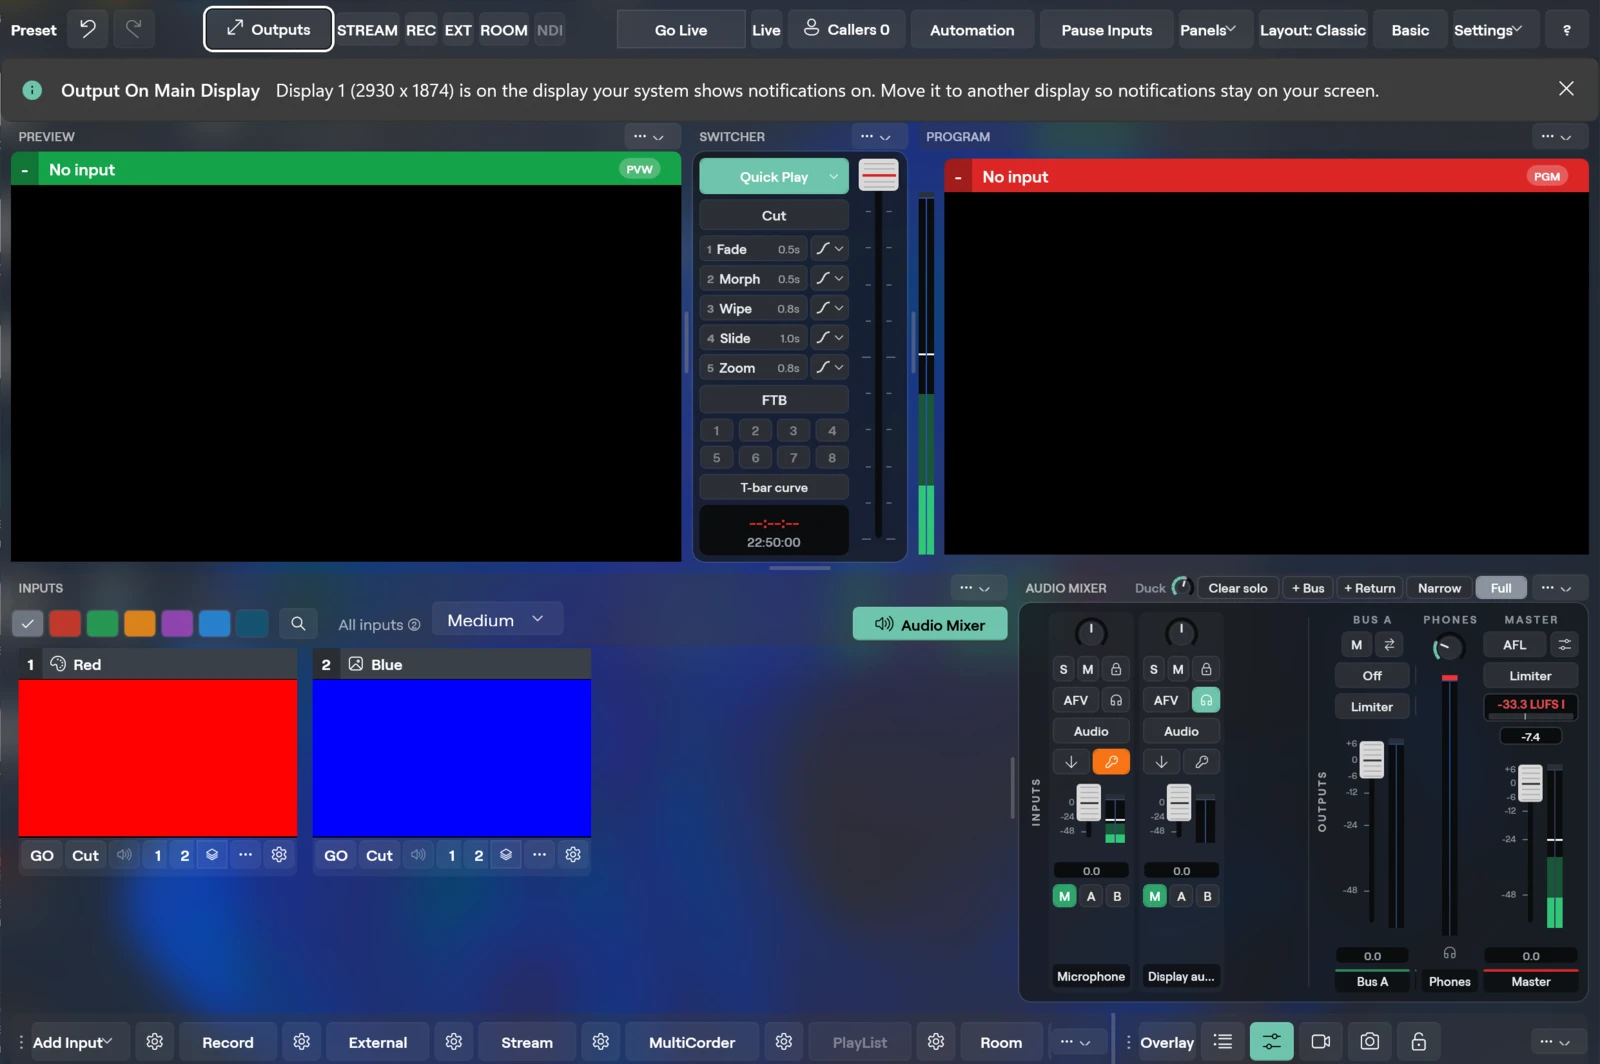
- Top bar lamps:
STREAM,REC,EXT,ROOMandNDI. The tooltips read Stream, Record, External output, Send Program to the room and Program as NDI. - Outputs button in the top bar (tooltip Outputs and video router): opens the Outputs window.
- Outputs bar at the bottom of the Studio window: Add Input, then Record, External, Stream, MultiCorder, PlayList, Room and NDI, each output with a cog beside it for its settings.
- Tools bar: Overlay, List view, Audio levels on tiles, Multiview panel, Snapshot of Program and the lock.
- Replay panel: open it from Panels, see Replay.
Outputs at a glance
| Output | What leaves Studio | Studio plan feature it needs | macOS | Windows |
|---|---|---|---|---|
| Room | Program, or one input, to everyone in the room | none in the app (the server caps how many shares the room carries, see Plans and limits) | Yes | Yes |
| NDI | Program as the Cliqer Program source, plus any input as its own source | NDI output | Yes | Yes |
| Record | Program to one MP4 or MOV file | Studio recording; HEVC and ProRes need the HEVC and ProRes feature | Yes | Yes |
| Stream | Program to one or more RTMP, RTMPS or SRT destinations | Studio streaming; HEVC needs HEVC and ProRes | Yes | Yes |
| External | Program as a camera other apps can pick | Studio virtual camera | Yes | Yes |
| Display | Program, Preview, Multiview or one input full screen on a display | none of its own (Multiview needs Studio multiview output) | Yes | Yes |
| Syphon or Spout | A named video source that other apps on this computer can pick | Syphon and Spout outputs | Syphon | Spout |
| Blackmagic | An output on a Blackmagic capture card | DeckLink outputs | Yes | Yes |
| MultiCorder | Every chosen input, and Program if you like, each to its own file | Studio ISO recording | Yes | Yes |
| Snapshot | The current Program frame as a PNG | none | Yes | Yes |
| PlayList | Not an output: takes a list of inputs to Program in turn | none | Yes | Yes |
A plan that does not include an output refuses to start it and shows the plan notice described in Plans and limits. Stopping an output is never refused.
Status of an output
Every output reports one of five states and shows a dot with the word, never a colour alone.
| Status | Meaning | Dot (macOS) |
|---|---|---|
| Off | Not running. | Grey |
| Starting... | Connecting, or waiting for the first frame. | Orange |
| Live | Running. | Red |
| Reconnecting... | A stream's connection dropped. The destination stays on and connects again, waiting 1 second at first and up to 30 seconds. The reason appears under the status. | Orange |
| Stopped | It stopped on its own. The reason appears under the status. | Orange |
Clocks show hours, minutes and seconds (00:12:45). An output that is not running shows --:--:--.
On macOS, when an output fails or is refused you get an alert titled after what failed, for example Recording Failed, Stream to
Room
Send the Program, or a single input, to everyone in the room. Presenters and viewers see it in their browser or in Cliqer Remote.
- Program to the room: the ROOM lamp, or the Room key.
- One input to the room: the input's menu item To Room on macOS, Show to the room on Windows.
- What the room hears: the audio bus the room receives.
- Resolution and Quality: the size and bitrate of the picture the room receives.
- Frame rate: shown, not set here.
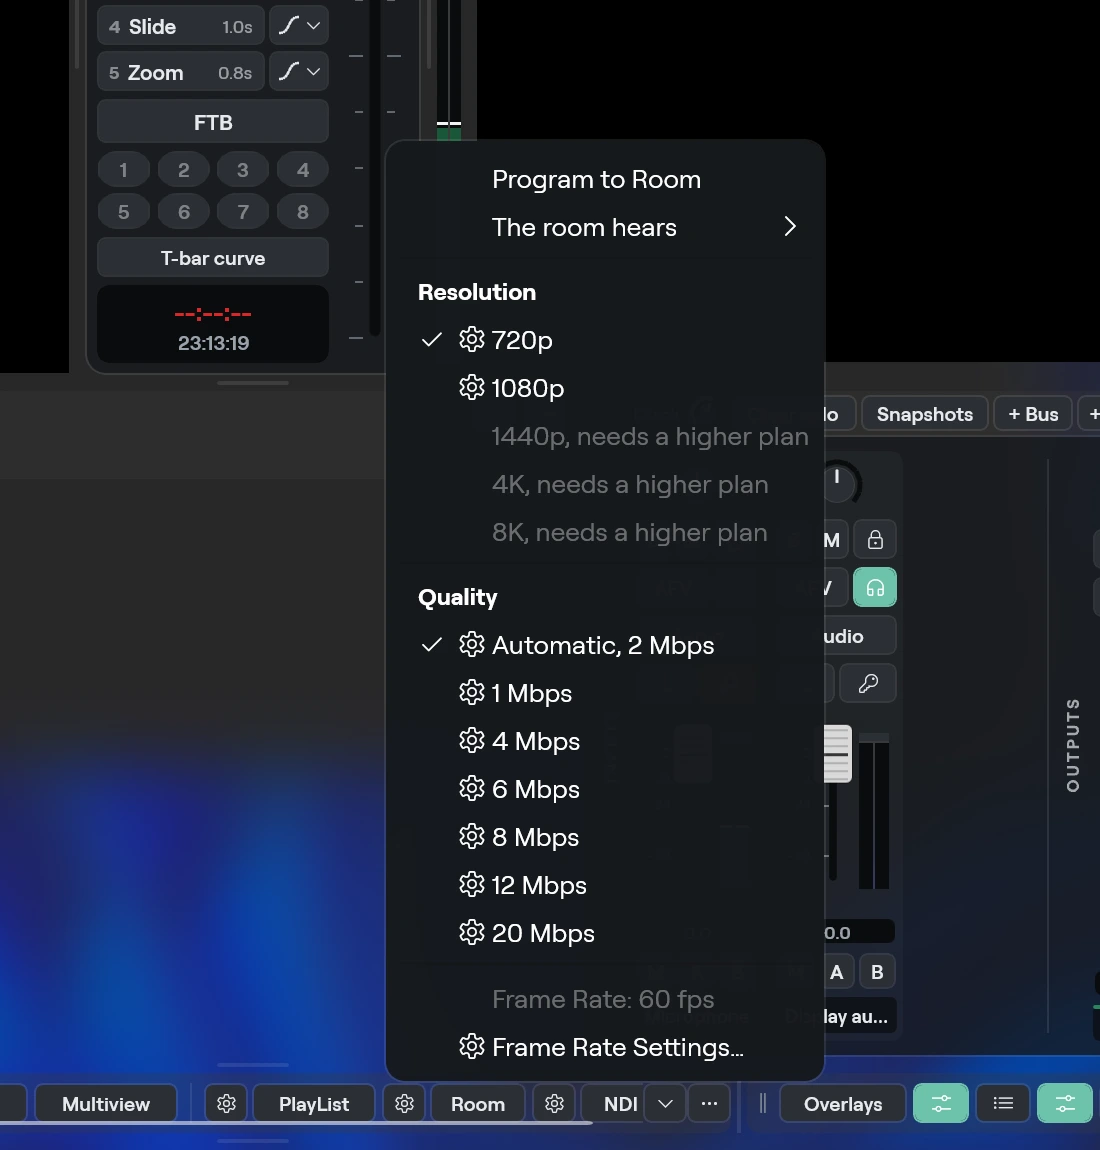
Click the cog beside Room (or right-click the Room key) for a menu with the toggle Program to Room and the submenu Room Hears. Room Hears offers Master, Headphones Mix, Bus A, Bus B and Silence. Bus A and Bus B need the Studio audio buses feature.
Below that, the menu has the output options as sections with a checkmark on the choice in effect. Resolution offers 720p, 1080p, 1440p, 4K and 8K; a size over your plan shows a lock and needs upgrade, and choosing it opens the upgrade notice. Quality lists Automatic, 3.5 Mbps first (the bitrate that suits the size in effect, so it reads 2 Mbps at 720p, 3.5 Mbps at 1080p, 6 Mbps at 1440p and 12 Mbps at 4K and 8K), then fixed steps of 1, 2, 4, 6, 8, 12 and 20 Mbps. A step equal to the preset is not listed twice. Choosing a new size leaves a fixed step alone; Automatic follows the new size. The line Frame Rate shows the rate the machine runs at (for example 60 fps), and Frame Rate Settings... opens Settings, Sharing, where it is set. These are the same values as in Settings, so a change in the menu shows there and the other way round. Program and Preview use the same size.
Click the cog beside Room for a menu with Program to Room and The room hears. The room hears offers Master, Headphones, Bus A, Bus B and Nothing. The same choice is in the menu of the Audio Mixer panel, and the Program panel menu also has Program to the room.
Below that, the menu has the output options under the headings Resolution and Quality, with a checkmark on the choice in effect. Resolution offers 720p, 1080p, 1440p, 4K and 8K; a size over your plan is dimmed and says it needs a higher plan. Quality lists Automatic, 3.5 Mbps first (the bitrate that suits the size in effect, so it reads 2 Mbps at 720p, 3.5 Mbps at 1080p, 6 Mbps at 1440p and 12 Mbps at 4K and 8K), then fixed steps of 1, 2, 4, 6, 8, 12 and 20 Mbps. A step equal to the preset is not listed twice. Choosing a new size leaves a fixed step alone; Automatic follows the new size. The dimmed line Frame Rate shows the rate the machine runs at (for example 60 fps), and Frame Rate Settings... opens Settings on the Video page, where it is set. These are the same values as in Settings, so a change in the menu shows there and the other way round. Program and Preview use the same size.
NDI
NDI sends video and audio over your network to vMix, OBS, Resolume and any other NDI receiver. Studio can advertise these sources:
| Source name | What it carries |
|---|---|
Cliqer Program | The Program mix. |
Cliqer <input name> | One input on its own. Parentheses in the name are dropped and the name is cut at 40 characters. |
Cliqer Caller - <name> <last 4 characters of the id> | One person on a video call, see Video calls. |
Cliqer Multiview | The Multiview picture, see Multiview and layouts. |
Cliqer Preview, Cliqer Clean Program, Cliqer Multiview 2 and so on | Any other NDI output you add in the Outputs window, named after its source. You can change the name in the output's setup. |
Cliqer Timer | The timer window, outside Studio. |
Receivers usually show your computer name in front, for example MACHINE (Cliqer Program). See NDI Output for network tips.
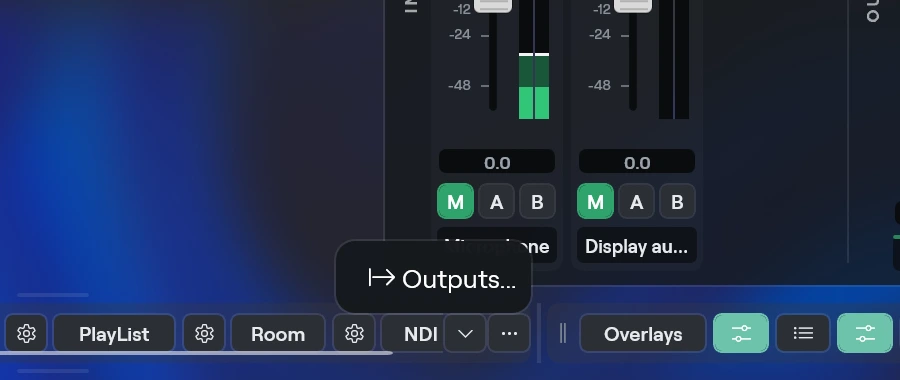
- Program: the NDI lamp or the NDI key. Its cog menu has the toggle Program as NDI and Outputs....
- What the NDI output hears: the output's Audio setting in the Outputs window (Off, Follows the source, Master, Headphones mix, Bus A, Bus B).
- One input: NDI Output in the input's menu, or Own NDI output in its inspector.
- These switches are shortcuts: each one is a row in the Outputs window.
- The input menu and the NDI Source list of Add Input link to About NDI® (ndi.video).
- Program: the NDI lamp or the NDI toggle on the Outputs bar (name Program as NDI), or Program NDI output in the Program panel menu. The cog beside NDI opens a menu with Program as NDI and Outputs....
- What the NDI output hears: the output's Audio setting in the Outputs window (Off, Follow the source, Master, Headphones, Bus A, Bus B).
- One input: NDI output in the input menu.
NDI needs the NDI runtime. When Cliqer cannot use it, every NDI control is off and a note beside the controls says why, with an Install NDI Tools link when installing fixes it. The notes read "NDI® is not installed on this computer. Install NDI Tools, then restart Cliqer.", "NDI® has no Windows on Arm version. The x64 Cliqer has NDI and runs on this PC." and "This build of Cliqer has no NDI®.". Windows on Arm has no NDI of its own: install the x64 Cliqer, which runs there. On Windows the NDI output entry is left out of Add output in the Outputs window while NDI cannot run. Quitting Cliqer stops every NDI sender, so OBS and vMix do not freeze on the last frame. On a plan that carries the watermark, the Cliqer Timer source carries the moving watermark too.
Record
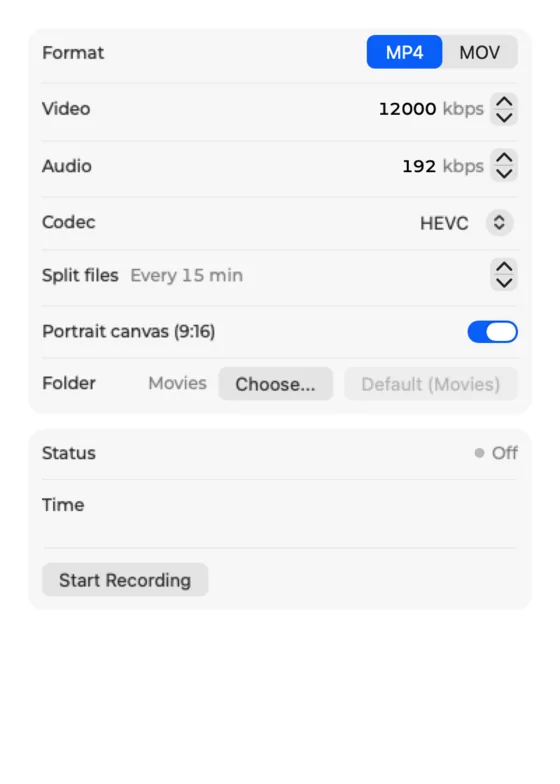
Records Program to one file. Video is H.264 unless you choose another codec, and audio is AAC from the Program bus. Files are written in small fragments, so a crash keeps everything up to about the last two seconds.
- Start and stop with the REC lamp, the Record key, or the keys you bound in External Control. The default key is
Command+Ron macOS andCtrl+Ron Windows. - Files are named
Cliqer <date> <time>.mp4(or.mov), for exampleCliqer 2026-10-08 14-30-05.mp4. If the picture size changes during a recording, or the Split files time is reached, it continues in a new file with(2),(3)and so on added to the name.
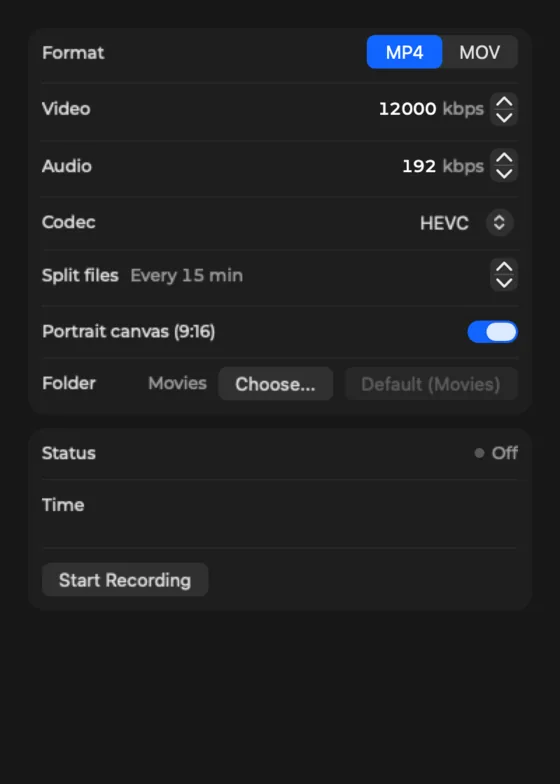
The Record settings popover:
| Setting | Choices |
|---|---|
| Format | MP4 or MOV |
| Video | 1000 to 100000 kbps in steps of 500. The default is 12000 kbps. |
| Audio | 64 to 320 kbps in steps of 32. The default is 192 kbps. |
| Codec | H.264, HEVC, ProRes 422 or ProRes 422 HQ. Choices your plan lacks carry a lock and "needs an upgrade". ProRes is always written as MOV, at its own bitrate. |
| Split files | Off, or a new file every 5 to 1440 minutes (steps of 5). |
| Portrait canvas (9:16) | Records the portrait canvas instead of the landscape one. It needs the portrait canvas feature. |
| Folder | Shows Movies by default. Choose... picks another folder. Default (Movies) goes back. |
While a recording runs, the popover also shows Status, Time, the File path and Reveal in Finder, and a Start Recording or Stop Recording button. The note "Changes apply to the next recording." appears while recording.
The Record settings cog opens a flyout titled Recording with the status, a Recording format list (MP4, MOV), a Recording video bitrate, kbps box and a folder button that reads Folder: Videos until you choose another folder. Below them are Recording codec (H.264 or HEVC; HEVC is off, with the reason, when the plan lacks it), a box "Start a new file every, minutes (0 is one file)" and the Portrait canvas (9:16) switch. ProRes is not offered on Windows: it records on a Mac only.
Stream
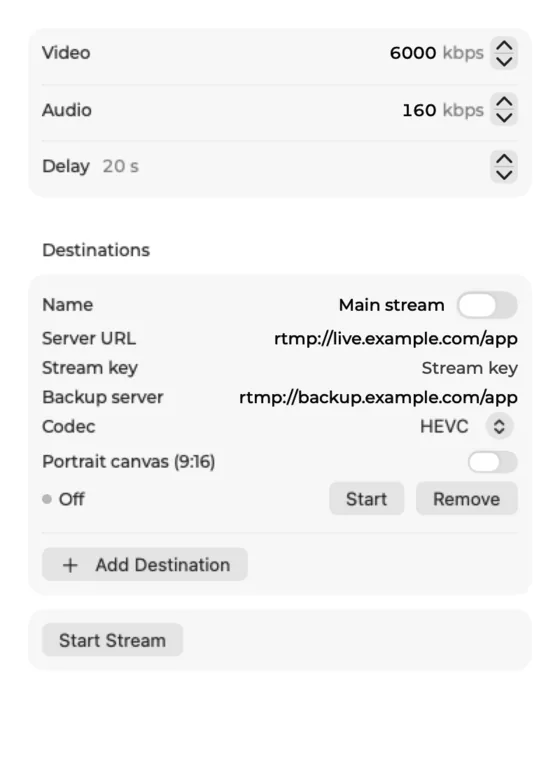
Streams Program to live platforms over RTMP, RTMPS, SRT or WHIP, and to your own Cliqer Live stream. One encode is shared by the destinations that use the same codec.
- A destination is a name, a server URL and a stream key. Studio has no preset list of services: copy the server URL and the key from your platform.
- The server URL starts with
rtmp://orrtmps://. For SRT usesrt://host:port(orsrt://:portto wait for a receiver to connect); the stream key is then the SRT passphrase. - For WHIP (WebRTC ingest, a standard many live services and media servers take) the server URL starts with
https://, orhttp://on your own network. The destination takes its kind from the URL. The secret field is then called Bearer token, optional, and it is the token the service gave you. WHIP sends H.264 only, so there is no HEVC, and it has no backup server. Cliqer sends the sound as Opus. See WHIP and simulcast. - A destination can have a backup server (RTMP and RTMPS only). It takes over when the first server drops; the status then says "Sending to the backup server".
- A delay of up to 120 seconds makes every destination send what Program showed that long ago. It applies from the next start.
- Stream starts every enabled destination at once. Each destination can also be started on its own.
- The stream key is stored in your system's secure storage and is never shown again. Type a new key to replace it.
- The default stream bitrate is 6000 kbps video and 160 kbps audio.
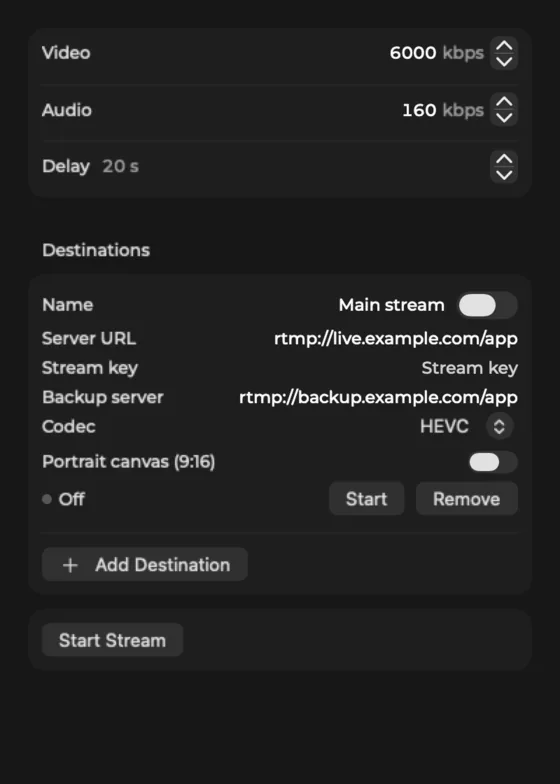
The Stream settings popover has Video (1000 to 100000 kbps), Audio (64 to 320 kbps) and Delay (Off, or 1 to 120 seconds) fields, then a Destinations list and the buttons Add Destination and Start Stream or Stop Stream. The key is stored in the Keychain.
Each destination row has:
| Control | What it does |
|---|---|
| Name | A label. A blank name is stored as "Destination". |
| Enabled | Includes the destination when you press Stream. |
| Server URL | The place to send to. The placeholder changes with the kind the URL names, for example https://example.com/whip/endpoint for WHIP. |
| Stream key | A secure field. It is named for the kind: Stream key (RTMP), Passphrase (SRT) or Bearer token (WHIP). It reads "Stored in the Keychain, type to replace" when one exists. |
| Backup server | Placeholder "Optional rtmp:// or rtmps://". Shown for an RTMP URL only: hidden for SRT and WHIP. |
| Codec | H.264 or HEVC (HEVC needs a plan that includes it). A WHIP destination offers H.264 only. |
| Layers | WHIP only. 1 layer, 2 layers (100, 50%) or 3 layers (100, 66, 33%). See WHIP and simulcast. |
| Portrait canvas (9:16) | Streams the portrait canvas. It needs the portrait canvas feature. |
| Start / Stop | Runs this destination alone, with its status beside it. |
| Forget Key | Removes the stored key. Shown only when a key is stored. |
| Remove | Deletes the destination. |
A new row shows "Not added yet" with Add and Cancel. Add stays off until the URL is filled in.
The Stream settings cog opens a flyout titled Streaming. It says "No destination yet." until you add one, then lists each destination with its URL, "no key" when none is stored, its status (plus "backup ..." and the codec when set) and a switch named Stream to https:// URL) the key field reads Bearer token, Backup server is hidden, the codec shows H.264 and a Layers stepper appears. The Add button stays off until a server is typed.
Cliqer Live
Cliqer Live streams Program to your own stream on cliqer.io. It is a destination like the others, but it needs no stream key: Studio signs in with your Cliqer account and gets the server and a fresh permission each time it connects. A typed wss:// server with its Publisher token works the same way.
- Sign in first. Without an account it says "Sign in to stream to Cliqer Live.". A licence key alone is not enough: sign in to the account the stream belongs to.
- Your plan. A plan without Cliqer Live says "Your plan does not include Cliqer Live." with an Upgrade button.
- One Studio per stream. If another Studio starts on the same Cliqer Live stream, this one stops and says Already Streaming Elsewhere: "Another Studio is already streaming to this Cliqer Live stream. Stop it there, then start again." It does not reconnect by itself, so the two never push each other off.
- A new or opened show. New Show and Open Show stop every Cliqer Live stream, and every other stream, that the new show does not have.
- Undo. Undo and Redo never remove a destination that is on air. They say Still On Air, for example "Undo would take “YouTube” off air. Take it off air first, then try again."
- Account changed. Signing in to another account stops the stream and says "The Cliqer account changed, so streaming to Cliqer Live stopped.".
- Server unreachable. "Cliqer Live cannot be reached right now. The Studio keeps trying." The stream starts once the server answers.
WHIP and simulcast
WHIP sends Program straight to a WebRTC media server or service. Paste its https:// endpoint as the Server URL, and its token in Bearer token if it gives one. Everything else is the same as RTMP: Stream starts it, the status shows beside it, and a lost connection retries by itself.
- It is H.264 video and Opus sound. HEVC is not offered, because WebRTC players do not take it. There is no backup server.
- Cliqer checks the server name and the secure connection when you start, so a wrong address fails at once with a status instead of waiting.
- The bearer token is stored like a stream key, in the Keychain (Windows Credential Manager), and is never shown again. Forget Bearer token removes it.
- WHIP needs the same plan feature as any other destination: Studio streaming (see Plans and limits).
Layers turns on simulcast: Cliqer sends the picture two or three times at once, at smaller sizes and bitrates, and the server hands each viewer the one that fits their connection.
| Choice | Sends |
|---|---|
| 1 layer | The picture at its full size. Default |
| 2 layers (100, 50%) | Full size and half size |
| 3 layers (100, 66, 33%) | Full size, two thirds and one third |
Each extra layer is one more video encode on top of the shared one, so it costs CPU. A server that does not accept simulcast gets the top layer only. Layers is for WHIP only: it is not shown for RTMP or SRT.
External
External shows Program as a camera in other apps, such as Zoom, Teams or a browser, so you can use the Studio mix as your webcam.
Other apps see the cameras Cliqer Program (the Program) and Cliqer Preview, plus two more, see Virtual camera and microphone. Install the virtual camera once in Settings, General. The popover says so, shows the Status and has Start External and Stop External.
The External toggle and the External settings cog (a flyout headed Virtual camera with the status) are on the Outputs bar. The cameras are registered by the Cliqer installer, see Virtual camera and microphone.
MultiCorder (one file per input)
MultiCorder records every input you choose to its own file, all started on the same instant so the files line up in an editor. Program can have its own file too.
- Files share one name stem,
Cliqer <date> <time>, followed by the input name. - The format and bitrates are shared by every file.
- Choosing an input or Program while recording starts or stops that file on the same clock.
- Starting with nothing chosen is refused.
The MultiCorder settings popover has the heading One file each, a Program switch, one switch per input (numbered, with its name), Format, Video, Audio, Folder, Status, Time and one row per file with its status. A file row shows "
The MultiCorder cog opens a flyout with the format, bitrate and folder, a switch for Program and one named Record on its own per input, and a line per file with its status and any dropped frames.
Snapshot
Snapshot saves the current Program frame as a PNG named Snapshot <time>.png, next to the open show file (or in the app's data folder when the show is not saved yet).
- macOS: the camera key in Overlays and Tools, or Snapshot in the Program monitor menu and the Studio menu. A note "Snapshot saved" confirms it.
- Windows: Snapshot of Program in the Tools bar.
The Outputs window
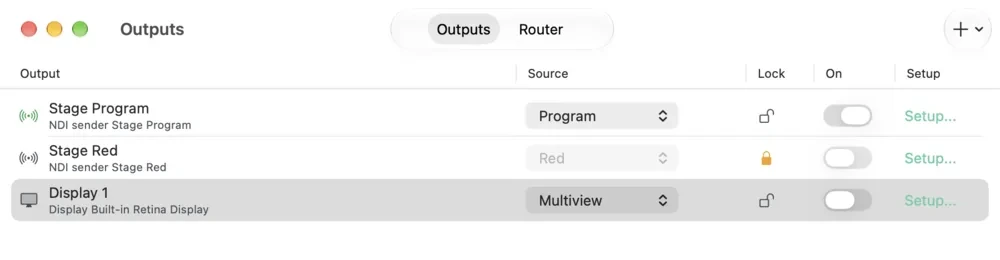
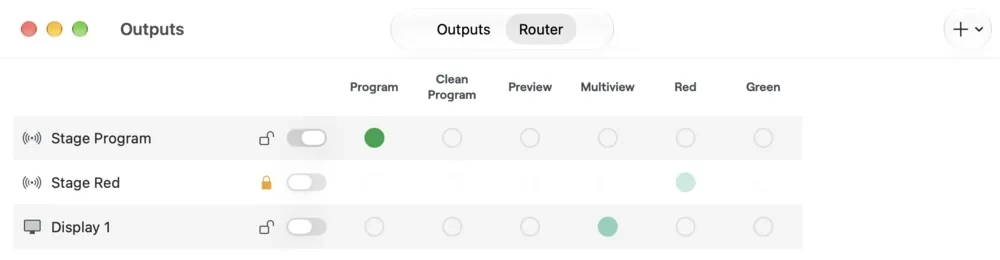
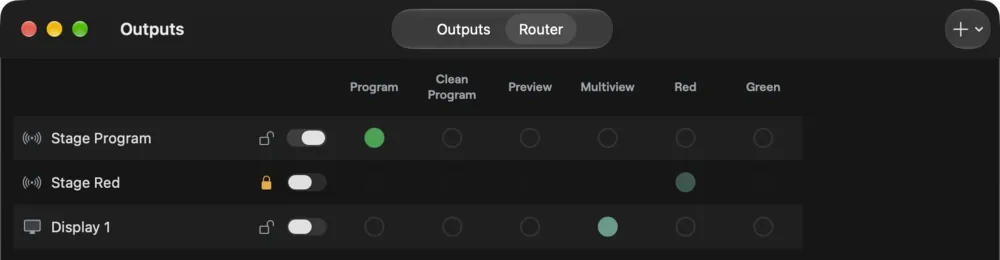
Besides Record, Stream and External, every place video leaves Studio is an output with its own name, source, setup and switch: NDI senders, displays, Syphon or Spout servers and Blackmagic cards. The Outputs window lists them and routes them.
- Open it with the Outputs button in the Studio toolbar, Studio, Outputs..., or Outputs... in the NDI key's menu.
- The Outputs and Router switch at the top changes between the list and the matrix. An empty window says "No Outputs".
- Add Output (the plus) offers NDI Output, Display (one entry per connected screen, kept current as screens come and go), Syphon Output and DeckLink Output (one entry per device). Each first asks for the source it carries: Program, Clean Program, Preview, Multiview or any input. Without the plan feature, Syphon and DeckLink read "(Upgrade)...". Without Blackmagic Desktop Video, the DeckLink item is off and says "Install Blackmagic Desktop Video to use DeckLink outputs.".
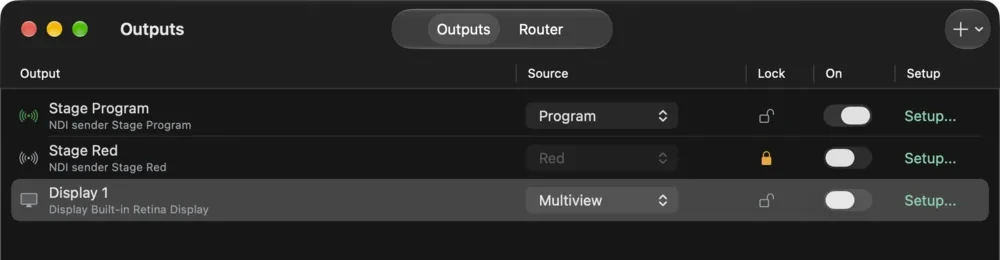
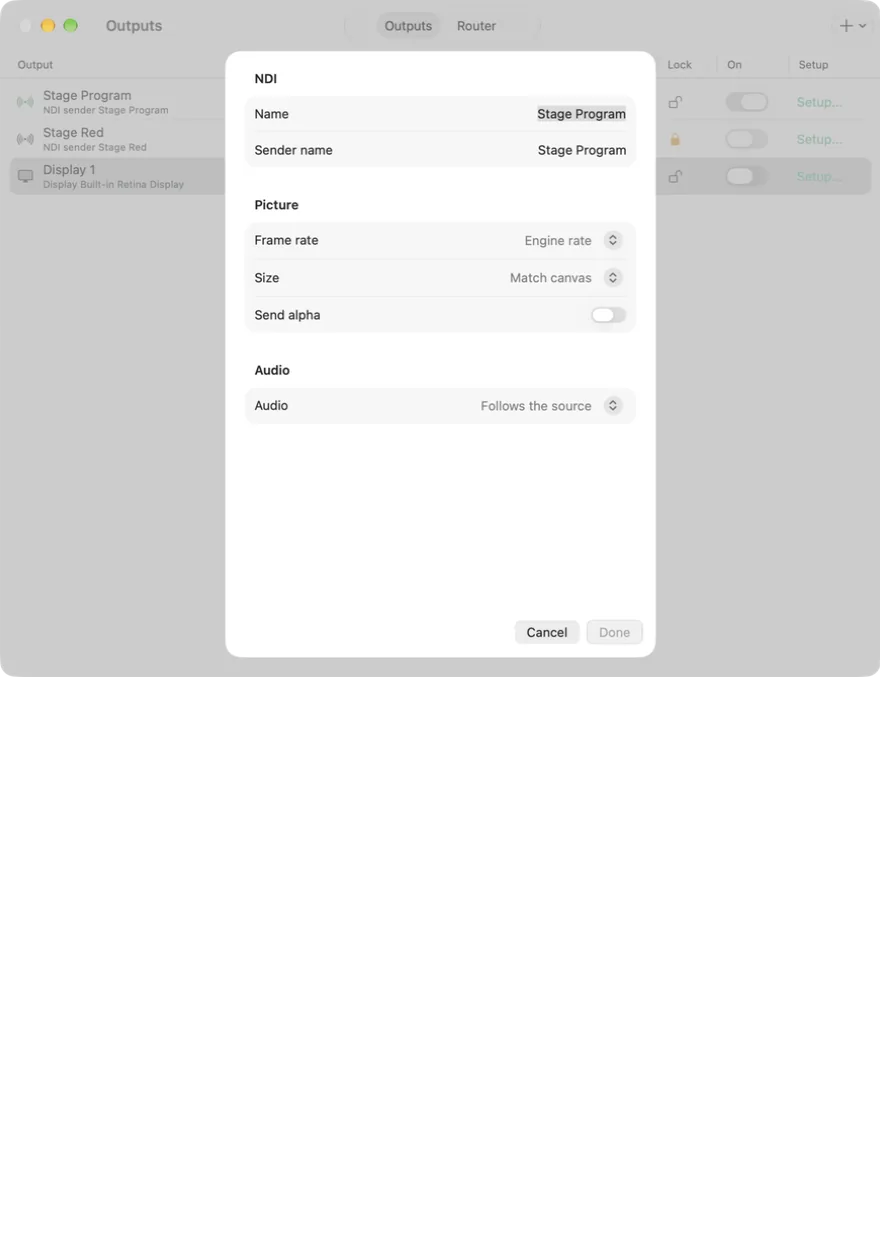
- The list has the columns Output (the name and, under it, "NDI sender ...", "Display ..." or "Display not connected", "Syphon server ..." or "Blackmagic output ..."), Source, Lock, On and Setup.... Lock freezes the output's source. Right-click a row for Setup..., Turn On or Turn Off, Lock Source or Unlock Source and Remove.
- The Router puts the outputs down the side and the sources across the top (Program, Clean Program, Preview, Multiview, then every input). Click a dot to route that output to that source; a locked row refuses clicks.
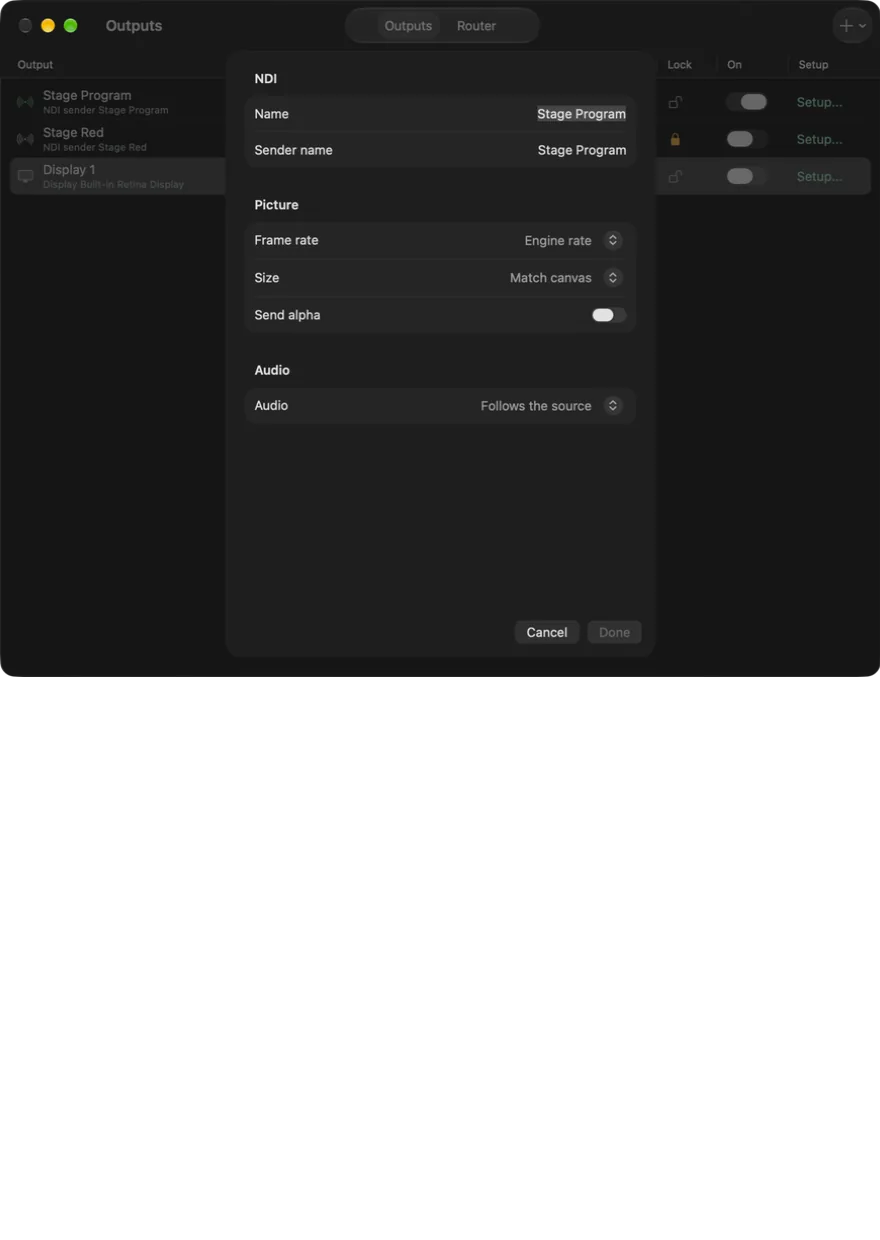
- Setup... opens a sheet with Cancel and Done:
| Setting | Choices |
|---|---|
| Name | The label in the list. |
| Target | Sender name (NDI and Spout), Server name (Syphon), Display (a screen) or Device (Blackmagic). |
| Frame rate | Engine rate, Half, A third or A quarter. |
| Size | Match canvas, or Fixed with a width and height of 16 to 16384 pixels (even numbers), at most 7680 x 4320 pixels in all. The Width and Height steppers (steps of 2) keep the other side inside that area, so one stops where the area limit is reached. A Blackmagic output picks Follows the source or 1280 x 720, 1920 x 1080, 2560 x 1440 or 3840 x 2160. |
| Send alpha | NDI only: sends the transparent parts as transparent. |
| Audio | NDI and Blackmagic only: Off, Follows the source, Master, Headphones mix, Bus A or Bus B. |
A refusal, for example a size your plan does not allow, shows at the top of the sheet and the sheet stays open.
- Open it with Outputs in the top bar.
- Add output offers NDI output, one entry per connected display (for example "Display 1 (1920 x 1080)", kept current as monitors come and go), Spout output and Blackmagic output. An entry the plan or the computer cannot use stays off with the reason, such as "Spout output (not in your plan)", "This build has no Blackmagic support." or "Install Blackmagic Desktop Video to use Blackmagic devices.". The list Router sources filters the matrix (All sources, Inputs, Scenes), and a count reads "
of on". - Outputs has a row per output: its icon, name, a source list, the On switch, a lock and Set up. A display row reads "Fullscreen on this display", or "Device missing. Choose a display in Set up." when the display is gone.
- Router is the matrix of outputs by sources (Program, Clean Program, Preview, Multiview, then every input). Click to route; a locked row refuses clicks.
- Set up opens a dialog with Name, the target (NDI sender, display, Spout sender or Blackmagic device), Frame rate (Engine rate, Half (every 2nd frame), A third (every 3rd frame), A quarter (every 4th frame)), Size (Match canvas or Fixed size with two number boxes, W and H, in pixels: even sizes from 16 to 16384, at most 7680 x 4320 pixels in all, each box stopping where the other side leaves room; a Blackmagic output plays every frame of the Studio's frame rate and picks its size from a list), Send alpha (NDI) and Audio (Off, Follow the source, Master, Headphones, Bus A, Bus B; Spout carries video only). Apply saves it, Remove output deletes it and Cancel closes it.
What a plan can refuse here: Syphon and Spout need Syphon and Spout outputs, Blackmagic needs DeckLink outputs, a fixed size taller than the plan's output height needs a larger output size, and Multiview needs Studio multiview output. The plan may also cap how many outputs run at once. See Plans and limits. A Display output on a real display is left out of screen captures on both platforms, so a screen input of the same display never films it. A Display output on a virtual screen is visible to a screen input or room share of that virtual screen, on macOS and Windows.
Projection
Projection lets one big picture be shown across several outputs, for example a wide wall made of two or three projectors. For each output you choose which part of the source it shows (its slice), you can pin its four corners to line it up with the screen, and Cliqer fades the overlap between neighbouring outputs for you (Edge Blend). The warp and blend part is in the Studio plan. It is on the Mac and on Windows.
| Control | What it does |
|---|---|
| Slice map | A small picture of the source with each output that shows it as a coloured box. Drag a box to move it, or drag an edge to resize it. Hatched bands show where two slices overlap |
| X, Y, Width, Height | The slice as numbers, in per cent of the source |
| Adjust on Output | On a display output: puts four handles on the output itself so you can pin its corners. Drag a corner, use the arrow keys to nudge it 1 px (Shift: 10 px), and press Return or Esc to end. A corner that would fold the picture stays where it was. On other outputs the switch reads Alignment grid and draws a grid and the overlap bands on the picture |
| Edge Blend | Fades the edge of this slice into its neighbour. A line under the curve says which edges fade and by how much, for example "Fades right 10 percent". It says "No ramp yet: another output of this source must overlap this slice with Edge Blend on." until two slices overlap |
| Gamma R, Gamma G, Gamma B, Power, Luminance | Shape the fade so the overlap matches the rest of the picture. The curve above them shows the result for red, green and blue |
| Black level | Lifts the black of the part of this slice that no neighbour overlaps, so the overlap, where two projectors add their black, does not show as a lighter band |
| Black zone | How far past each fade the lifted black reaches, 0 to 64 pixels. A few pixels wider than the fade hides the edge of the lift |
| Top left, Top right, Bottom left, Bottom right | The black level trim at each corner of the slice, from -0.5 to 0.5, blended across the slice. Use them when a projector's black is lighter in one corner |
| Mirror left-right, Mirror top-bottom | Flip this output's picture, for a rear-projection screen, a beam-splitter prompter or a confidence monitor. Free on every Studio plan, projection or not |
| Warp Grid | A grid of points over the picture you move to bend it onto a curved or uneven screen. Columns and Rows (2 to 9) set the grid, Curve is Linear (straight lines between points) or Bezier (smooth curves). Reset puts every point and handle back |
| Smooth | Bezier grid, picked point. On, the handle opposite the one you move mirrors it, so the curve stays smooth through the point. Off, the two sides bend alone |
| Handles > Reset Handles | Bezier grid, picked point. Puts the point's four handles back to their automatic place. Smooth stays as it is |
| Trim | Colour and brightness of this slice only: Red, Green, Blue, Brightness and Contrast, plus Flip Horizontal and Flip Vertical. Reset Trim undoes it |
| Masks | Up to eight masks (rectangles inside the picture you shape point by point), each with Invert (cut a hole) and Feather. Add mask, Duplicate mask, Delete mask, Reset masks |
The ellipsis menu in the Projection header (Projection actions) has Reset Slice, Reset Corner Pin, Reset Edge Blend, Reset Trim, Reset Warp Grid, Reset Masks and Reset Projection; each greys out when there is nothing to reset.
Slices stretch to fill each output. The section says it too: "Slices stretch to fill each output. Set Program to the whole wall's size so nothing looks stretched." So set the size of Program (or of the source you project) to the size of the whole wall, not to one projector.
With Adjust on Output on, the Handles switch on the output picks what you drag: Corners, the Grid points or the Masks. On a Bezier grid, picking a point shows its four handles as dots on lines; drag a dot to bend the edge on that side. The arrow keys nudge the picked point, never a handle, and Tab walks the points. One drag is one undo step.
Projection on Windows
The same controls are there, as a side sheet. It has no picture to drag on, so everything is a number, a slider or a key. Open the Outputs window and use the Projection of key on the output's row. Without the plan the sheet is greyed out.
- Slice, Corner pin, Edge blend (with Gamma R, Gamma G, Gamma B, Power, Luminance, Black level, Black zone and the four corner trims Top left, Top right, Bottom left, Bottom right), Trim, Warp grid and Masks are the same as on the Mac. The edge blend rows appear only while Edge blend is on.
- Mirror left-right and Mirror top-bottom are in the Mirror group and are free on every Studio plan.
- Warp grid has Columns, Rows and Curve (Linear or Bezier). A grid point is picked with its key, and its X and Y boxes (percent of the output) and the arrow keys move it: 0.1 percent per press,
Shift10 times more,Ctrl10 times less. - On a Bezier grid, the Handle keys (Left, Right, Up, Down, only the sides that bend something) pick one of the point's handles. Its X and Y boxes and the arrow keys then move that handle. Press the lit key again to go back to nudging the point. Smooth mirrors the opposite handle, and Reset handles drops them.
- Add mask, Duplicate mask, Delete mask and Reset masks work as on the Mac.
Deletetakes the picked mask point out (three stay).
Under External Control, Output grid turns Adjust on Output on and off, and Output mirror sets the two mirrors.
Replay
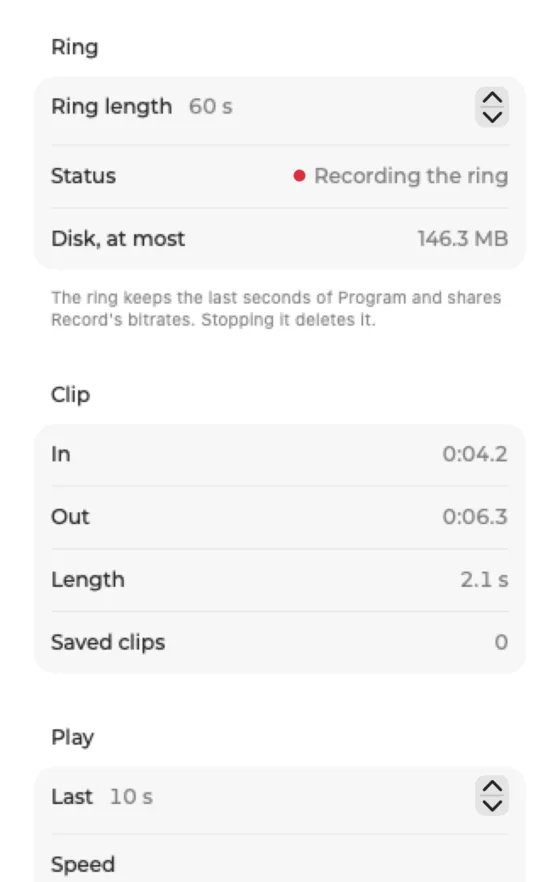
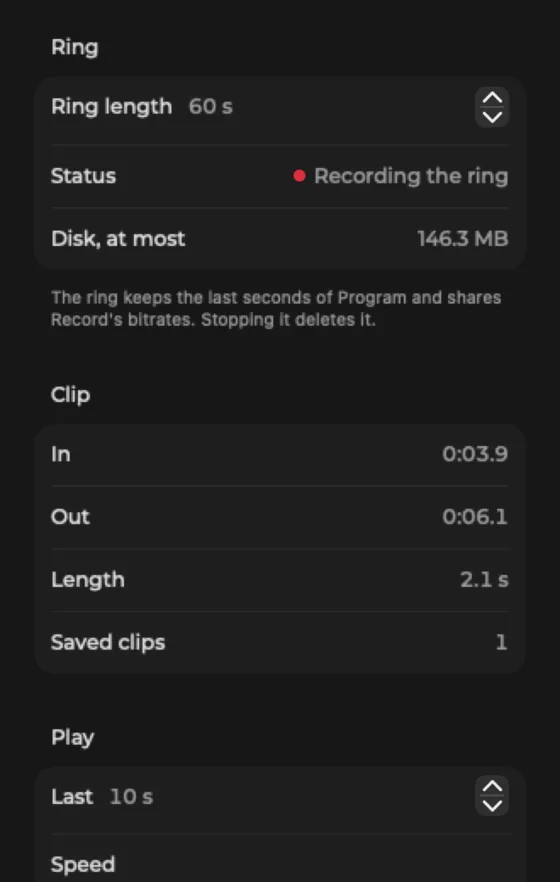
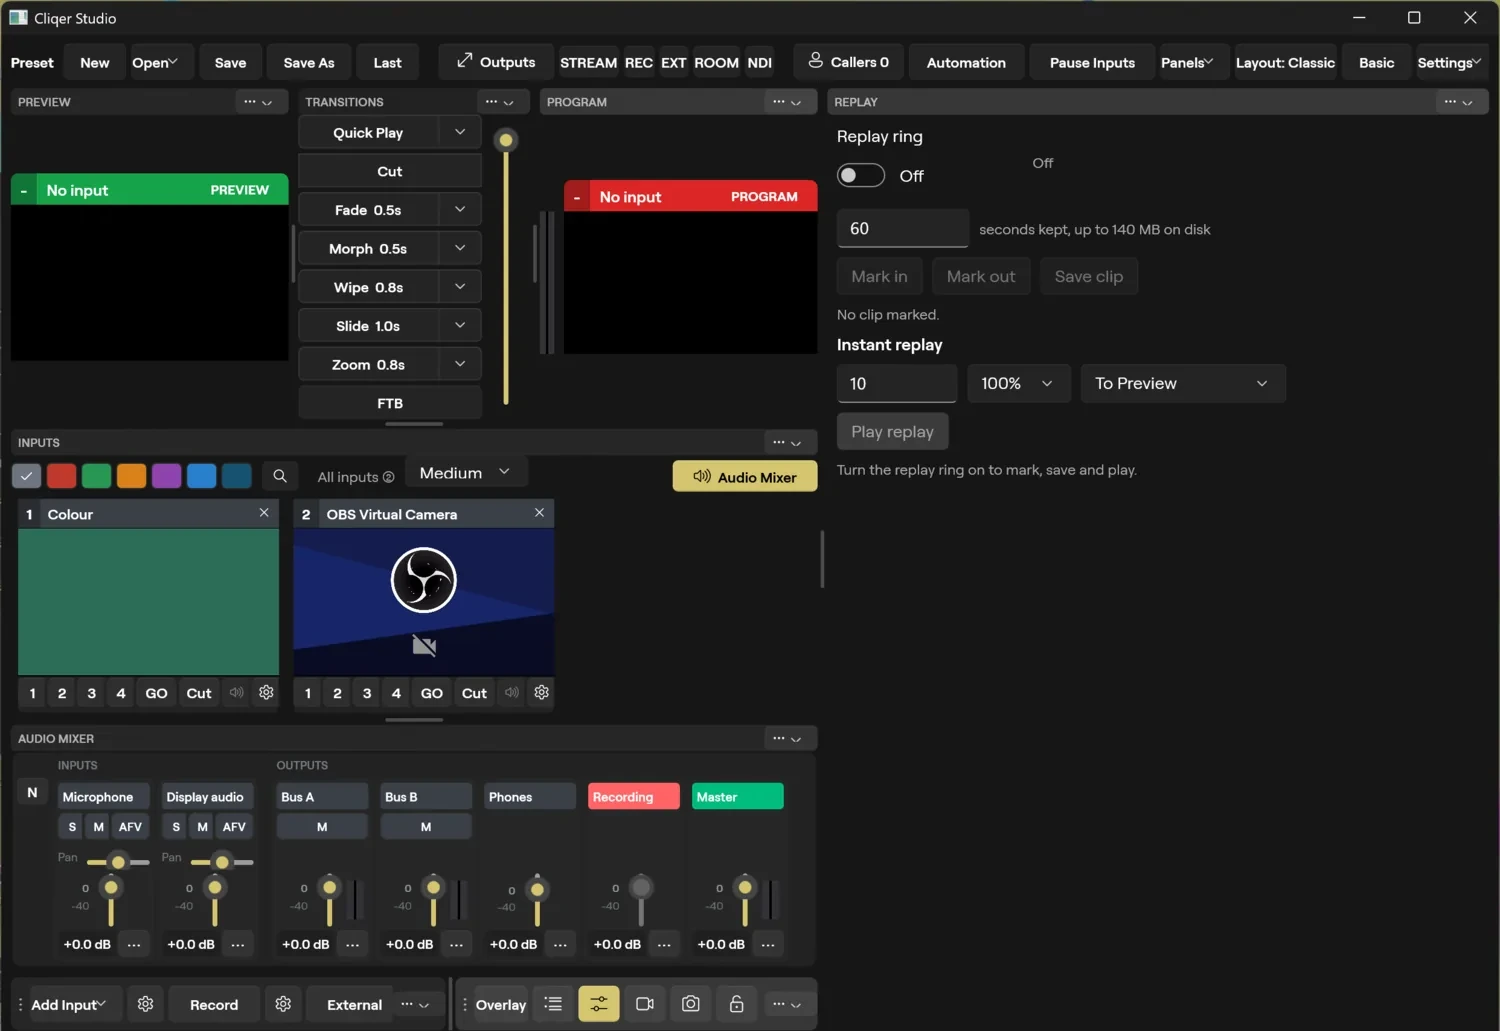
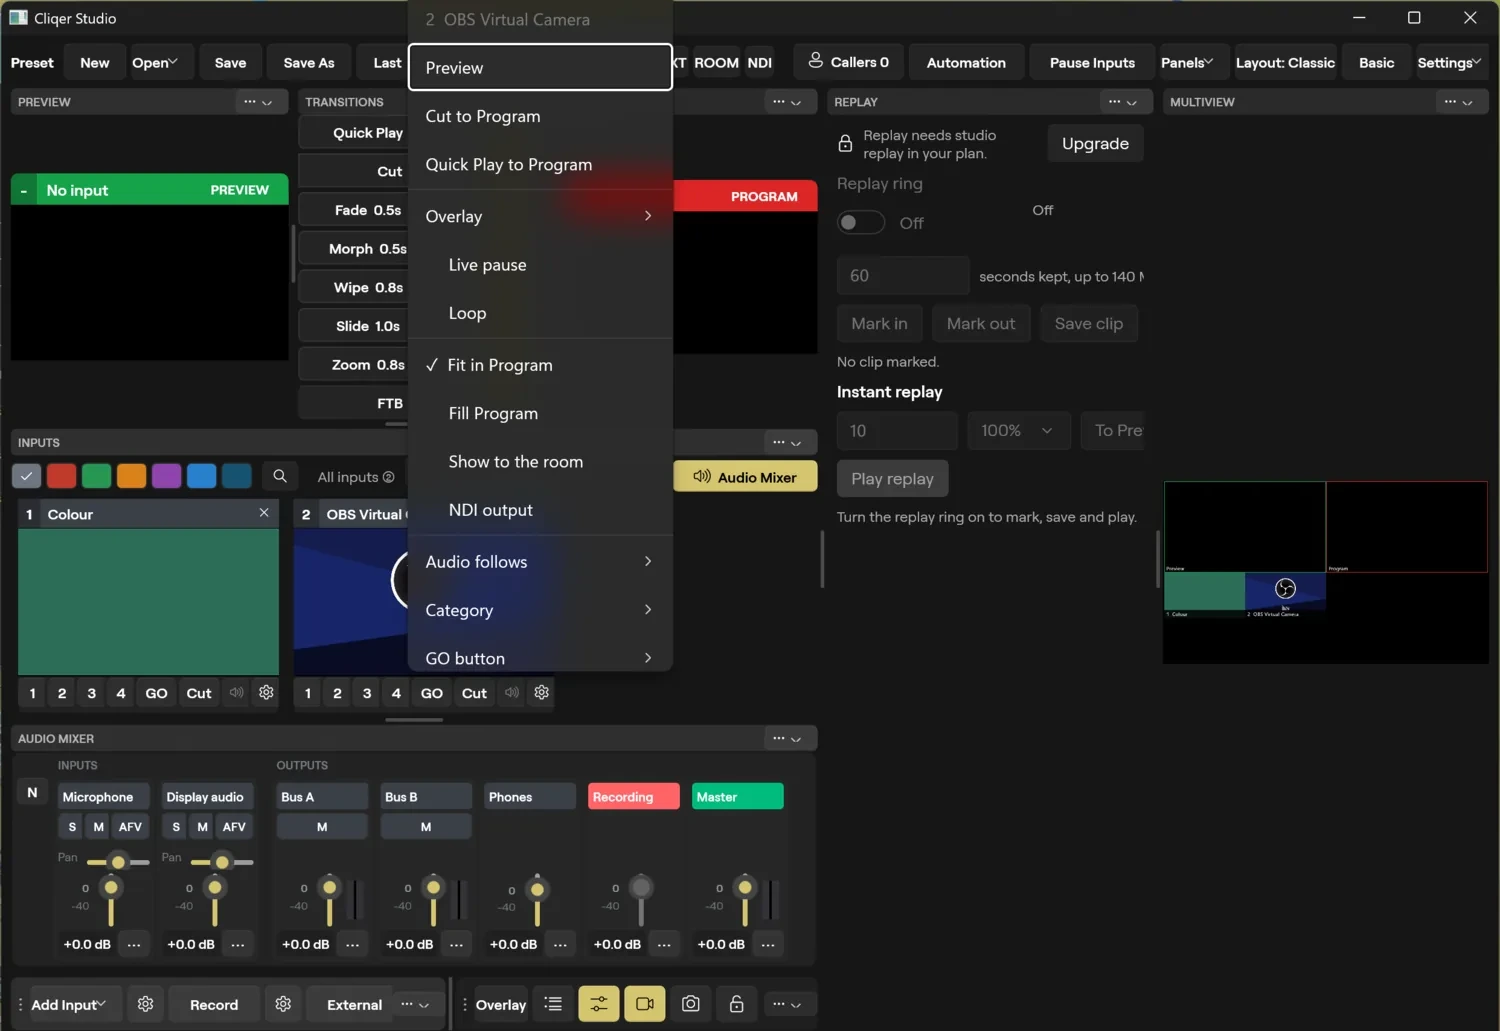
Replay keeps the last seconds of Program on disk. You mark a clip with In and Out, save it as an input, or play the last seconds again at a slower speed on Preview or straight to Program. Ultra and up replay Program from one angle. More angles, Quad and a Default angle need the Replay add-on, included on Studio and Enterprise. A locked control says "Needs the Replay add-on or a plan that includes it. Upgrade on cliqer.io.". Stopping the ring deletes it, and it shares Record's bitrates.
The Replay group of the bottom bar has the keys Replay (starts and stops the ring; right-click it or use the cog for settings), In, Out, Save (saves the marked clip as a media input; mark In first) and Play. The popover has:
| Setting | What it does |
|---|---|
| Ring length | 5 to 300 seconds, in steps of 5. |
| Status, Disk, at most | "Recording the ring" while it runs, and the most disk it will use. |
| In, Out, Length, Saved clips | The marks ("Not set" until marked) and the number of saved clips. |
| Last | How many seconds Play shows again, 1 to 300. |
| Speed | 100%, 75%, 50% or 25%. |
| Show on | Preview or Program. |
Open the Replay panel from Panels. It has a Replay ring switch, a box "seconds kept" (5 to 300), Mark in, Mark out and Save clip, then Instant replay with the seconds to replay, a Replay speed list (100%, 75%, 50%, 25%), a Replay goes to list (To Preview, Straight to Program) and Play replay. Before the ring is on it says "Turn the replay ring on to mark, save and play.".
Angles, sound and events
Besides Program, each camera, caller, NDI, stream or Blackmagic input can keep its own ring: an angle. At most eight inputs have one. Every camera takes them all; turn it off to pick the inputs one by one. A change applies when the ring next starts.
- Sound. Each angle records the sound of its own input, next to its pictures, and Program's ring records Program's. Playing or saving an angle plays its own sound. An input with no sound has a silent angle. A quad plays the sound of the event's default angle only, and the other tiles are muted. Reverse is always silent.
- Marks. In opens an event at this instant on every angle, Out closes it. An auto mark makes an event of the last 5, 10 or 20 seconds, ending now. Add event makes one from typed In and Out times.
- Replay Events panel. On the Mac, the key beside the Replay keys ("Show or hide the Replay Events panel"), or Panels > Replay Events. On Windows, Replay Events in Panels. It lists the events, with a tag filter above them. The selected event has a Name, its In and Out points, a Default angle (the angle a quad or a single play shows first), Tags and notes, with a comment for each angle. Duplicate copies an event and Delete removes it.
- Transport. Preview or Program plays the selected event there, at the Speed (100%, 75%, 50% or 25%) and Direction (Forward or Reverse) you chose. Step one frame either way, Stop goes back to the In point. Quad plays the next event as a picture of up to four of its angles. Save makes the event a media input. Play last replays the last seconds of Program.
- Undo. Adding, deleting, renaming, trimming, duplicating and tagging an event are undo steps. Marks, selecting and playing are not.
Events are stored beside the show. When you mark an event, Studio keeps its pictures and sound in a Replay folder inside the show's folder, so the event stays after the ring is stopped or Studio is closed. The list of events is saved at once in that folder as well: marking or editing an event does not mark the show as unsaved, and you do not need to save the show to keep it. Copy the whole show folder to take the events along. Studio never deletes an event's files by itself: delete the event, and its files go when nothing can undo it any more. There is no size limit for events. When the show's disk is nearly full the notice Replay Disk Almost Full says about how many minutes are left, and the ring keeps running. If an event's files are gone, it shows Unavailable, and the notice Replay Expired asks you to delete it or mark a new one.
Related
Audio Mixer
The Studio mixer has a strip for every input with sound, as many Groups and Returns as you add, a headphones mix and a Master. Learn the strip controls, the sends, the faders and meters, and how to choose what the room and NDI hear.
Multiview and Layouts
Watch every input at once in Multiview, show Program, Preview or Multiview on a display, and arrange, save and lock the Studio window.