Multiview and Layouts
This page covers how you watch and arrange Studio: the Preview and Program monitors, Multiview, showing a picture on a display, the dock of panels and the layouts you can save.
Preview and Program monitors
Preview shows what you will take next, and Program shows what is on air. Each monitor has a title bar in its tally colour: green for Preview and red for Program. The same colours frame input tiles and Multiview cells, and the word is always shown too, so colour is never the only signal.
The monitors carry the badges PVW and PGM. Right-click a monitor, or use its menu, for these items:
| Monitor | Menu items |
|---|---|
| Preview | Take with Quick Play, Cut to Program, Input Settings..., Edit Scene... (scenes only), Make a Scene from This (live sources), Show on Display, Clear Preview |
| Program | Input Settings..., Overlay Channels..., Snapshot, Show on Display, Fade to Black |
The menu in the monitor's title bar adds Safe Areas, Centre Cross and Close
Each monitor has a title bar with the input number, its name and the word PREVIEW or PROGRAM. The ... menu on the title bar holds the input's menu. The panel header menus add:
- Preview panel menu: Quick Play (Space), Cut (Enter) and, when a scene is on Preview, Snapping, Safe Areas, Inspector, Edit Live and Edit in Scene Editor....
- Program panel menu: Fade to black (B), Program NDI output and Program to the room.
- The Preview, Program and Multiview panel menus also hold the guide switches Safe areas and Centre cross.
The Program monitor has a level meter on its left edge.
Multiview
Multiview is one picture that shows Preview and Program side by side on the top half and your inputs in rack order below. Each cell has the input number and name, a tally frame (green Preview, red Program) and an audio meter. It is made for a second monitor, a projector or an NDI receiver, so a crew can see everything without looking at the Studio window.
Pick how many input cells you want: 2 Inputs, 8 Inputs or 14 Inputs (Windows: 2 inputs, 8 inputs, 14 inputs). Multiview only renders while something shows it: the panel, a Multiview window, a display or its NDI output.
NDI needs the NDI runtime. Without it (not installed, or Windows on Arm, which has no NDI), Windows leaves NDI output out of the Multiview panel menu and dims Send as NDI in the Multiview window, with the reason as its tooltip. On macOS Send as NDI in the window's Send menu is dimmed. See Outputs.
- Open it with the Multiview key in the MultiCorder and Multiview group of the bottom bar, or from Panels. It is not in the default Classic layout.
- The panel's menu has Layout (2 Inputs, 8 Inputs, 14 Inputs), Multiview as NDI, Multiview Window, Safe Areas, Centre Cross and Show on Display. The cog beside the Multiview key (tooltip Multiview settings) or a right-click on the key opens the same menu.
- An NDI badge appears on the picture while the NDI output is on.
- Open it with the Multiview panel toggle on the Tools bar, or from Panels.
- The panel menu has the layouts 2 inputs, 8 inputs, 14 inputs, NDI output, Multiview Window, Safe areas and Centre cross.
The Multiview NDI source is named Cliqer Multiview. Showing Multiview on a display or sending it over NDI needs the Studio multiview output feature, see Plans and limits. Looking at the Multiview panel does not.
Multiview shown on a virtual screen is visible to a screen input or room share of that virtual screen. On a real display, the Multiview window stays out of every capture.
Multiview in its own window
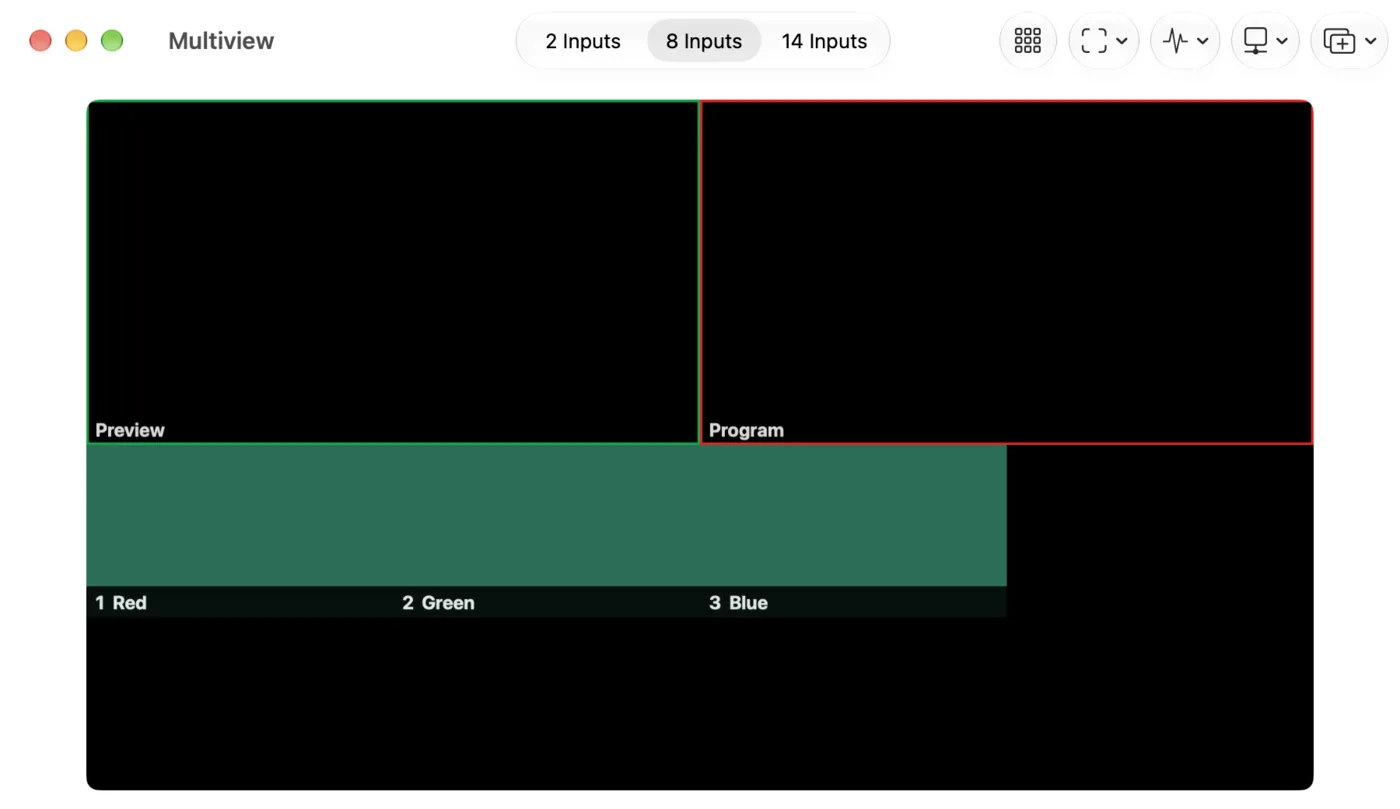
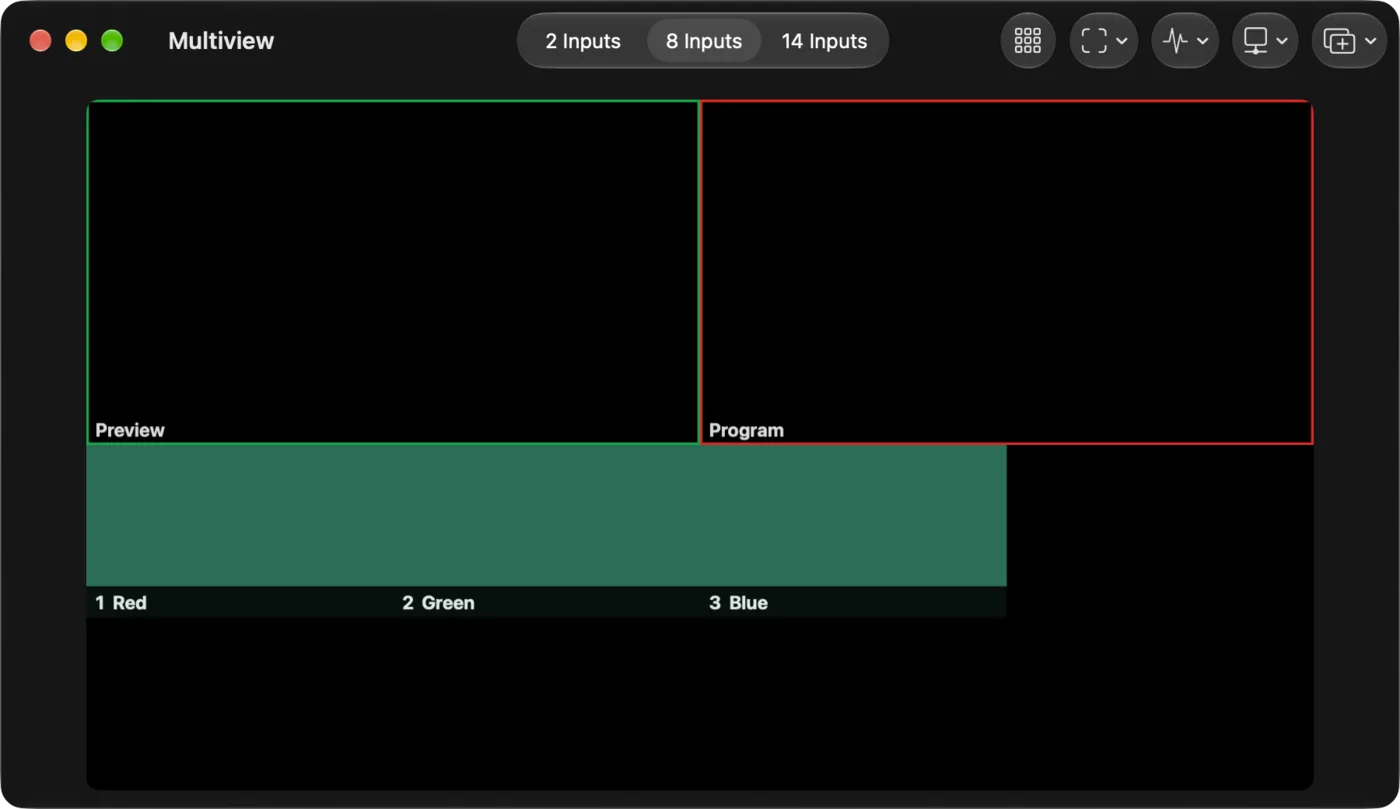
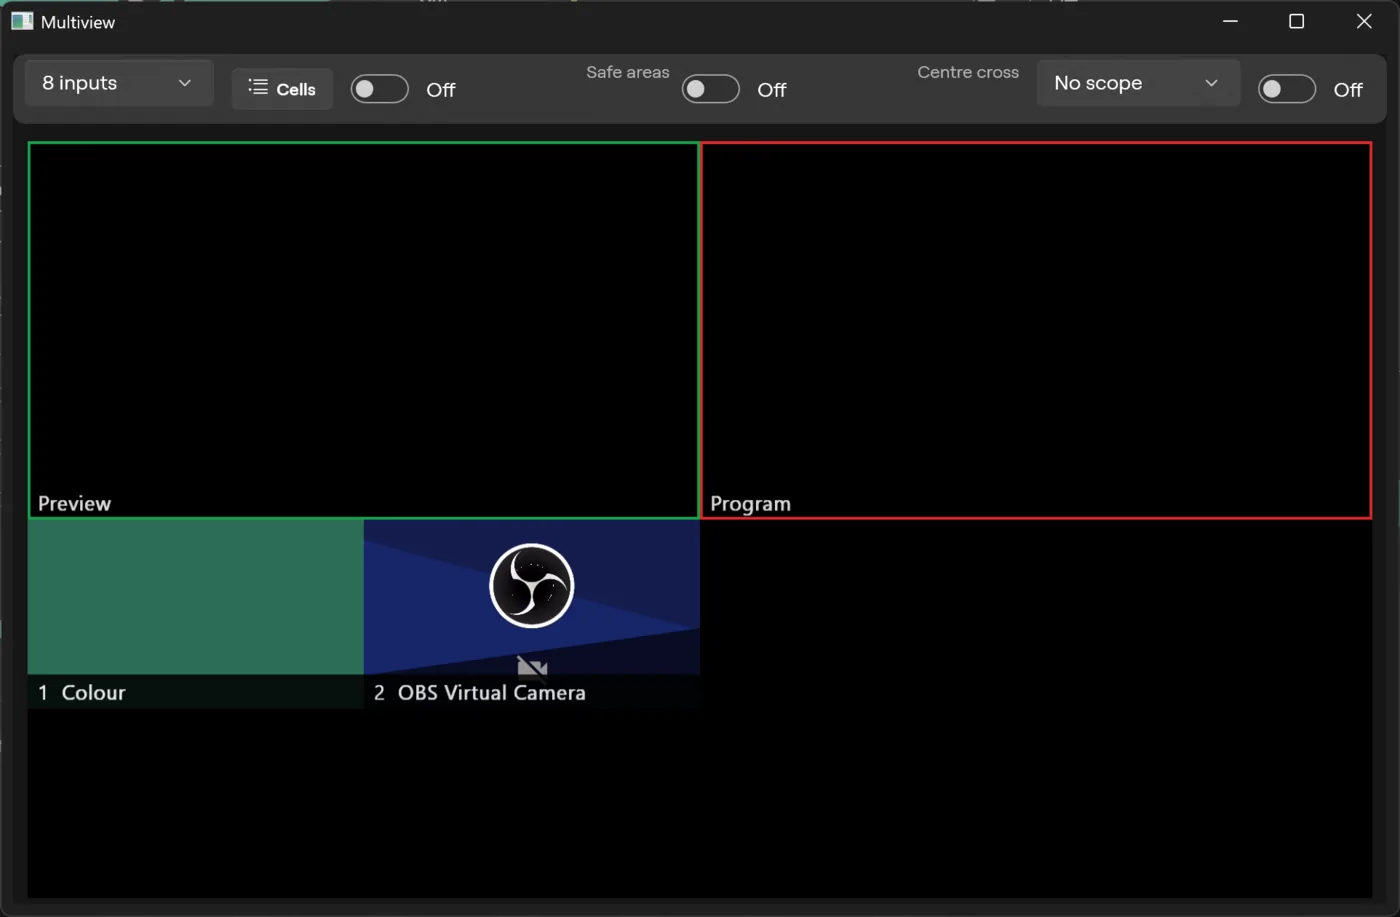
Besides the panel and a display, a Multiview can be a window of its own. Multiview Window opens this numbered Multiview window with its own toolbar; Open in Window in the panel's header menu instead moves the Multiview panel itself into a window (see Panel windows). You can move the Multiview window to another display, resize it as large as you like, and it remembers where you left it on this computer. Cliqer opens it again with Studio if you left it open.
Open it from the Multiview panel's menu (Multiview Window), or Studio, Multiview Window.
The toolbar, left to right: the layout (2 Inputs, 8 Inputs, 14 Inputs), Cells, Guides (Safe Areas, Centre Cross), Scope (None, Waveform, Vectorscope), Send (Send as NDI and Show on Display) and Multiviews.
Open it from the Multiview panel's menu or the Studio menu (Multiview Window). The window's toolbar holds the layout list, Cells, the Safe areas and Centre cross switches, the scope list (No scope, Waveform, Vectorscope), Send as NDI and Multiviews. There is no display send in this window; use the Outputs window for that.
Several multiviews
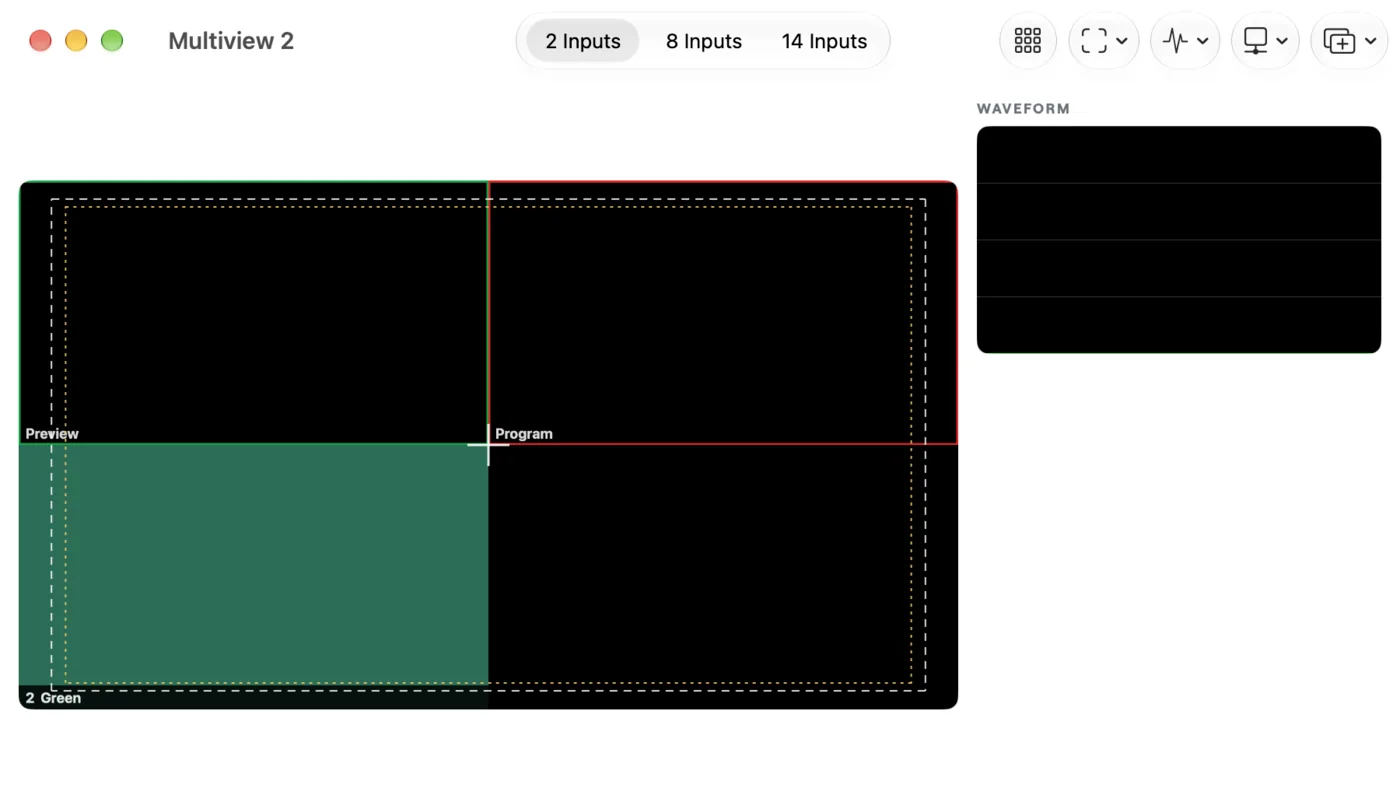
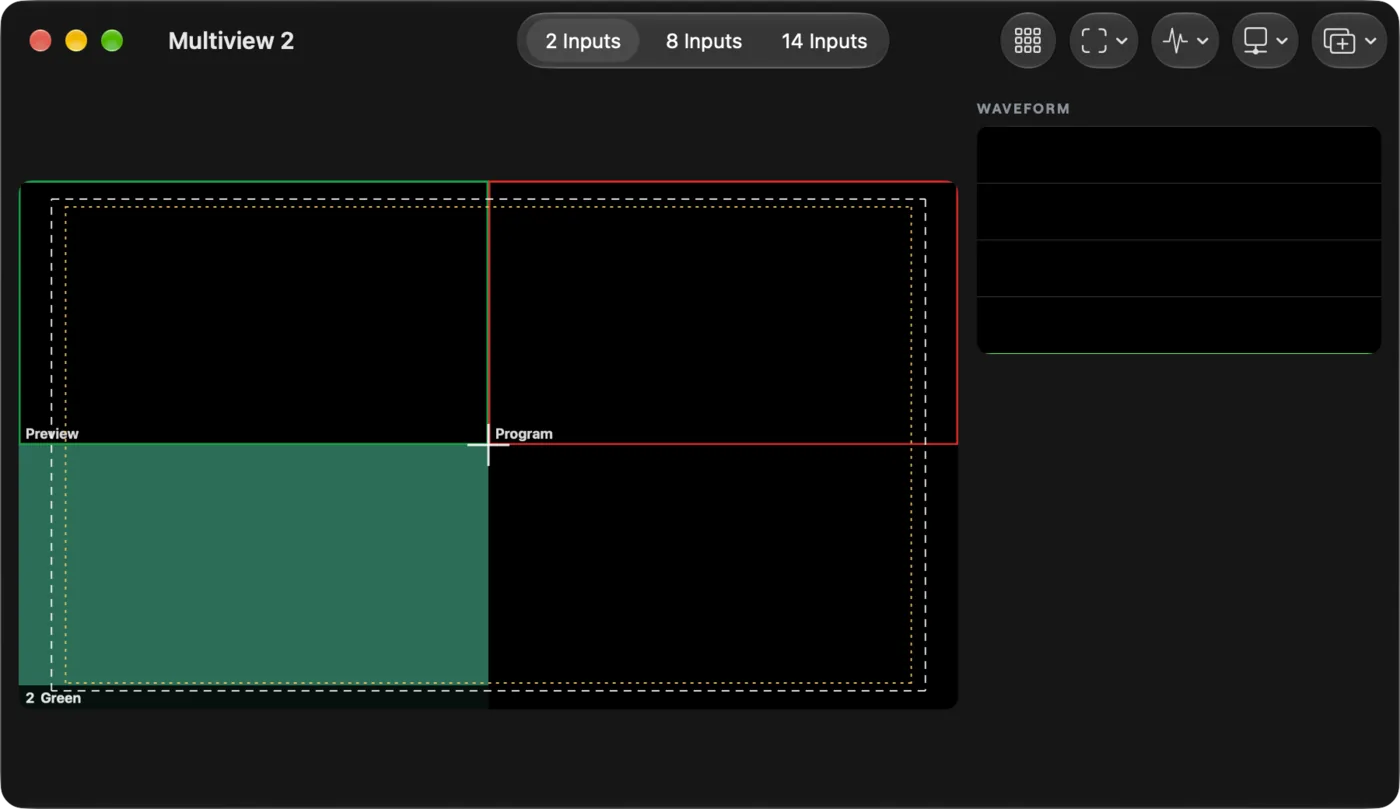
Add as many as you need (up to eight). Multiviews in the window's toolbar has Add Multiview (Windows: Add multiview), Open Multiview and Open Multiview n for each one, and Remove Multiview n... (Multiview 1 always stays). Each has its own layout and cells, and its own window. Numbers never move: removing Multiview 3 leaves 2 and 4. Removing one asks you to confirm, and the core refuses while an output still shows it.
Cells lists each cell of the layout with the input it shows: Blank, or any input. Rack Order (Windows: Rack order) goes back to the inputs in the order of the input grid, which is the default.
Guides
Safe Areas (Windows: Safe areas) draws two rectangles over the picture: action safe (3.5% in from each edge) and graphics safe (5%), as in EBU R 95. Centre Cross marks the middle. They show on the Program and Preview monitors, the Multiview panel and every Multiview window, and they are never in an output. Switch them from the monitor menus or the Multiview window's toolbar; the setting is shared, so one switch covers all of them.
Scopes
Choose Waveform (brightness by picture column) or Vectorscope (colour) in a Multiview window to see a scope of Program beside the picture. Scopes are on the Studio and Enterprise plans; without them the scope pane says so (macOS: Scopes are not in your plan, so none is drawn. Windows: Scopes are not in your plan) and nothing is drawn. Sending a Multiview out (NDI or a display) needs the Studio multiview output feature too (Ultra, Studio and Enterprise plans and the free trial), and the controls are dimmed with a note when your plan lacks it. See Plans and limits.
Full screen on a display
Send a picture to any connected display, for example a projector or a confidence monitor. You can send Program, Preview, Multiview or a single input. Each one is a Display output: a row in the Outputs window, so it has a name, a source and an on switch like any other output.
- Display menu in the Studio toolbar: one section for Program and one for Preview, each listing your displays by name. A display is ticked while it shows that source; click it again to stop.
- The Show on Display submenu of the Preview and Program monitors, of the Multiview menu and of the Multiview window's Send menu does the same for that source, and the one in an input's menu shows that single input.
- A Display output is a borderless window over the whole screen. If the screen is unplugged, the row in the Outputs window reads "Display not connected" and the output comes back when it returns.
- Open Outputs in the top bar, choose Add output and pick a display. It starts on Program; pick another source (Program, Clean Program, Preview, Multiview or an input) in its row and switch it on.
- Windows lists displays by number and size, for example "Display 1 (1920 x 1080)", not by name. A row for a display that is not attached reads "Device missing. Choose a display in Set up.".
Showing Multiview on a display needs the Studio multiview output feature; Program and Preview need nothing extra. See Plans and limits.
Meters
On macOS, level meters run from -60 to 0 dBFS. Green is below -18, amber from -18 to -6 and red above -6. The meter falls back at 26 dB per second and a thin line holds the peak for 1.5 seconds. A clip light latches for 2 seconds when the signal reaches full scale, and a click on a mixer meter clears it. Input tile meters are stereo and have no clip light. See Audio mixer.
Arranging the Studio window
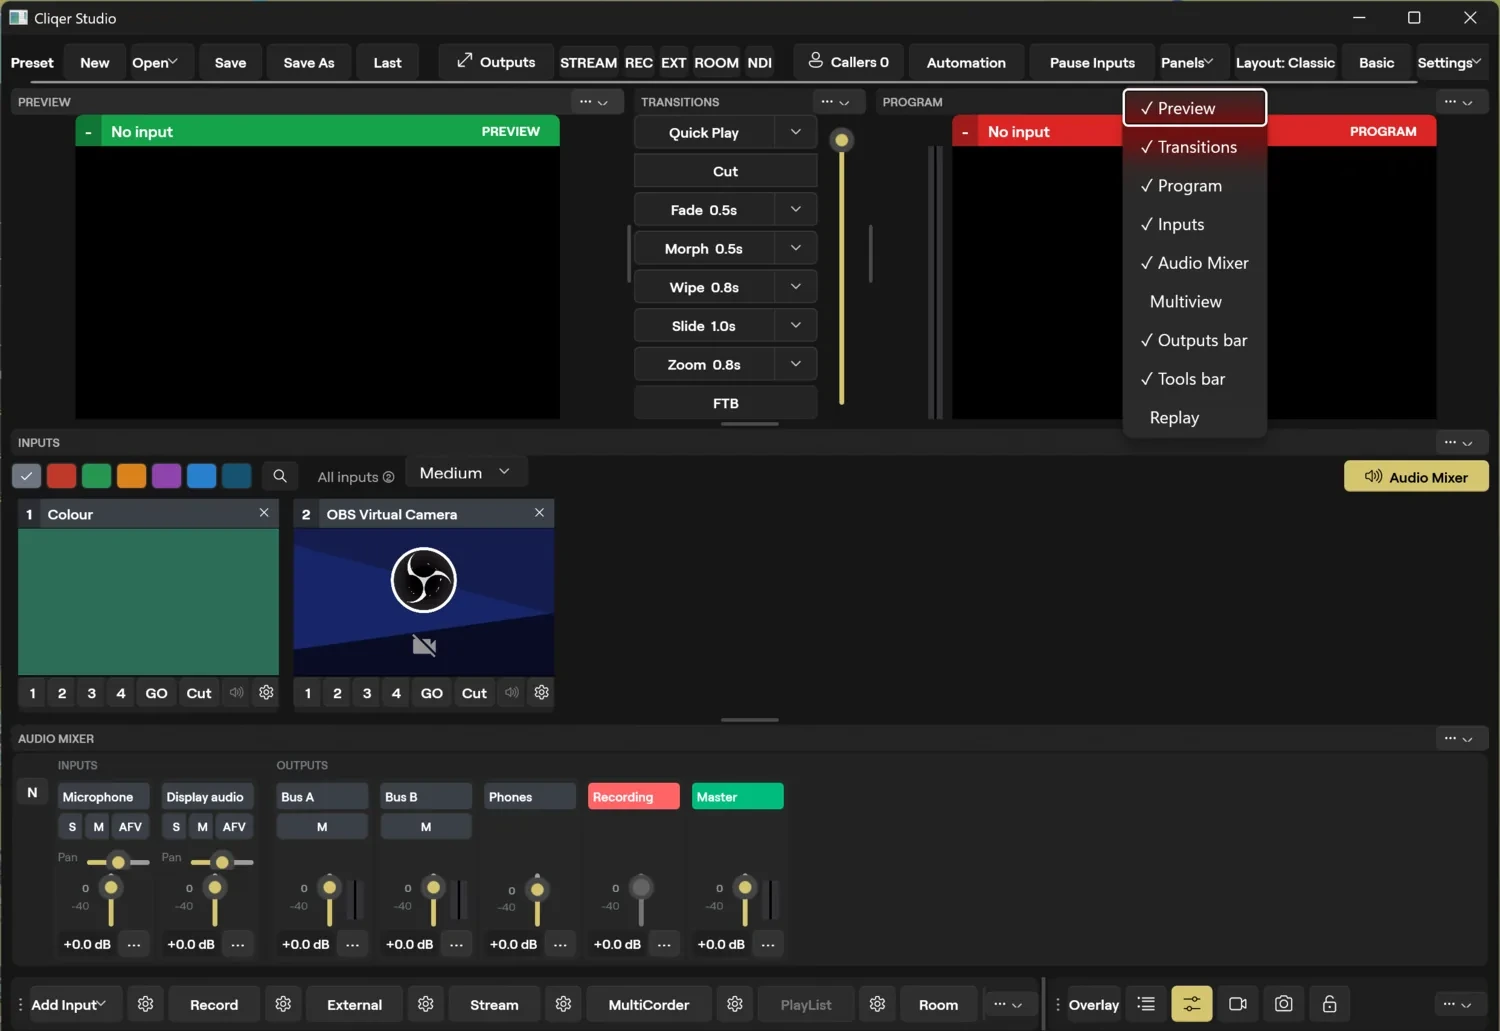
The Studio window is a dock of panels. Move them, resize them, close the ones you do not need and save the arrangement as a layout.
| Panel | macOS | Windows |
|---|---|---|
| Preview | Preview | Preview |
| Transitions | Switcher | Transitions |
| Program | Program | Program |
| Input tiles | Inputs | Inputs |
| Audio | Audio Mixer | Audio Mixer |
| Multiview | Multiview | Multiview |
| Output keys | Bottom bar groups: Add Input, Record, Stream and External, Replay, MultiCorder and Multiview, PlayList, Room and NDI, Overlays and Tools | Outputs bar and Tools bar |
| Replay | The Replay group above | Replay |
- Move a panel: drag its grip (tooltip "Drag to move
") or its title onto another panel. Drop near an edge (within 30 per cent of the panel's width or height) to dock beside it on that side. Drop in the middle to swap the two panels. A preview shows where it will land. - Dock across the whole window: drop a panel or a bar group on the outer edge of the window to make a full-width row above or below everything, or a full-height column at a side. Screens and the bottom bar groups are ordinary panels you can move this way.
- Resize: drag the divider between two panels. Dividers whose neighbours cannot change size show no handle. The height of every docked panel can be dragged, also past a bar row.
- Close a panel: the
...menu in its header, Close. For a bottom bar group, right-click it and choose Close . - Reopen: Panels in the Layouts menu, or Panels in the View menu. It lists every panel and bar group with a check mark while open.
- Tile size: Tile Size has Small, Medium, Large and Extra Large. It is saved with the layout.
- The window needs about 1420 points of width to show the settings cogs on the bottom bar.
- Move a panel: drag its header onto an edge of another panel. A green rectangle named "Drop here" shows the result.
- Dock across the whole window: drop a panel or a bar group on the outer edge of the window to make a full-width row above or below everything, or a full-height column at a side. Screens and the bar groups are ordinary panels you can move this way. Every height is a splitter and is saved with the layout.
- Resize: drag the splitters between panels. The splitter beside the Transitions panel only moves the width by about 10 per cent.
- Close a panel: the menu in its header, Close
. Panels in the top bar lists every panel with a check mark while open and reopens them. - Tile size: the list in the Inputs panel (Small, Medium, Large, Extra Large), saved with the layout.
- Studio needs a window at least 1240 units wide, and the top bar scrolls sideways below that.
Layouts
A layout stores which panels are open, where they are, which panels sit in their own windows and where those windows are, which panels are folded, the tile size and the order and width of the mixer strips. The last arrangement comes back the next time you open Studio, even if you never saved it.
Open Layouts in the Studio toolbar or in the Studio menu.
| Item | What it does |
|---|---|
| Layout list | Switch to Classic or to a layout you saved. |
| Save Layout | Overwrites the active saved layout. Off for Classic, which is built in. |
| Save Layout As... | Asks for a name ("Name the arrangement on screen.") and saves a new layout. |
| Rename Layout... | Renames the active saved layout ("Choose a new name."). Off for Classic. |
| Delete Layout... | After you confirm, removes it and brings Classic back. Off for Classic. |
| Reset to Classic or Revert Layout | Goes back to the arrangement you started from. Off when nothing changed. |
| Panels | Shows or hides each panel. |
| Tile Size | The four sizes. |
Classic is the only built-in layout: Preview, Switcher and Program across the top, Inputs and Audio Mixer in the middle and the bottom bar groups (Add Input, Record, Stream and External, MultiCorder and Multiview, PlayList, Room and NDI, Overlays and Tools) under them. Replay and the Multiview panel are not in it; add them from Panels.
Open Layout:
Panel windows
Every panel can leave the Studio window and become a window of its own, for example to put the mixer on a second display. The bottom bar groups (macOS), the Outputs bar and Tools bar (Windows) and the Screens strip can too, and on macOS so can the Inspector. Windows has no inspector column, so there is no inspector to move there. A panel in a window keeps working: the mixer meters move and Multiview keeps showing.
- Tear out: drag the panel's header grip and let go outside the Studio window. The window opens where you let go, at the panel's docked size. Letting go inside the Studio window away from a drop target, or holding
Escapewhile you let go, changes nothing. - From a menu: Open in Window in the panel's header menu (
...on macOS), or the panel's name in Window > Panel Windows, opens it as a window beside Studio. Panel Windows lists every panel, checked while it is in a window.
Bring a panel back in any of these ways:
- Drag its window's header grip onto an edge of a Studio panel. The usual drop preview shows where it lands.
- Double-click its header.
- Click the window's close button. Closing a panel window never hides the panel; use Close
in its header menu for that. - Dock in Studio in its header menu.
- Its name in Window > Panel Windows (it is checked while in a window).
- Window > Dock All Panels brings every window back at once.
The last panel docked in Studio always stays there, so the Studio window is never empty: tearing it out or opening it in a window leaves it docked.
Panel windows are part of the layout. Quitting keeps them as windows, and the next launch opens them where you left them. Save Layout As saves them with the layout, switching to Classic docks them, and switching back opens them again.
Fold panels
Fold a panel to make room for its neighbours. Click the fold chevron in its header: in a row the panel becomes a thin strip with its name reading bottom to top; in a column it becomes a header bar. The panels beside it take the space. Click the strip or double-click the header to unfold it. A folded panel window shrinks to its header and unfolding brings back its full size. The grip on a folded strip still drags the panel, out of the window too.
- Option-click (macOS) or Alt-click (Windows) a chevron to fold every panel, and again to unfold them all.
- Window > Collapse All Panels and Expand All Panels do the same, and are off when there is nothing to change.
- Collapse Panel and Expand Panel in a panel's header menu fold or unfold that panel.
Folds are saved with the layout and come back after a relaunch, for docked panels and panel windows alike.
Basic view
A smaller Studio for simple shows.
The Basic button in the toolbar (tooltip "Basic mode: hide the categories, mixer and status line") hides the category chips, the search field, the Audio Mixer panel and the status line. The mixer is hidden, not closed, so it returns in the same place when you switch back.
The Basic toggle in the top bar (tooltip "Basic view: fewer tile buttons") hides the button rows on each input tile.
Lock
Lock freezes the controls that change what is on air, so a stray click or key cannot change the show.
- Frozen: Preview, Program, Cut, Quick Play, the transition buttons, the T-bar, Fade to Black, GO, stingers, overlays, loop, live pause and Pause Inputs. Pressing one shows a short "Locked" note.
- Still working: the audio mixer and everything that is not a take.
- On macOS, keyboard shortcuts bound in External Control are ignored while locked.
Turn it on with Lock Switching in the Studio menu (Shift-Command-K) or the lock key in Overlays and Tools (tooltip "Lock the switching controls").
Turn it on with the lock in the Tools bar (tooltip "Lock the switching controls (Ctrl+Shift+K)") or Lock switching in the Studio Settings menu. On a tile it disables GO, Cut, audio and the close button. Overlay toggles stay available.
Related
Outputs
Send the Studio Program to the room, to NDI, to a recording, to a live stream, to displays and capture cards and to other apps as a camera, and record every input to its own file.
Video Calls
Bring people from your room onto camera in Studio, stage them like any other input, choose what they see and hear, and send each person out on their own NDI source.