Automation
Automation is a window of its own with three tabs. Auto Switching takes the right shot to Program from who is speaking, from silence and from a clock. Triggers fire one action when something happens in the show, such as recording starting or a caller joining. Macros are named sequences of actions that you record while you work or write by hand, and replay with one press.
Everything Automation does is made of the same actions you press by hand. A rule takes an input to Program, a trigger or a macro step runs an action from the External Control list, and each one meets the same plan checks and refusals as if you had pressed it yourself.
What you need
- You are signed in and Studio is open. See Studio.
- A plan with Studio auto switching for the Auto Switching tab, and Studio triggers and macros for the Triggers and Macros tabs.
- For auto switching, at least one input to show and at least one audio channel to listen to.
Open Automation
Click Automation in the trailing end of the Studio toolbar. The button shows a bolt, filled while auto switching is on. Its tooltip reads "Automation: auto switching, triggers and macros", or "Automation: auto switching is on" while it runs.
The window is called Automation. Its three tabs, Auto Switching, Triggers and Macros, sit in a segmented control in the title bar.
Click Automation in the Studio top bar, between Callers and Pause Inputs. Its tooltip reads "Automation: auto switching, triggers and macros".
The window is called Cliqer Automation. Its three tabs, Auto Switching, Triggers and Macros, sit in a selector bar at the top. Clicking Automation again while the window is open brings it to the front.
The status line
Under the tabs, one line says what Automation is doing, in words and never by colour alone:
| Text | Meaning |
|---|---|
| Auto switching off | The rules are off. |
| Auto switching on | The rules are listening and may switch Program. |
| Auto switching paused | The rules are on but a shot taken by hand is holding them. See Pause and resume. |
| Speaking: Mic 1, Mic 2 | The mixer channels the rules hear as speaking now. Shown only while auto switching is on and somebody is speaking. |
| Running: Intro | The macros that are replaying now. |
| Recording Intro: 3 steps | A macro is being recorded, with its step count. When some actions could not be recorded it adds ", 1 skipped". |
Auto Switching
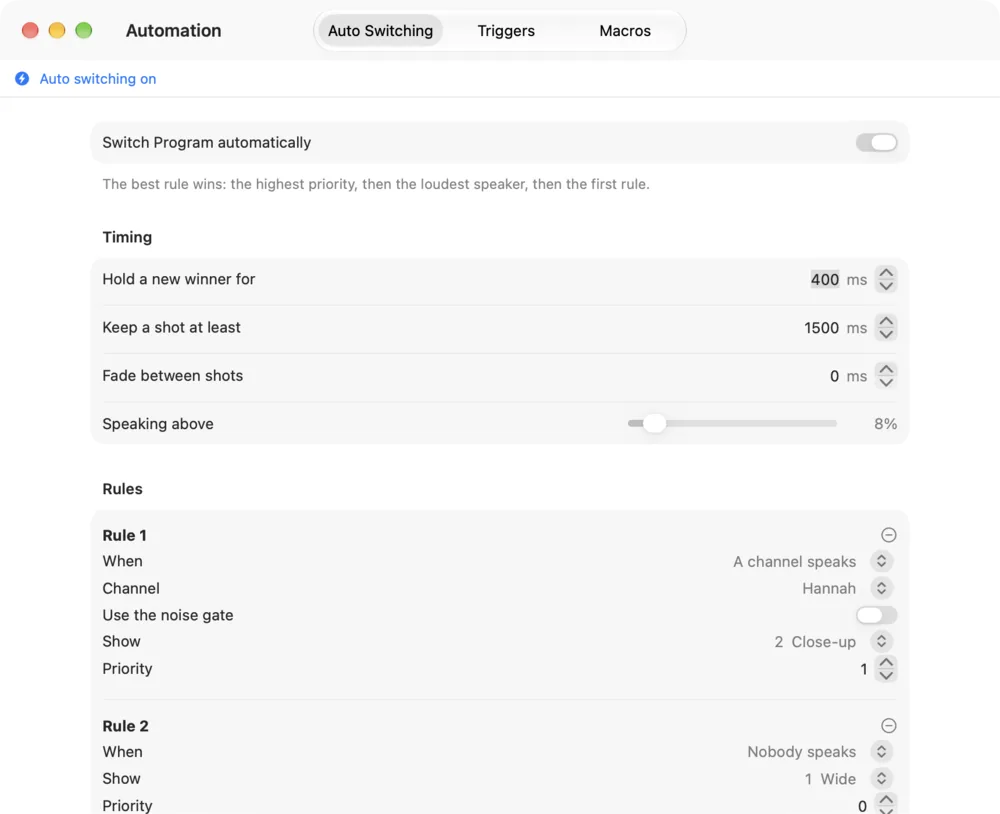
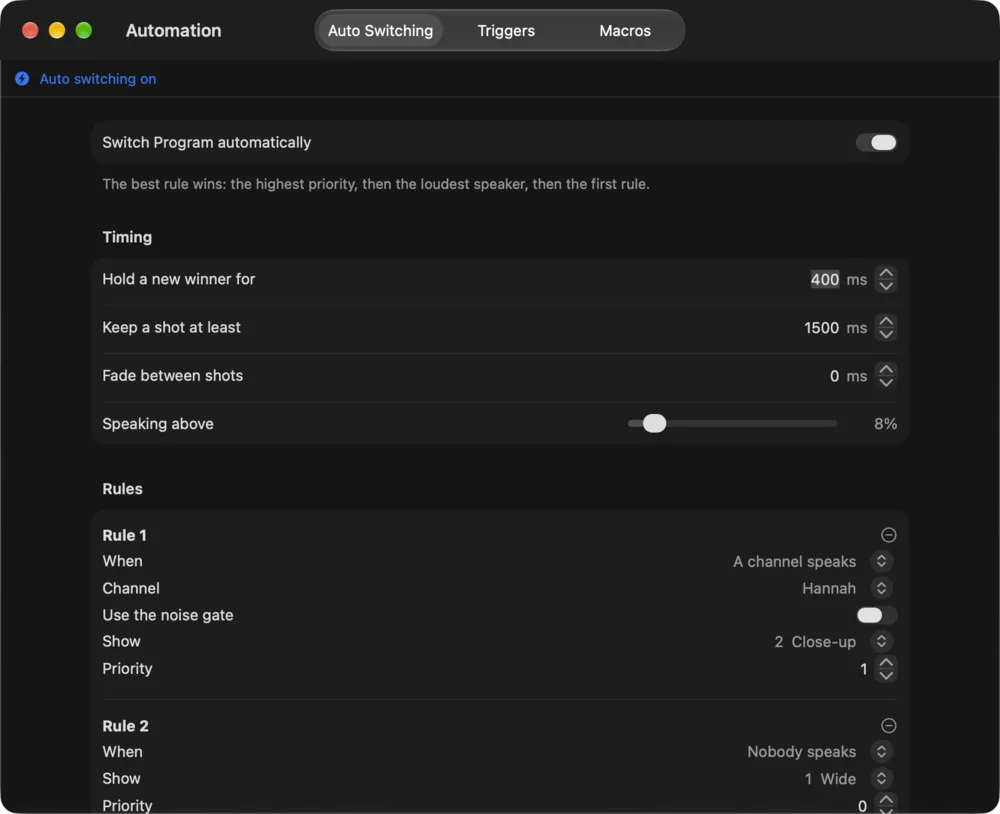
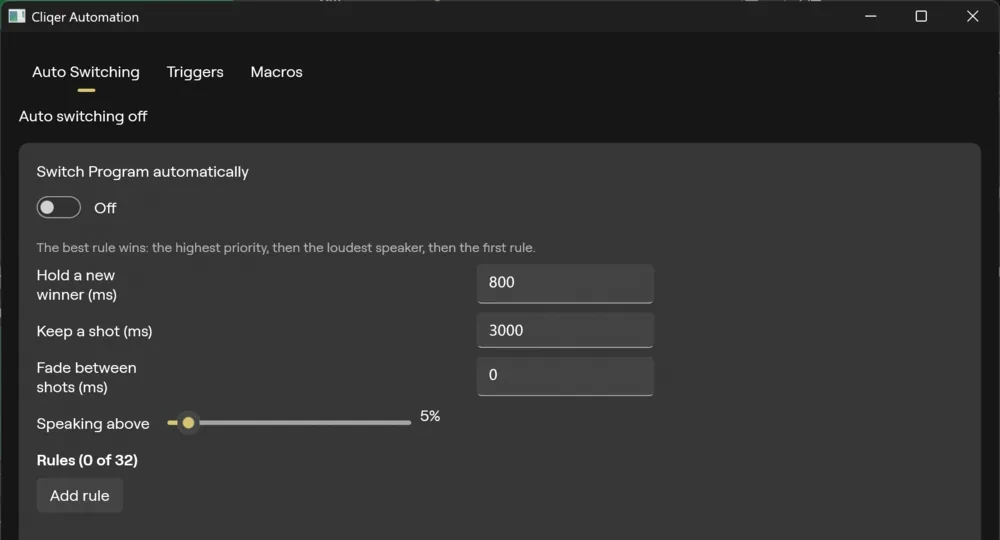
Auto switching works like a camera operator who cuts to whoever talks. You write rules. Each rule says "when this is true, show that input". Every moment, the rules that are true put their input forward as a candidate, and the best candidate wins. Studio then takes the winner to Program, with the same take you would make by hand.
The best rule wins in this order: the highest priority, then the loudest speaker, then the first rule in the list.
Switch and timing
Turn on Switch Program automatically to start the rules. It is a switch, off by default, and it stays off when you open a saved show. The rules themselves are saved in the show. A footer under the switch says "The best rule wins: the highest priority, then the loudest speaker, then the first rule."
The numbers below keep the picture from jumping on every cough. A change of shot happens only once the winner has held for Hold a new winner for and the shot on Program has been up for Keep a shot at least, whichever of the two ends later.
| Setting | Range | Default | What it does |
|---|---|---|---|
| Hold a new winner for (Windows: Hold a new winner (ms)) | 0 to 3,600,000 ms (one hour) | 800 ms | How long a new winner must keep winning before Program switches to it. |
| Keep a shot at least (Windows: Keep a shot (ms)) | 0 to 3,600,000 ms | 3000 ms | The shortest time a shot stays on Program before the rules may switch again. |
| Fade between shots (Windows: Fade between shots (ms)) | 0 to 3,600,000 ms | 0 ms | The length of the crossfade of each automatic switch. 0 is a cut. |
| Speaking above | 0% to 100% | 5% | The meter level above which a channel counts as speaking. A slider with the value beside it. |
On macOS each number is a field with a stepper beside it (steps of 100 ms, 500 ms for Keep a shot at least, and 100 ms for the fade), and a typed value is held to its range. On Windows each is a number box with the same range.
Rules
Click Add Rule (Windows: Add rule) to add one. A rule is numbered Rule 1, Rule 2 and so on, with a remove button (Remove on Windows). A counter beside the list reads "2 of 32" (Windows: Rules (2 of 32)). Add Rule turns off at 32 rules.
| Field | Choices | What it does |
|---|---|---|
| When | A channel speaks, Nobody speaks, On a schedule | What makes the rule a candidate. A new rule starts as A channel speaks. |
| Channel | Any mixer channel by name | Shown for A channel speaks. The channel whose meter the rule listens to. |
| Use the noise gate | On or off, off by default | Shown for A channel speaks. When on, "speaking" means the channel's noise gate is open instead of the meter being above Speaking above. The strip's gate must be on for this to work. On Windows the row is labelled Gate and the box reads "Use the noise gate: speaking is the gate open". |
| Every (Windows: Every (ms)) | 1000 to 3,600,000 ms, 10,000 ms when you pick the kind | Shown for On a schedule. The period of the schedule. |
| Show | Any input, by number and name | The input to take to Program when the rule wins. A scene is an input too, so a rule can show a scene. |
| Priority | 0 to 255, 0 by default | A higher number beats a lower one, whatever the loudness. |
What each When means:
- A channel speaks: the channel's meter peak is above Speaking above, or, with Use the noise gate, its noise gate is open. When two speaker rules are both true at the same priority, the louder channel wins.
- Nobody speaks: none of the channels that your A channel speaks rules listen to is speaking. This is the wide shot for silence.
- On a schedule: the rule becomes a candidate Every period after its shot last aired, or after the rules were turned on, and stays one until it airs again. It does not need anyone to speak.
If you remove an input from Studio, the rules and triggers that named it are removed with it.
Pause and resume
A shot taken by hand pauses the rules. Any change of Program that is not the rules' own take counts: a click, a key, a MIDI control, and also a take made by a trigger or a macro. While paused the status line reads Auto switching paused, and the tab shows a Paused row that says "A shot taken by hand holds the rules." with a Resume button.
To resume:
- Click Resume.
- Or turn Switch Program automatically off and on again.
- Or press the Auto switch action from External Control. It toggles, and while the rules are paused it resumes them. While they run, it turns them off.
When the rules resume, the shot on Program counts as theirs from that moment, so the Keep a shot at least time counts from then.
Turning auto switching off needs no plan feature, so you can always stop it.
Sound and the lock
Auto switching changes the picture, not the mix. The input it takes only brings its own sound with it if the strip has AFV (audio follows video) on, or the input's Audio follows setting sends that sound along. The channel a rule listens to does not have to be the input it shows: you can listen to a room microphone and show a wide shot. See Audio mixer.
Lock Switching freezes the switching controls in the Studio window so a stray click cannot cut away. It does not stop the rules, triggers or macros, which run in Studio's engine, not through those controls.
Triggers
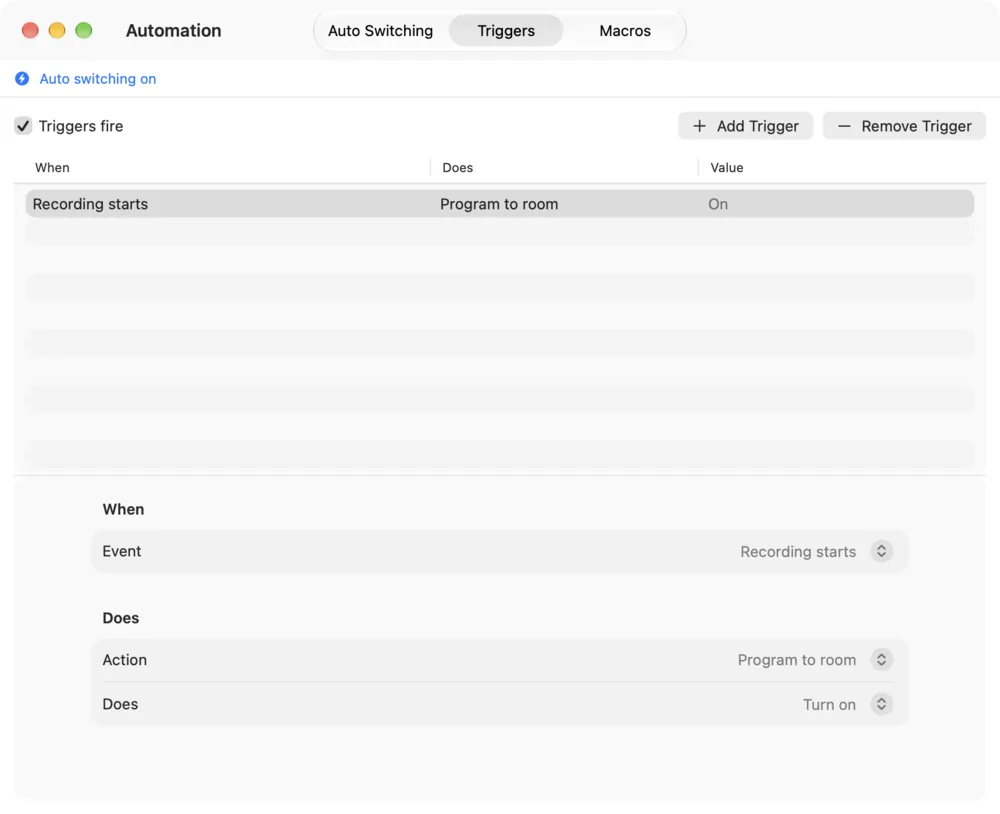
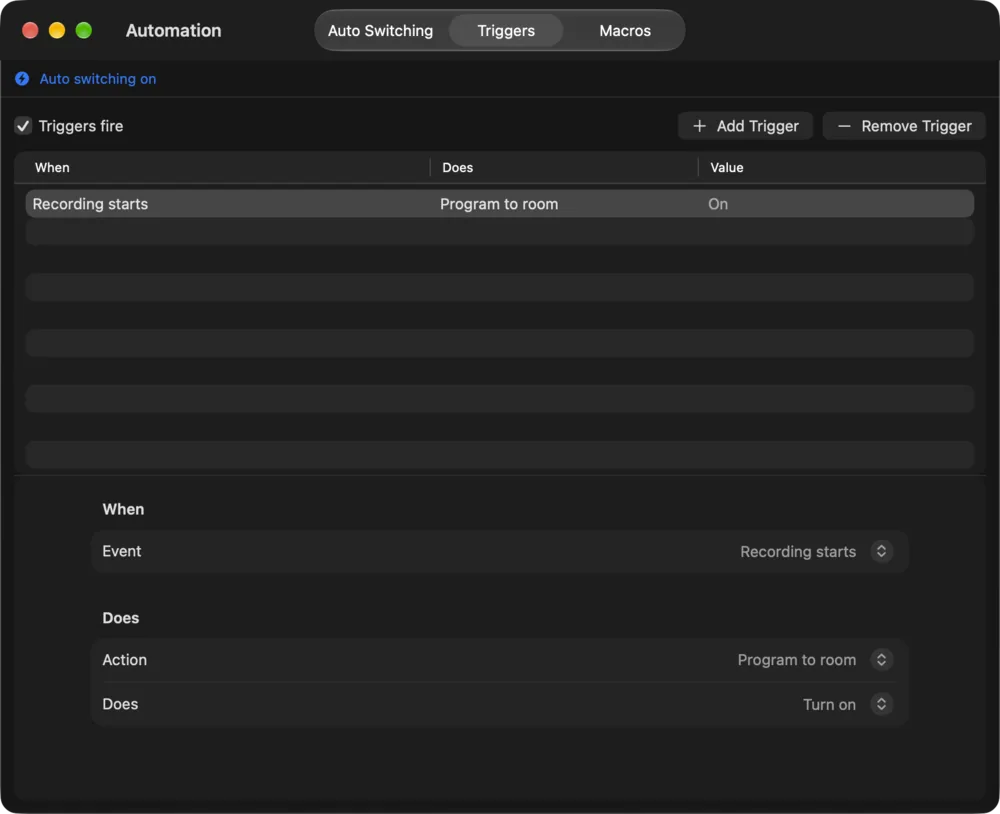
A trigger is one line: when something happens, do one action. Each trigger fires once per occurrence.
On macOS the Triggers tab has a table with the columns When, Does and Value, and a form for the selected trigger below it. On Windows the list shows each trigger as "When, Does" and the form sits under it.
- Triggers fire is the table's own switch. On by default. The tooltip on macOS says "Macros run either way", and on Windows the label reads "Triggers fire (macros run either way)".
- Add Trigger adds one (Windows: Add). It starts as Recording starts with the first action in the list. It turns off at 64 triggers.
- Remove Trigger removes the selected one (Windows: Remove).
What starts a trigger
Pick the event in the Event menu (Windows: When).
| Event | Fires when |
|---|---|
| An input goes to Program | The chosen input comes on Program. Pick it in Input. The table reads "2 Camera goes to Program". |
| An input leaves Program | The chosen input leaves Program. The table reads "2 Camera leaves Program". |
| Recording starts, Recording stops | Record turns on or off. |
| Streaming starts | The first stream destination starts. |
| Streaming stops | The last stream destination stops. |
| The timer enters a phase | The timer reaches the phase you pick in Phase: idle, talk, warning, overtime or paused. The table reads "The timer is talk". |
| A caller joins, A caller leaves | A guest joins Studio (into the green room), or leaves. |
What a trigger does
The Does part is any action from the External Control catalogue: the same list, in the same groups, as the Action menu of an External Control binding (Windows labels it Does). After you pick one, its settings appear (an input, a channel, text, a number or a choice).
How the action fires depends on its kind:
| Kind | What you set |
|---|---|
| Button | Nothing. It presses. |
| Switch | Toggle, Turn on or Turn off. |
| Level | A value in the action's range. |
A trigger keeps the action as you picked it, not a frozen result. A trigger that takes "the input on Preview" takes whichever input is on Preview when the trigger fires. Settings that hold secrets, such as stream keys, cannot be part of a trigger.
Macros
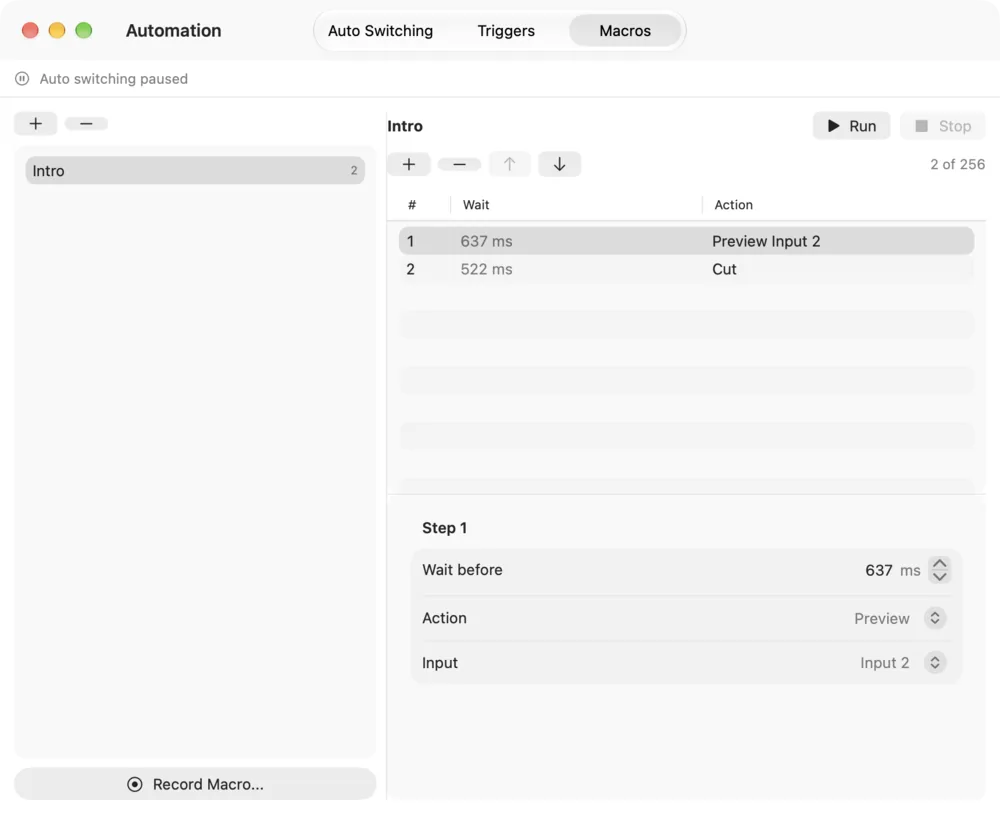
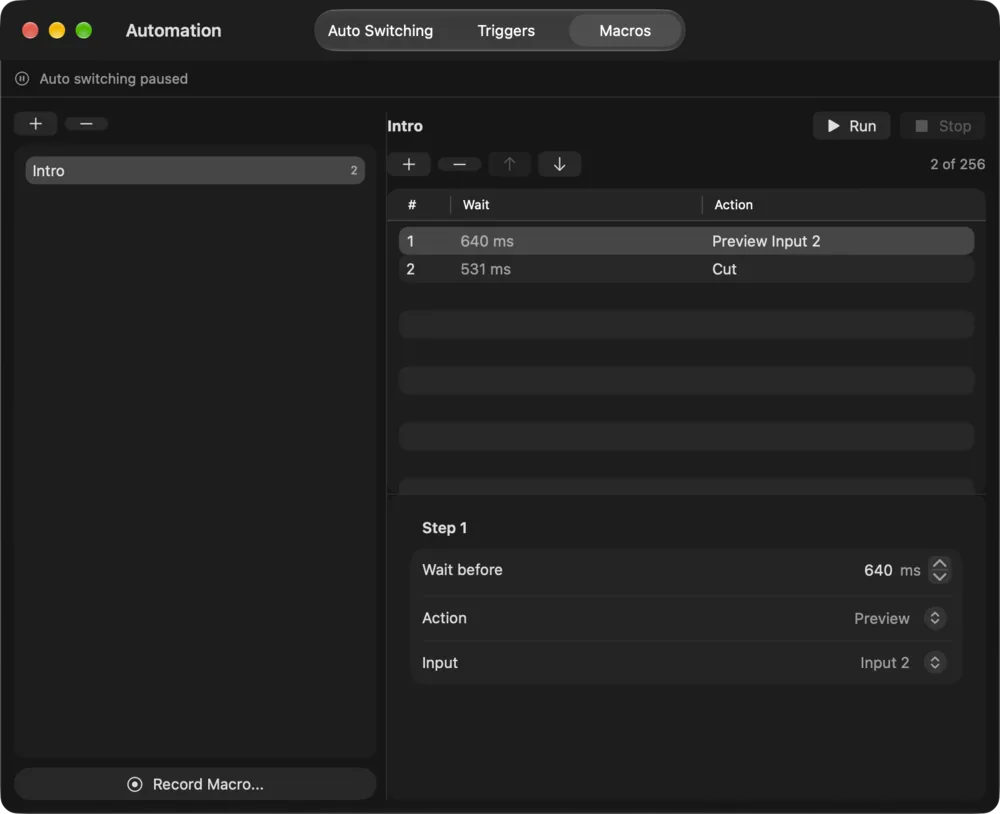
A macro is a named list of steps. Each step is one action from the same catalogue as a trigger, with a wait before it. Run a macro and the steps play in order, each after its own wait. Macros run whether or not Triggers fire is on, and you can also run or stop one from External Control with Macro run and Macro stop, which take the macro's name as text.
The list on the left shows each macro with its step count, and Recording or a play mark beside the one that is recording or running. Pick one to see its steps on the right.
At the foot of the list a bar holds add, duplicate and remove. Right-click a macro for Run, Stop, Duplicate and Remove; Delete removes the selected macro. A copy is named "
Record a macro
- Click Record Macro... (Windows: Record macro...) under the list. Cliqer asks for a Name in a dialog titled Record a Macro (Windows: Record a macro), with the note "Cliqer records the Studio actions you take until you stop." (Windows: "Cliqer records the Studio actions you take, with the waits between them, until you stop.") Click Record.
- Work in Studio as you normally would. Each action you take becomes a step, with the wait since the step before. The first step's wait counts from the moment you clicked Record. The status line shows Recording
and the step count. - Click Stop Recording (Windows: Stop recording). The macro appears in the list and is selected.
Good to know about recording:
- Only actions from the catalogue become steps. Anything else, such as saving a whole settings record, is left out and counted as skipped in the status line.
- Editing macros is never recorded, and neither is anything a trigger, a macro or the auto switcher does.
- A recording stops adding steps at 256. Further actions count as skipped.
- A name that already exists is replaced when you stop.
Write a macro
Click New Macro (the plus above the list, tooltip "New or remove a macro"; Windows: New), type a Name and click Create. A macro of the same name is replaced. The name is trimmed, and a macro may not have an empty name. Then add steps:
| Control | What it does |
|---|---|
| Add Step (Windows: Add step) | Adds a step with the first action in the list. Off at 256 steps. |
| Remove Step (Windows: Remove) | Removes the selected step. |
| Move Up, Move Down (Windows: Up, Down) | Moves the selected step. |
| Wait before (Windows: Wait before (ms)) | 0 to 3,600,000 ms, 0 by default. The wait before this step. For the first step it counts from the start. |
| Action (Windows: Does) | The action to run, and then its settings or Toggle, Turn on, Turn off, or a value, as for a trigger. |
The step table shows #, Wait and Action (on macOS), and a counter reads "3 of 256".
Run a macro
Pick the macro and click Run. Stop ends it before its last step. The status line shows Running:
If a step is refused (for example the plan does not include what it does), you get the same Studio notice as for a hand-made action.
The plan notice
Auto switching, triggers and macros are on the Studio and Enterprise plans. When your plan does not include a tab's feature, the window keeps its controls and shows a notice at the top of that tab. The core then refuses the change or the action, and the notice tells you why up front.
A bar with a lock and an Upgrade button, which opens your account page:
- On Auto Switching: "Auto switching is part of the Studio plans. Yours does not include it, so the rules never switch Program."
- On Triggers: "Triggers and macros are part of the Studio plans. Yours does not include them, so none fires."
- On Macros: "Triggers and macros are part of the Studio plans. Yours does not include them, so none runs."
A bar with a lock and an Upgrade button:
- On Auto Switching: "Auto switching needs Studio auto switching in your plan."
- On Triggers and Macros: "Triggers and macros needs Studio triggers and macros in your plan."
Stopping things never asks for the plan: you can always turn auto switching off, turn Triggers fire off, stop a macro or remove one.
Limits
| What | Most |
|---|---|
| Rules in auto switching | 32 |
| Triggers in a show | 64 |
| Macros in a show | 64 |
| Steps in a macro | 256 |
| A wait, a hold, a minimum shot, a fade or a schedule period | 3,600,000 ms (one hour) |
| A schedule period, shortest | 1000 ms |
| A macro name | 64 characters |
Rules, triggers and macros are saved in the show. Auto switching itself always comes back off when a show opens.
Related
Plans and Limits
What you need to open Studio, which plan includes which Studio feature, how many inputs each plan allows and what you see when a plan does not cover an action.
Overview
Run Cliqer from keys, MIDI, OSC and control surfaces, learn every default shortcut, and read the log when something needs checking.