Virtual Camera and Microphone
Other apps (Zoom, Teams, Google Meet, OBS, browsers) list cameras and microphones. Cliqer adds its own: four cameras that carry Studio's pictures, and a microphone that carries the Program audio. This page shows where to install them, how to check that they are there, and how to remove them. The same two cards sit under General in Settings.
| Device | What other apps see | Needs |
|---|---|---|
| Virtual Camera (Windows: Virtual camera) | Cliqer Program, Cliqer Preview, Cliqer Clean Program and Cliqer Source | Turn on External in Studio to send Program to them |
| Virtual Microphone | Cliqer Microphone, the Program audio while Cliqer runs, silence otherwise | Nouse VB-CABLE (below) |
Open Cliqer Settings... (Command-comma) and stay on General. Scroll to Virtual Camera and Virtual Microphone.
Virtual Camera
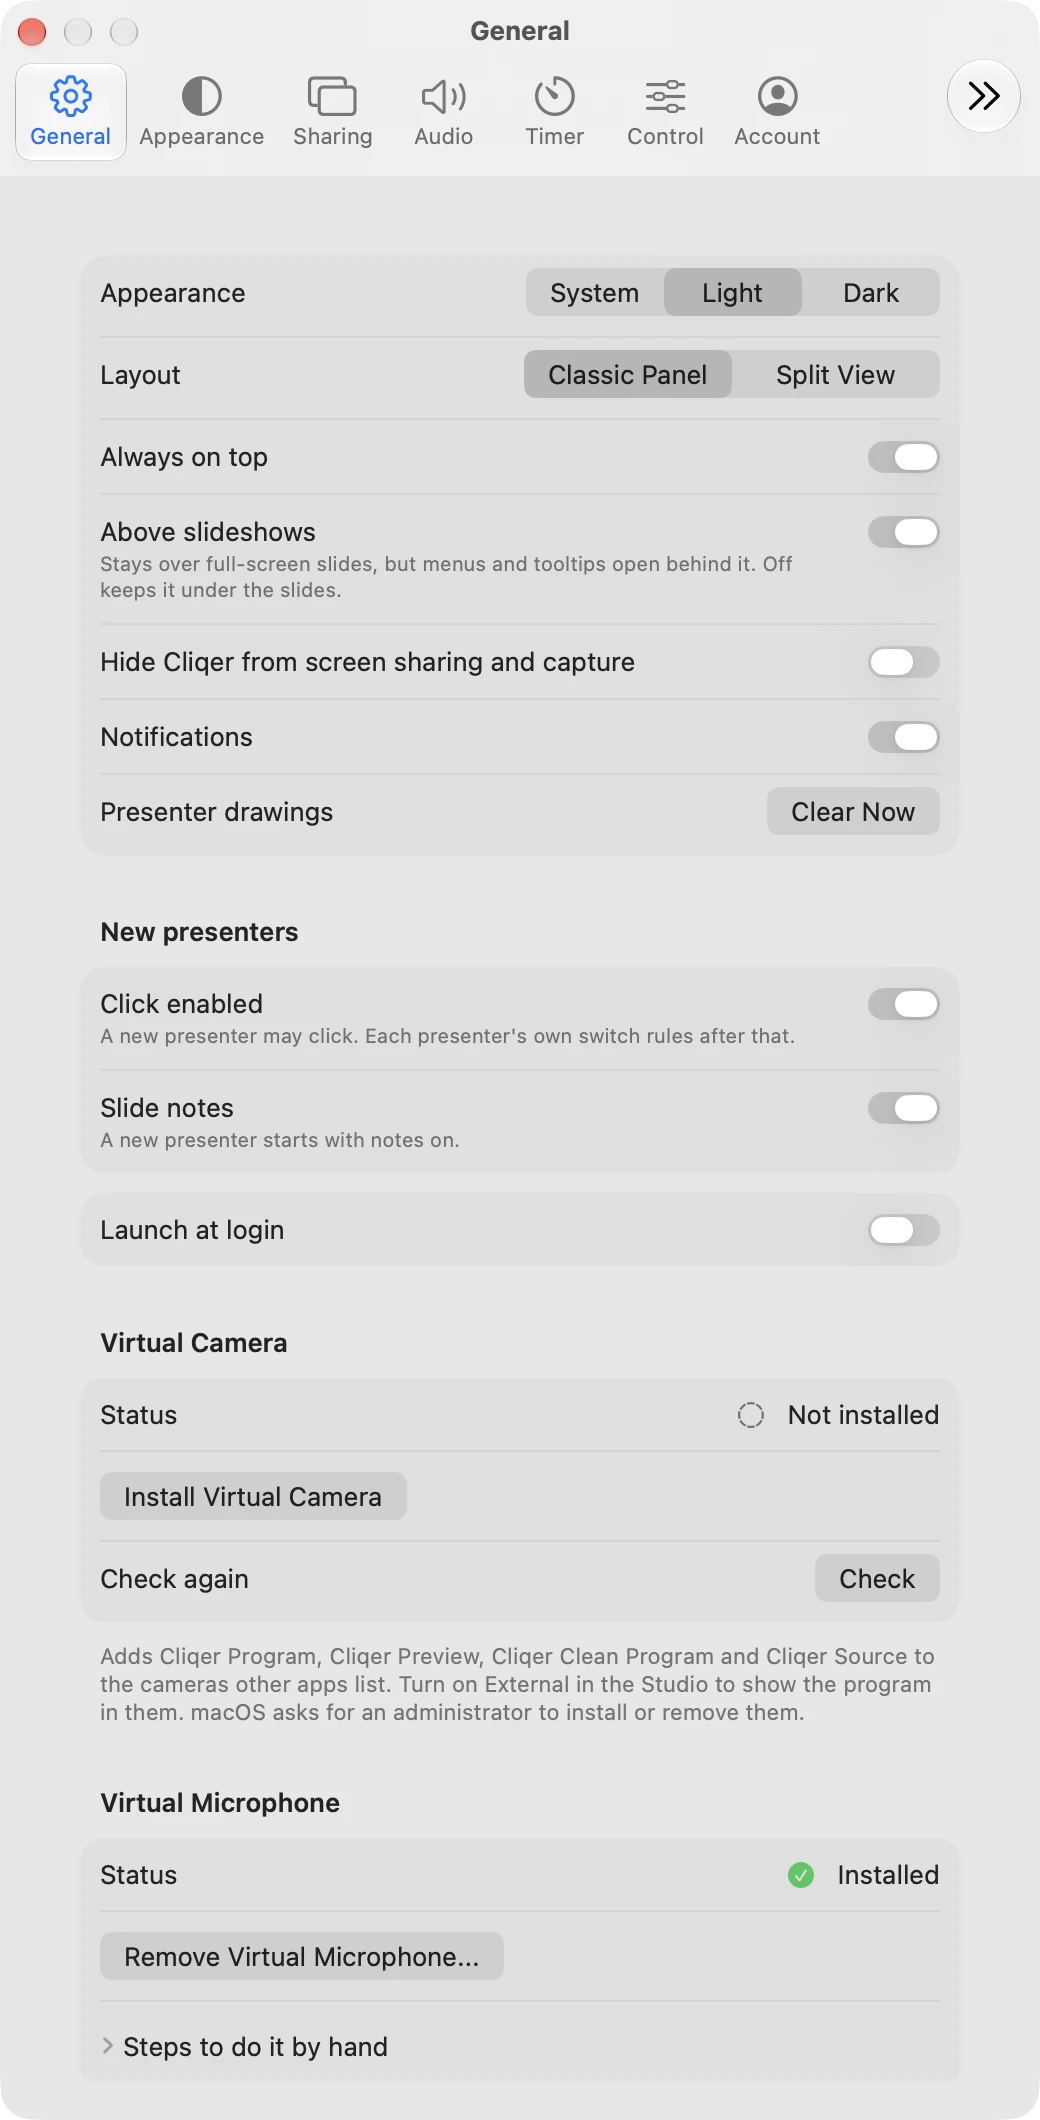
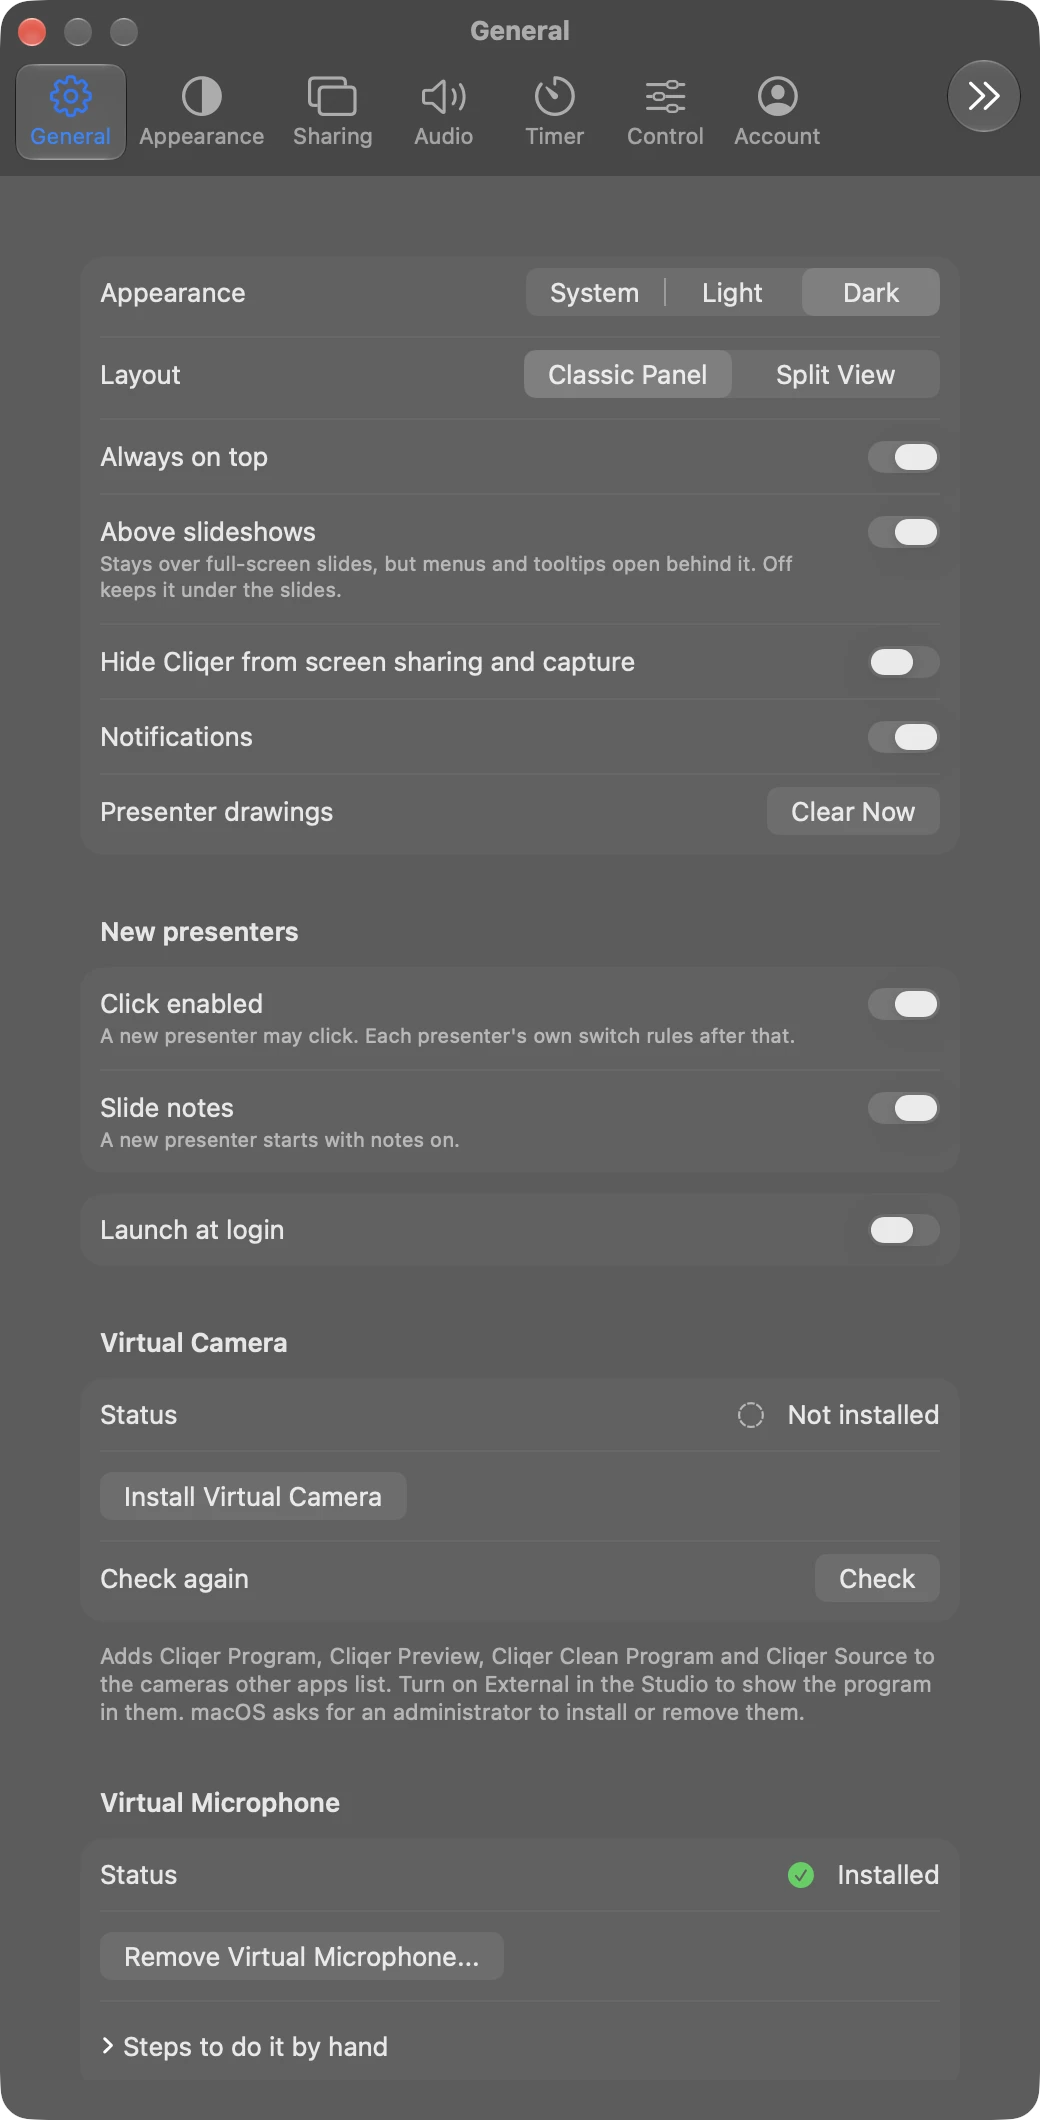
The camera is a macOS system extension. macOS installs it only when you ask, and asks an administrator to allow it.
- Move Cliqer to the Applications folder if it is not there (the status says Move Cliqer to the Applications folder first).
- Click Install Virtual Camera. The status reads Installing....
- If the status changes to Allow Cliqer in System Settings, General, Login Items & Extensions, click Open Login Items & Extensions..., find Cliqer under Camera Extensions and switch it on. Enter your administrator password if macOS asks.
- The status reads Installed. If it reads Restart your Mac to finish installing, restart.
To check it, look at Status. It shows Checking... while it reads, then Installed, Not installed, Installing..., Removing..., an Allow Cliqer... message while macOS waits for you, or a Restart message. Click Check (next to Check again) to read it once more; Cliqer also reads it when you open Settings and when you come back to Cliqer from System Settings. In another app, open its camera list: the four Cliqer cameras are there.
To remove it, click Remove Virtual Camera... (shown while it is Installed) and confirm Remove. macOS asks for an administrator password. The status goes to Not installed, or to Restart your Mac to finish removing. You can install it again here at any time. If an app still lists the cameras, quit and reopen that app.
Virtual Microphone
The microphone is an audio driver. The Cliqer installer places it in /Library/Audio/Plug-Ins/HAL and restarts Core Audio, so on a normal install Status already reads Installed. Cliqer reads this from Core Audio's own device list, and again each time that list changes.
| Status | Meaning |
|---|---|
| Installed | Core Audio lists Cliqer Microphone. |
| Installed, waiting for Core Audio to load it | The driver file is there but Core Audio has not loaded it yet. Wait a moment, or restart your Mac. |
| Not installed | Neither the file nor the device is there. |
| Working... | An install or removal is running, with the administrator prompt up. |
- Install Virtual Microphone (shown when Not installed) copies the driver from inside Cliqer into
/Library/Audio/Plug-Ins/HALand restarts Core Audio, with one administrator password prompt. The same steps the installer runs. Apps playing or recording sound pause for a moment. - Remove Virtual Microphone... (shown when Installed) deletes the driver, forgets the installer's receipt and restarts Core Audio, after you confirm Remove.
- If you would rather use Terminal, open Steps to do it by hand: it lists the exact commands for installing and removing, each with a Copy button. Run them one at a time.
If you cancel the password prompt, Cliqer shows User canceled. under the buttons and changes nothing.
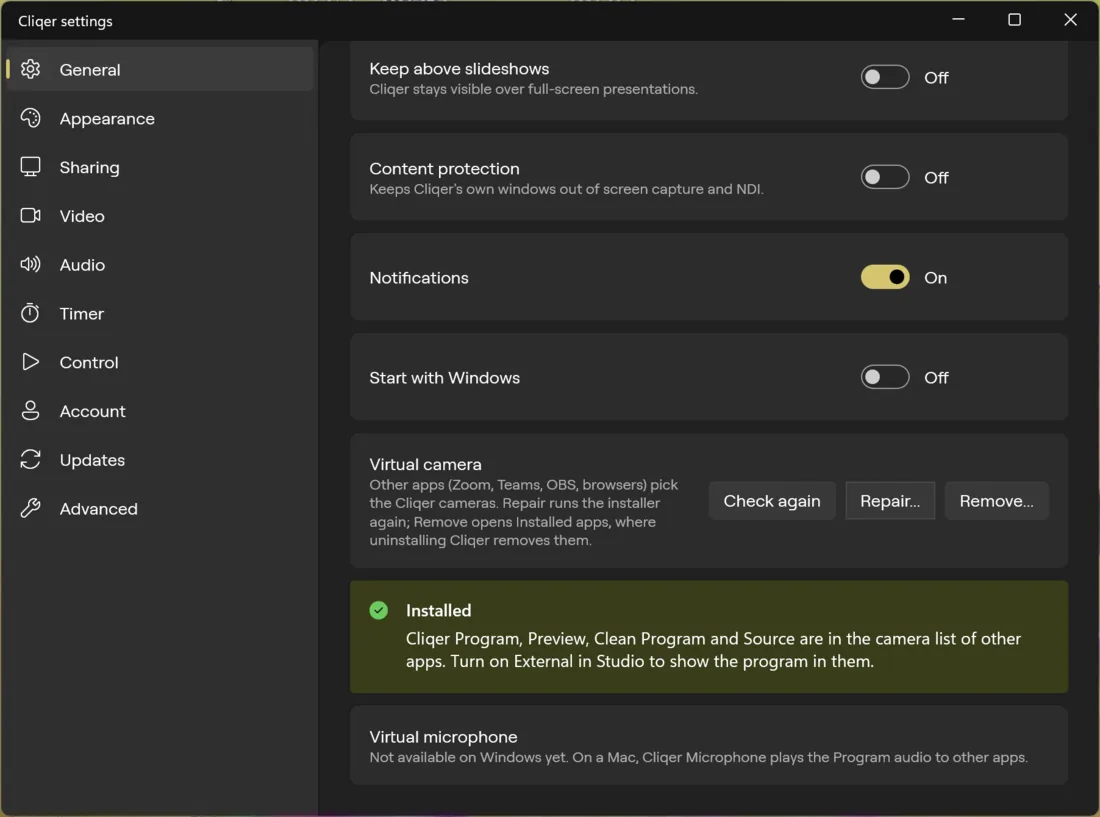
Open Settings and stay on General. Scroll to Virtual camera and Virtual microphone.
Virtual camera
The Cliqer installer registers the camera with Windows (it adds a media source that the Windows camera service loads), so there is nothing to switch on inside Cliqer.
The card shows one message under the buttons:
| Message | Meaning | What to do |
|---|---|---|
| Installed | The cameras are registered and their file is on disk. | Turn on External in Studio, then pick Cliqer Program (and the others) in the other app. |
| Needs repair | The cameras are registered but their file is missing, for example after Cliqer was moved or part of it was deleted. | Click Repair... and run the installer again. |
| Not installed | The cameras are not registered. | Click Install or repair..., run the installer, then click Check again. |
- Check again reads the registration once more. Cliqer reads it when the card opens and when you click this, never in the background.
- Install or repair... (Repair... once installed) opens the Cliqer download page. Run the installer again: it registers the cameras and puts their file back. You do not need to uninstall first.
- Remove... opens Settings, Apps, Installed apps in Windows. Removing Cliqer there also removes the cameras, because the installer owns them.
Virtual microphone
Windows has no Cliqer Microphone. To send Cliqer's audio into Zoom, Teams or another app, use the free VB-CABLE virtual audio cable:
- Install VB-CABLE from vb-audio.com and restart Windows if it asks.
- In Cliqer, Settings, set Speakers to CABLE Input (VB-Audio Virtual Cable). Cliqer now plays what you hear (the Headphones mix of the Audio Mixer) into the cable.
- In the other app, choose CABLE Output (VB-Audio Virtual Cable) as its microphone.
You no longer hear Cliqer on your own speakers while the cable is selected.
When something is not right
| What you see | Try |
|---|---|
| The cameras are Installed but an app does not list them | Quit and reopen that app. Turn on External in Studio. |
| macOS: Allow Cliqer in System Settings... stays | Open Login Items & Extensions..., switch Cliqer on under Camera Extensions, then click Check. |
| macOS: Move Cliqer to the Applications folder first | Quit Cliqer, drag it into Applications, open it from there. |
| macOS: the microphone installs but no sound arrives | Cliqer plays the Program audio only while Cliqer is running; otherwise it is silent. Check that Program has sound in the Audio Mixer. |
| Windows: Needs repair after a repair | Run the installer as the same Windows user and allow the administrator prompt, then click Check again. |
Sending Program to the camera uses the External output, see Outputs. Which plan includes it is in Plans and limits.