Inputs
An input is anything Studio can put on Preview or Program. Inputs live in the Inputs panel as tiles. Each one gets a number (used by the keyboard), a name, a live picture and, if it carries sound, a strip in the Audio mixer.
Input kinds
| Kind | macOS | Windows |
|---|---|---|
| Screen (a whole display) | YesScreen | Yeslisted as Display |
| Camera | YesCamera | YesCamera |
| NDI source | YesNDI Source | YesNDI |
| Person on a video call | YesVideo Call | YesVideo call: invite a presenter |
| Audio device (microphone or interface) | YesAudio Input | YesAudio: name in Add Input |
| Media file (video or audio) | YesMedia File... | YesVideo, audio or image file... |
| Media list (a playlist of files) | YesList | YesList |
| Image | YesImage... | YesImage... |
| Colour | YesColour | YesColour |
| Scene (layers of other inputs) | YesScene | YesNew scene and New scene template |
| Single window capture | NoNot available as a Studio input. | NoNot available as a Studio input. |
| Network stream (SRT, RTMP, RTSP, HLS) | YesNetwork Stream... | YesNetwork stream... |
| Syphon or Spout sender (another app's picture) | YesSyphon... | YesSpout... |
| Blackmagic capture card | YesBlackmagic... (needs Blackmagic Desktop Video) | YesBlackmagic... (needs Blackmagic Desktop Video) |
| Web page | YesWeb Page... | YesWeb page... |
| Title graphics (lower third, timer, clock) | YesTitle... | YesTitle... |
| Timer (a countdown title that runs its own clock) | YesTimer | YesTimer |
| Timeline (clips laid out in time on tracks) | YesTimeline (Ultra and Studio plans) | YesTimeline (Ultra and Studio plans) |
| Teleprompter (a script that scrolls on Program) | YesTeleprompter (Studio titles) | YesTeleprompter (Studio titles) |
| Mix (a Screen shown as an input) | YesMix (Pro, Ultra, Studio and Enterprise) | YesMix (Pro, Ultra, Studio and Enterprise) |
| Canvas (an output canvas shown as an input) | YesCanvas (Pro, Ultra, Studio and Enterprise) | YesCanvas (Pro, Ultra, Studio and Enterprise) |
| Captions (the live caption lines in a frame of their own) | YesCaptions (live captions plan feature) | YesCaptions (live captions plan feature) |
Add an input
Use Add Input (plus icon) in the bottom bar, or the Add Input button in the empty Inputs panel. The empty panel says: "Add a screen, camera, NDI source, caller or media file, or drop a file here."
| Entry | What it does |
|---|---|
| Screen | A submenu with one item per connected display, by name. The list follows screens being plugged in or unplugged while Studio runs, so a new monitor or virtual display shows without a relaunch. Adds a Screen input and starts capturing that display. macOS must have allowed Screen Recording, otherwise Studio shows the alert Screen Recording Is Off with an Open System Settings button |
| Camera | One item per camera, or "No cameras found". If Cliqer has no camera access yet the submenu shows Allow Camera Access..., or Open Camera Privacy Settings... if you refused before |
| NDI Source | One item per NDI source on the network, or "No NDI sources found", and a link About NDI® (ndi.video) |
| Video Call | Section Invite a Presenter (everyone in the room, by name) or "No presenters in the room", and Copy Room Link so a guest can join from the link. See Video calls |
| Audio Input | Microphones and interfaces with input channels, or "No audio inputs found". Adds an audio-only input with its own mixer strip |
| Network Stream... | A sheet to receive an SRT, RTMP, RTSP or HLS stream. See Network streams |
| Syphon... | A sheet that lists the Syphon servers running on this Mac. See Syphon and Spout |
| Blackmagic... | A sheet for a Blackmagic capture card. Hidden in builds without card support. See Blackmagic cards |
| Media File... | Pick one or more movies, audio files or images. Each becomes its own input, named after the file |
| Image... | Pick one or more images |
| List | An empty media list called "List". Add files in its settings |
| Colour | A colour input called "Colour". It starts as solid Cliqer green and its editor opens at once. See Colour inputs |
| Web Page... | A sheet to show a web page as an input. See Web pages |
| Title... | The Add Title sheet: a lower third, a timer or a clock. It opens the Title Designer once added. See Titles |
| Timer | A Timer title added at once, with no sheet: big digits that fill the frame and count down from 5:00 on their own clock. It opens the Title Designer once added. Needs titles in your plan, like Title.... See Timer titles |
| Scene | An empty scene called "Scene". See Scenes and looks |
| Timeline | An empty timeline called "Timeline 1" (then "Timeline 2" and so on). Ultra and Studio plans; other plans see a padlock on the entry. See Timeline and the Timeline editor |
| Teleprompter | A scrolling script called "Teleprompter". Needs Studio titles. See Teleprompter |
| Mix | A submenu with one item per Screen that is not a Mix yet, or "No screens to mix". Adds that Screen as an input. Pro, Ultra, Studio and Enterprise plans. See Mix |
| Canvas | A submenu with one item per output canvas that has no Canvas input yet, or "No canvases". Adds that canvas as an input, so you can put the whole canvas on Preview or Program. Pro, Ultra, Studio and Enterprise plans. See Output canvases |
| Captions | A captions input added at once, with no sheet. Its look opens in the input inspector. The entry shows a padlock when your plan lacks live captions. See Captions inputs |
Use Add Input in the Outputs bar. The menu starts with a heading "Add input".
| Entry | What it does |
|---|---|
| Display n | One per display. The number is the display's id, not its monitor name. The list follows monitors being plugged in or unplugged while Studio runs. Starts a screen capture. If capture fails an info bar says "capture failed" with the reason |
| Camera name | One per camera, or the heading "No camera found" |
| Audio: device name | A microphone or audio interface as its own input, with its own strip in the Audio Mixer. Plugging or unplugging the device updates the list. |
| NDI name | One per NDI source, or the heading "No NDI sources found" |
| New scene | Creates "Scene n" and opens the Scene Editor |
| New scene template | Side by side, Side by side 65/35, Picture in picture, top left / top right / bottom left / bottom right, Grid 2 x 2, Floating card, Studio floor |
| Colour | A colour input called "Colour". It starts as solid Cliqer green and its editor opens at once. See Colour inputs | | Network stream... | A side card to receive an SRT, RTMP, RTSP or HLS stream. See Network streams | | Spout... | A side card that lists the Spout senders running on this PC. See Syphon and Spout | | Blackmagic... | A side card for a Blackmagic capture card. Hidden in builds without card support. See Blackmagic cards | | Web page... | Opens the Add web page card for the URL and page size. See Web pages | | Video, audio or image file... | Pick one or more files. Each becomes its own input | | Image... | Pick one or more images | | List | An empty media list called "List n". Add files from its menu | | Title... | The Add Title dialog. It opens the Title Designer once added. See Titles | | Timer | A Timer title added at once, with no dialog: big digits that fill the frame and count down from 5:00 on their own clock. It opens the Title Designer once added. Needs titles in your plan, like Title.... See Timer titles | | Teleprompter | A scrolling script. Needs Studio titles. See Teleprompter | | Mix | One item per Screen that is not a Mix yet. Adds that Screen as an input. Pro, Ultra, Studio and Enterprise plans. See Mix | | Canvas | One item per output canvas that has no Canvas input yet, or "No canvases". Adds that canvas as an input. Pro, Ultra, Studio and Enterprise plans. See Output canvases | | Captions | A captions input added at once, with no card first. Its card opens when it is added. The entry reads "Captions, needs upgrade" when your plan lacks live captions. See Captions inputs | | Video call: invite a presenter | A submenu of everyone in the room, by name, or the heading "No presenters in the room". See Video calls |
When Cliqer cannot use NDI (the NDI runtime is not installed, the build has no NDI, or it is Windows on Arm), the NDI controls are switched off and the reason shows beside them or in their tooltip. On Windows the NDI entry is also left out of Add Input. See NDI.
Drag and drop
- Drop files from Finder anywhere on the tile grid. Each becomes a media input named after the file without its extension. While you drag, the list shows a green highlight reading Add as input, and the highlight clears when you drop (or move away).
- Drag a tile onto another tile to move it into that place.
- Drag a tile onto a numbered category chip to file it in that category.
- Drag a tile onto a scene tile to add it as a layer. The tile shows "Add as a layer" while you hover.
Drag a tile by its title bar onto another tile to move it there, or onto a scene tile to add it as a layer. You can also use Move earlier and Move later in the tile menu.
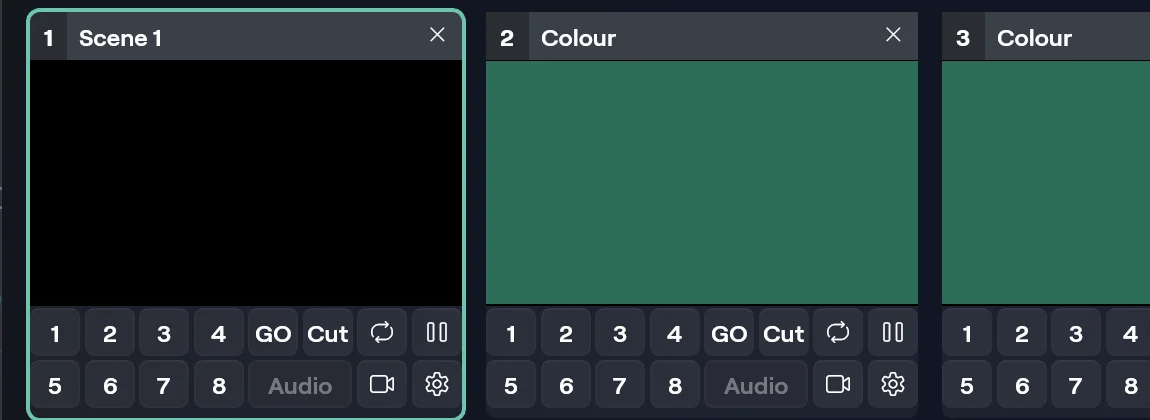
The tile
Header: a category colour stripe, the input number, a kind symbol, the name, and, while you hover over the tile or it is selected, an X button (tooltip "Close input") that removes the input at once with no confirmation. Caller tiles also show a link dot (green connected, amber connecting, red otherwise). A pause glyph ("Live pause is on") appears when the input is paused. The header turns red while the input is on Program and green on Preview, and the picture has the same tally ring.
Picture: a click puts the input on Preview. Double-click puts any other input on air (Program, no fade) and leaves Preview alone. Double-click a scene tile to open the Scene Editor instead, so a mis-click cannot cut it live. Inputs with sound show a small stereo level bar on the right edge. While you hover over the tile or it is selected, a Pop-up preview key at the top right of the picture opens a floating live picture of the input.
Footer, one row at every tile size:
| Key | What it does |
|---|---|
| GO | Runs the action chosen in the input's GO does setting (see below) |
| Cut | Sends this input straight to Program with no fade |
| Speaker | Turns the input's audio on or off. Disabled with the tooltip "This input has no audio" |
| 1, 2, ... | One key per overlay channel, in order, as many as the tile has room for (tooltip "Overlay 1 for "). Each key toggles this input on that channel with one click, lights red while it is on, and can be assigned to a control surface with a right click |
| Overlays | After the number keys, always there: a flyout with Overlay 1 to Overlay 8 (ticked when on), On Preview with Overlay 1 to Overlay 8 for each channel's Preview, then Take Off All. While the input is live on a channel whose key did not fit, the flyout lights and lists those numbers, for example 3, 7, 8. It shows the word Overlays when no number key fits, otherwise an icon |
| ... | Everything for this input (the same items as right-click) |
| Cog | Opens or closes the inspector for this input (tooltip "Input settings") |
GO and Cut are left out on an audio input and on a caller still in the green room, which cannot go to Program.
Media tiles also have Play or Pause, a position bar you click or drag to seek, Restart, and on list inputs Previous item and Next item.
Title bar: the input number, a kind icon, the name (ellipsis when long), a link dot on caller tiles (green connected, amber connecting, red otherwise) and, while you hover over the tile or it is selected, a close button. The bar is red on Program, green on Preview, otherwise the category colour or grey. Closing removes the input with no confirmation.
Picture: a left click puts the input on Preview. A double-click puts the input on air (Program, no fade), scenes included. A right click opens the input menu. Inputs with sound show a level bar on the right edge (turn it off with Audio levels on tiles in the Tools bar). On hover a Pop-up preview key at the top right opens a floating live picture of the input.
Footer, one row at every tile size (hidden by Basic):
| Button | What it does |
|---|---|
| GO | Runs the input's GO action |
| Cut | Straight to Program (tooltip "Cut to Program") |
| Speaker | Audio on or off. Disabled when the input has no audio |
| 1, 2, ... | One key per overlay channel, in order, as many as the tile has room for. Each toggles this input on that channel (Alt+1 to Alt+8 for the selected input) |
| Overlays | After the number keys, always there: the word Overlays when no number key fits, otherwise an icon. It opens a flyout with Overlays 1 to 8, On Preview 1 to 8 and Take off all. While the input is on a channel that has no key of its own, it lights and shows those numbers |
| ... | Opens the input menu |
| Gear | Opens or closes the input card |
GO and Cut are left out on an audio input and on a caller still in the green room, which cannot go to Program.
Media tiles have no position bar on Windows. Right-click the tile, open Media and choose Position... to open the Playback card: Play or Pause, Restart (tooltip "Back to the mark in") and a Position slider in seconds, 0.1 s a step, that seeks.
Click the title bar to select a tile without touching Preview. List view in the Tools bar shrinks tiles to the title bar and the footer.
The input menu
Right-click a tile, or use its ... button. The Preview and Program monitors also open it for the input they show.
In order: Preview (and Assign Shortcut, MIDI or OSC...), Quick Play, Cut, Transition (1 to 5), Overlay (1 to 8, checked when on), Show on Display (one item per attached screen, checked while a Display output of this input runs on it), then by kind:
- Scene: Edit Scene..., Add Layer, Duplicate Scene.
- Image or Colour: Duplicate. A colour also has Colour... to open its editor.
- Caller: Message....
- Any live input: Make a Scene from This (a scene that shows the source full frame).
- NDI input: Change Source to re-point it at another NDI source.
Then Picture (Fit or Fill), To Room, NDI Output, About NDI® (ndi.video), Loop (media only), Live Pause, Category (None, Category 1 to Category 6), Move Left, Move Right, then by kind Stream Settings... and Reconnect (network streams), Syphon Source... or Blackmagic Settings..., then Rename and Settings..., PTZ Controls... (cameras and NDI inputs) and Close.
In order: a heading with the number and name, Preview, Cut to Program, Quick Play to Program, Overlay (1 to 8), Audio on, Live pause, Fit in Program, Fill Program, Show to the room, NDI output, Audio follows, Category, GO button, then rows by kind (Overlay on Preview; Media for media inputs, with Loop, and List for lists; Title on overlay n and Edit title text... for a title; Hang up and Caller return for a caller), NDI source (NDI inputs only), Edit scene... (scenes), Colour... (colours), Stream settings... and Reconnect (network streams), Spout sender..., Blackmagic settings..., Effects... (any input except scenes and audio inputs), PTZ camera... (cameras and NDI inputs), Web page... (web pages), Captions... (captions inputs), Duplicate (scenes, images, colours) or Make a Scene from this (live inputs), Assign Shortcut, MIDI or OSC..., Rename, Move earlier, Move later and Remove input.
Items with a state show a tick when on. Rename opens a text box on the tile: Enter saves, Escape cancels.
Input settings
Open the Inspector (toolbar, the cog on a tile, or Rename and Settings...). It never blocks the Studio window.
Input n
| Setting | Options |
|---|---|
| Name | Text. Saved on Return |
| Kind | Read only |
| Category | None, Category 1 to Category 6 |
| GO does | Quick Play, Cut, Transition 1 to Transition 5, Overlay 1 to Overlay 8 |
| Picture | Fit or Fill |
Output
| Setting | What it does |
|---|---|
| To the room | Sends this input to the room as its own picture |
| Own NDI output | A separate NDI source for this input |
| Audio | Its own, None, or take the sound from another input |
| Audio on | Shown only when the input has sound |
| Live pause | Hold the last frame |
| Include in ISO record | Records this input to its own file in the MultiCorder |
Overlays: Overlays keys 1 to 8 put the input on that channel, On Preview keys 1 to 8 on that channel's Preview, the same as the tile's keys and flyout.
Kind settings: a network stream shows its stream fields here with Apply and Reconnect; a colour a Colour section with its editor; an NDI input a Source section with Change Source; Syphon, Blackmagic and title inputs a Settings section with Syphon Source..., Blackmagic Settings... or the title's items.
Media and list inputs add a Playback section (Loop, Play when on Program, Pause when off Program, Restart when on Program, Speed 50, 100, 150 or 200 %, Length, and Marks with In, Out and Clear to play only part of a clip) and a Stinger section (see Transitions). List inputs add a List section: Play this item, Remove from the list, Add Files..., Previous, Next, Play next automatically, Start with the first item, Loop the list, Shuffle, Import M3U... and Export M3U....
Caller inputs add a Caller section: see Video calls.
Other sections: Effects (every input except a scene, see Effects), Video delay (cameras), Web page and Page size (web pages, see Web pages) and PTZ (cameras and NDI inputs, see PTZ cameras).
The last section has Duplicate Scene (scenes), Duplicate (images and colours) or Make a Scene from This (live inputs), Show on Display, then Remove Input.
The gear on a tile opens its input card as a side card; click the gear again to close it. In order: Overlays keys 1 to 8, On Preview keys 1 to 8, Include in ISO record (the MultiCorder), Live pause, then Loop and Playback... for media inputs, then the input's own settings, the same rows as in its menu: Edit scene..., Colour..., Stream settings... and Reconnect, Spout sender..., Blackmagic settings..., Effects..., PTZ camera... and Web page..., whichever apply.
The card has no Duplicate or Show on Display yet; Duplicate is in the input menu. The other settings are in the input menu too:
| Setting | Options |
|---|---|
| Fit in Program / Fill Program | Picture mode |
| Show to the room | Send this input to the room |
| NDI output | A separate NDI source for this input |
| Audio follows | Its own, None, Microphone, Computer sound, or another input |
| Category | Category None, Red, Green, Amber, Purple, Blue, Teal |
| GO button | GO is Quick Play, GO is Cut, GO is Transition 1 to Transition 5 |
Effects, PTZ and web page settings open as a side card from Effects..., PTZ camera... and Web page... in the same menu. Media, list, title and caller settings are in its submenus.
Network streams
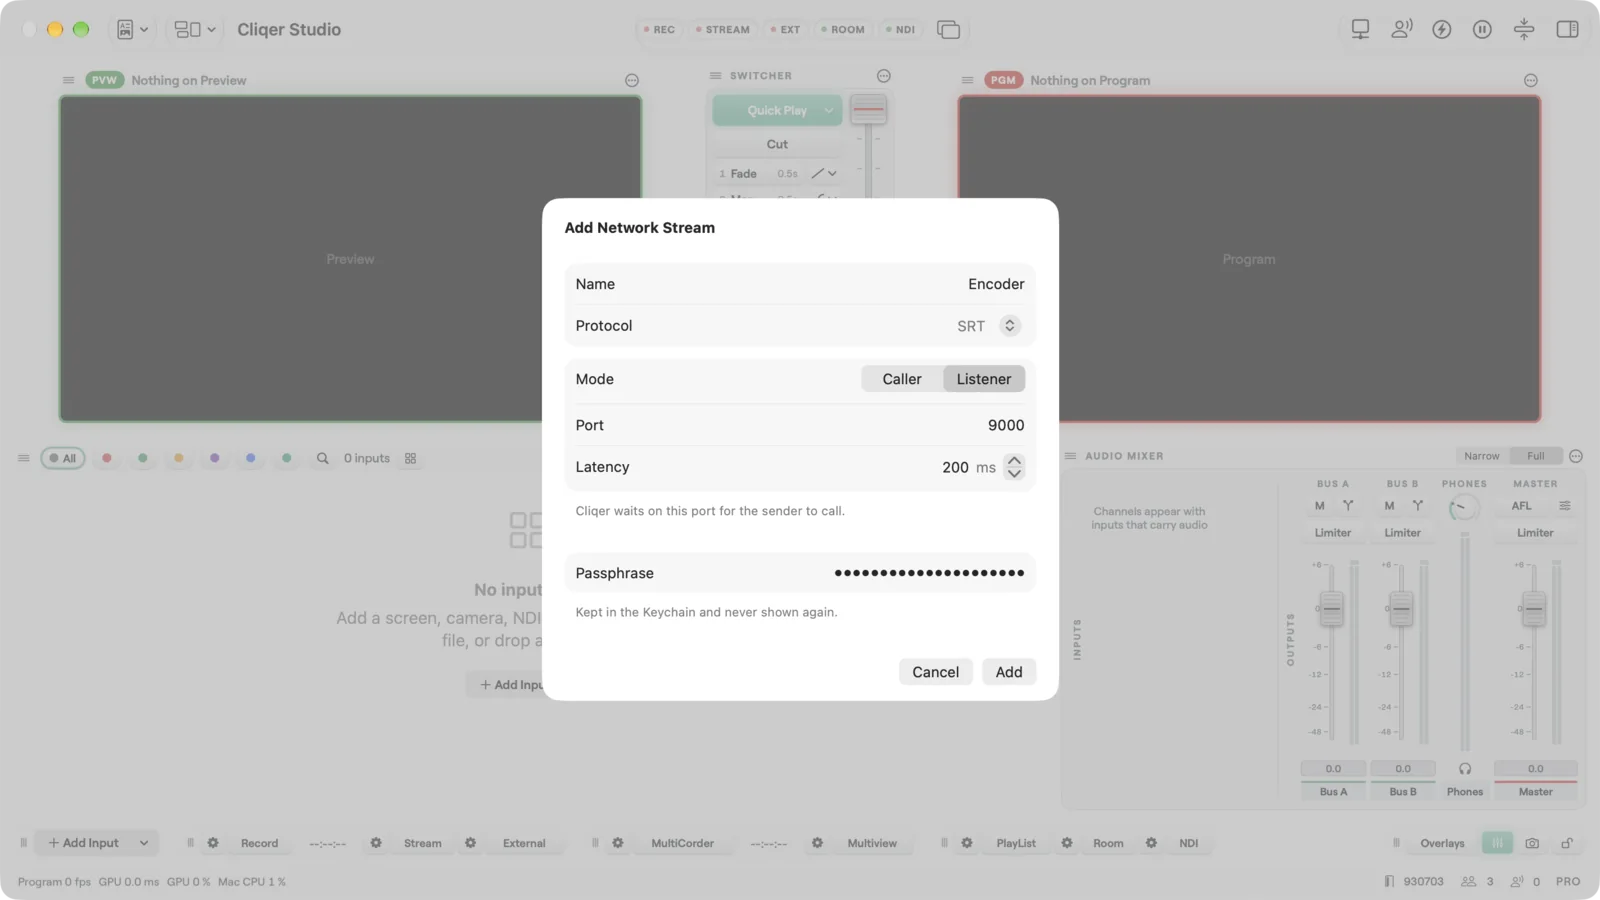
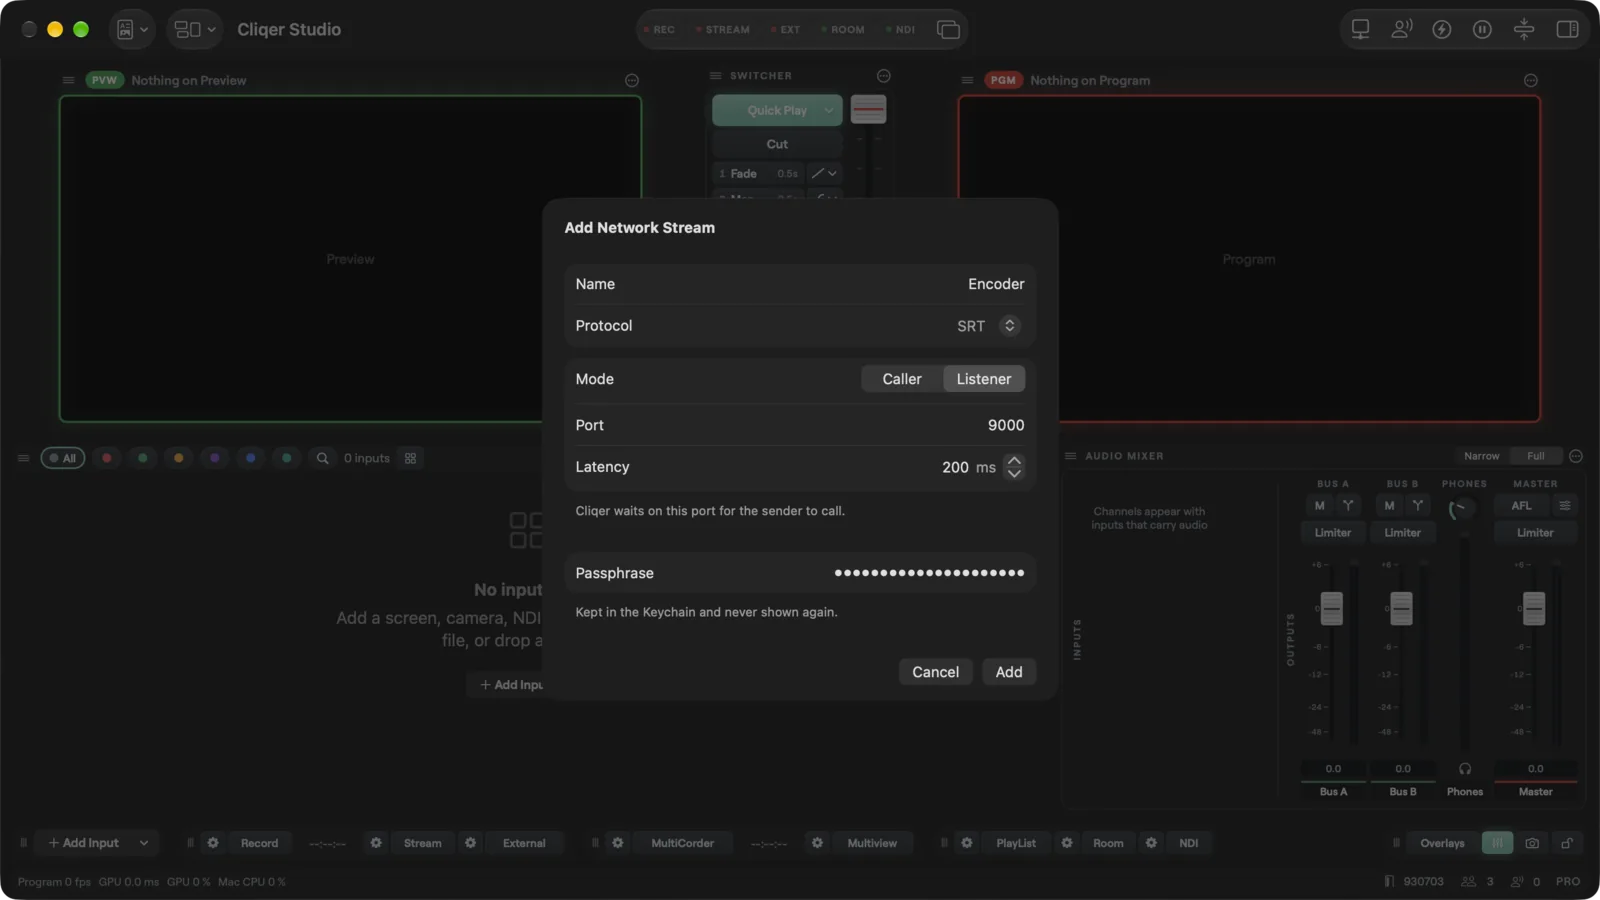
A network stream input receives a picture from an encoder or camera over the network. Choose Network Stream... (macOS) or Network stream... (Windows). It opens Add Network Stream (macOS) or Add network stream (a side card on Windows) with a Name and a Protocol. Windows writes the protocol and field names in sentence case, for example RTMP (listen).
| Protocol | Fields |
|---|---|
| SRT | Mode: Caller (Cliqer calls a Host and Port) or Listener (Cliqer waits on a Port for the sender to call). Latency in milliseconds (20 to 8000, 120 to start; when the two ends differ the larger is used). Stream ID (caller only, optional). A Passphrase (optional) |
| RTMP (Listen) | Port (1935 to start), App ("live" to start) and a Stream Key (optional). An encoder publishes to rtmp://this-computer:port/app/key |
| RTMP (Pull) | The URL to pull from, for example rtmp://host/app/stream |
| RTSP | The URL, for example rtsp://host/path, and an optional User Name and Password |
| HLS | The URL of the stream's playlist, for example https://host/path/stream.m3u8. Plays live and recorded (VOD) HLS in TS or fMP4. If the playlist lists several sizes, Studio plays the best H.264 one. Encrypted streams are refused, and a separate audio playlist is not played. No key or password |
A passphrase, stream key or password is kept in the system's secure store (the Keychain on macOS, the credential store on Windows) and is never shown again. Forget Passphrase, Forget Stream Key or Forget Password removes it. The status reads Off, Connecting..., Waiting for a sender, Live or Retrying with the reason. It shows in the sheet and as a badge on the tile (macOS). Open the settings again with Stream Settings... (Stream settings... on Windows) in the input menu, and use Reconnect to restart the connection.
Syphon and Spout
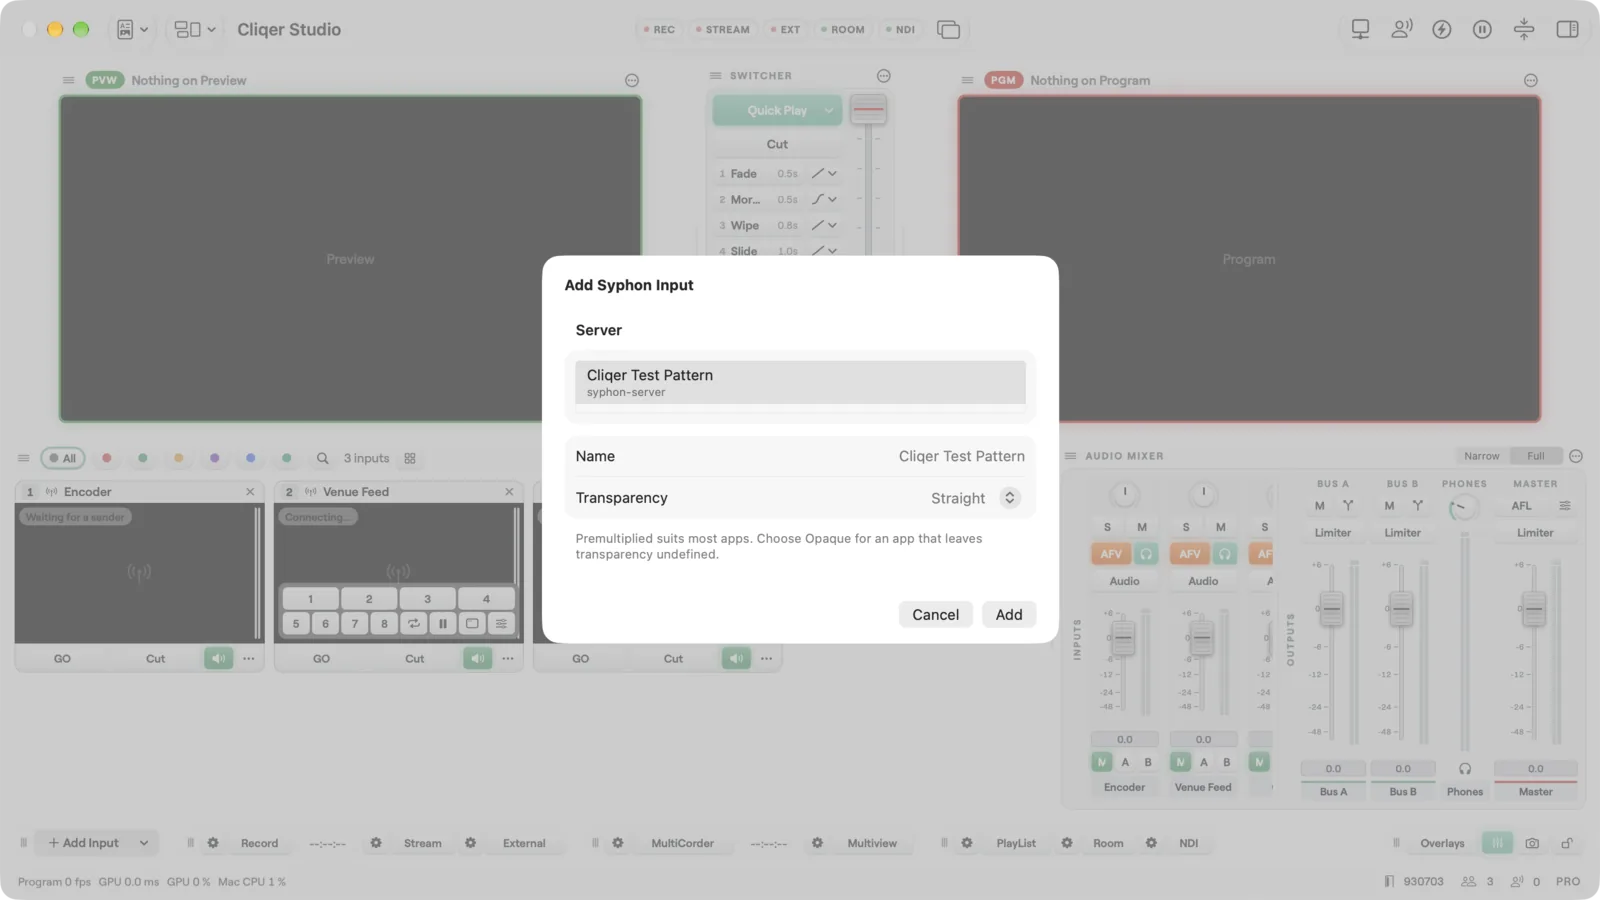
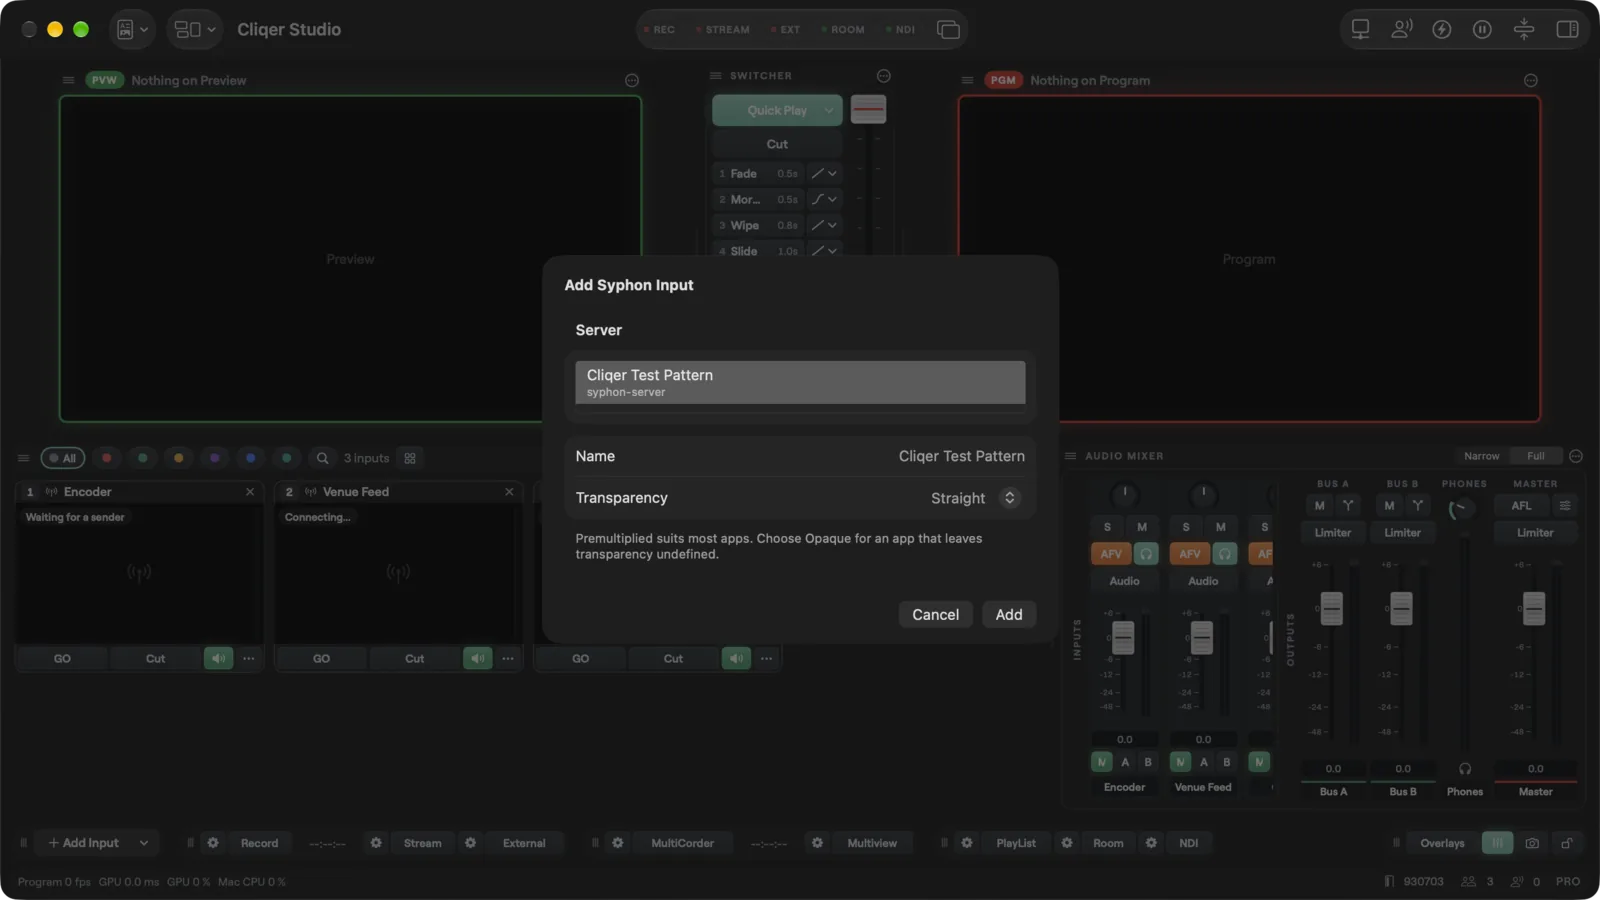
Syphon (macOS) and Spout (Windows) share the picture of another app on the same computer. Choose Syphon... or Spout..., pick a running server or sender from the list, optionally rename it and choose Transparency: Premultiplied (suits most apps), Straight or Opaque (ignore alpha) for an app that leaves transparency undefined. On macOS the list updates as soon as an app starts or stops publishing. On Windows the senders are listed when the card opens. With none running the list says "No Syphon Servers" (macOS) or "No Spout senders." (Windows). Change the pick later with Syphon Source... (macOS) or Spout sender... (Windows) in the input menu.
Blackmagic cards
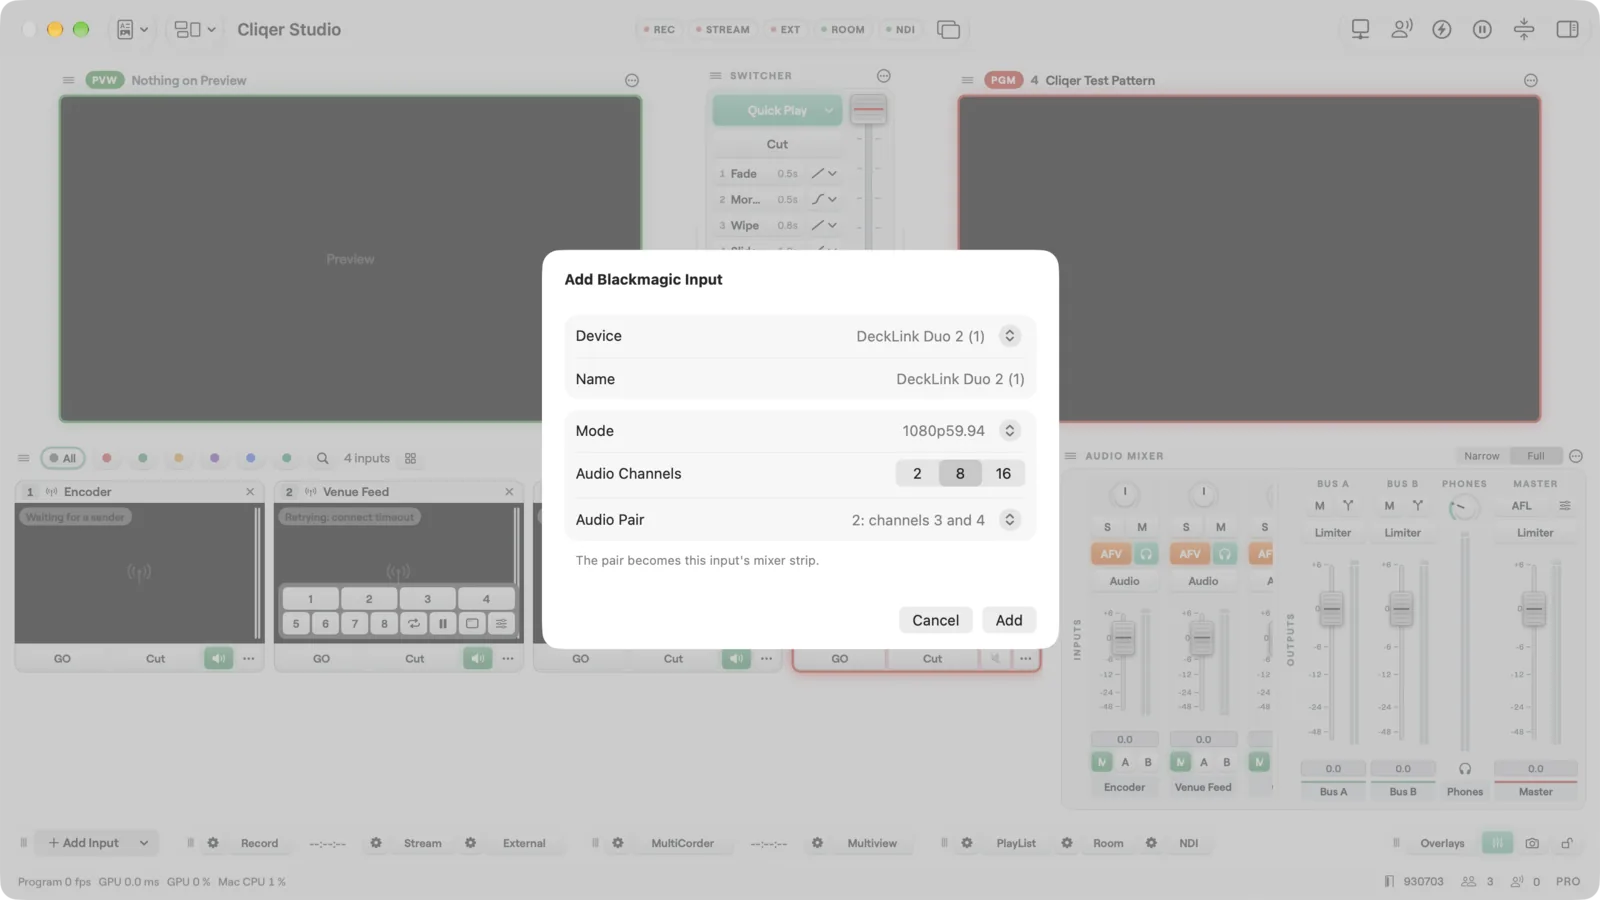
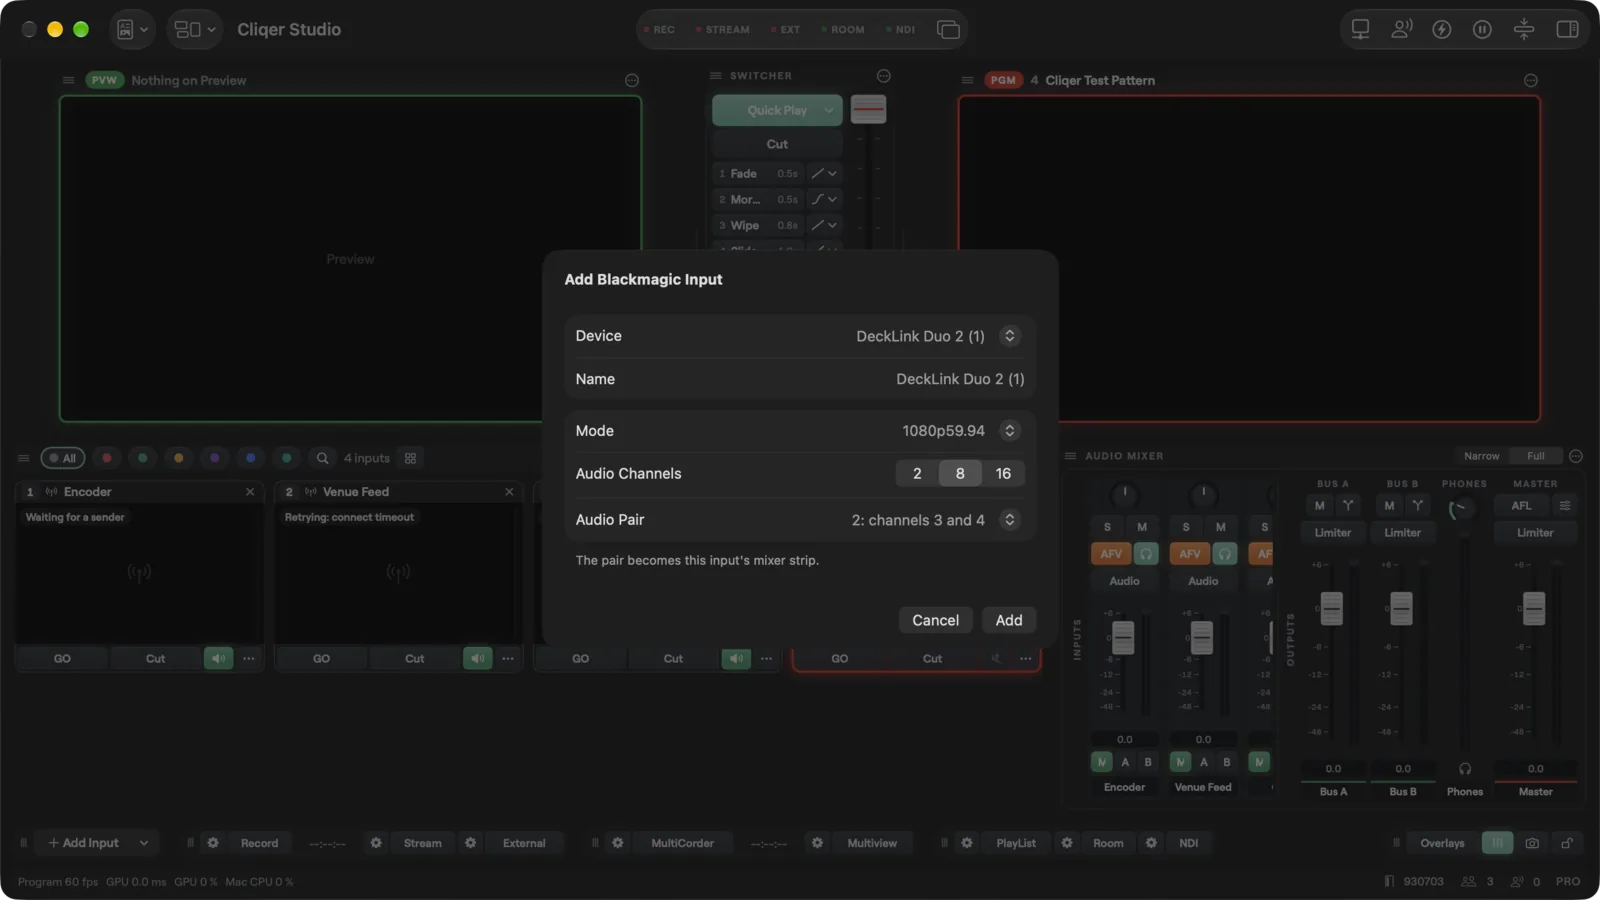
Blackmagic... adds a capture card input. Choose the Device, a Name, the Mode (Detect Automatically or a fixed mode), the number of Audio Channels and the Audio Pair that becomes the input's mixer strip. Cliqer reads the card through the Blackmagic Desktop Video driver: without it the sheet says "Blackmagic Desktop Video is not installed." The tile shows the signal mode, or "No signal". Change the settings later with Blackmagic Settings... (macOS) or Blackmagic settings... (Windows).
Web pages
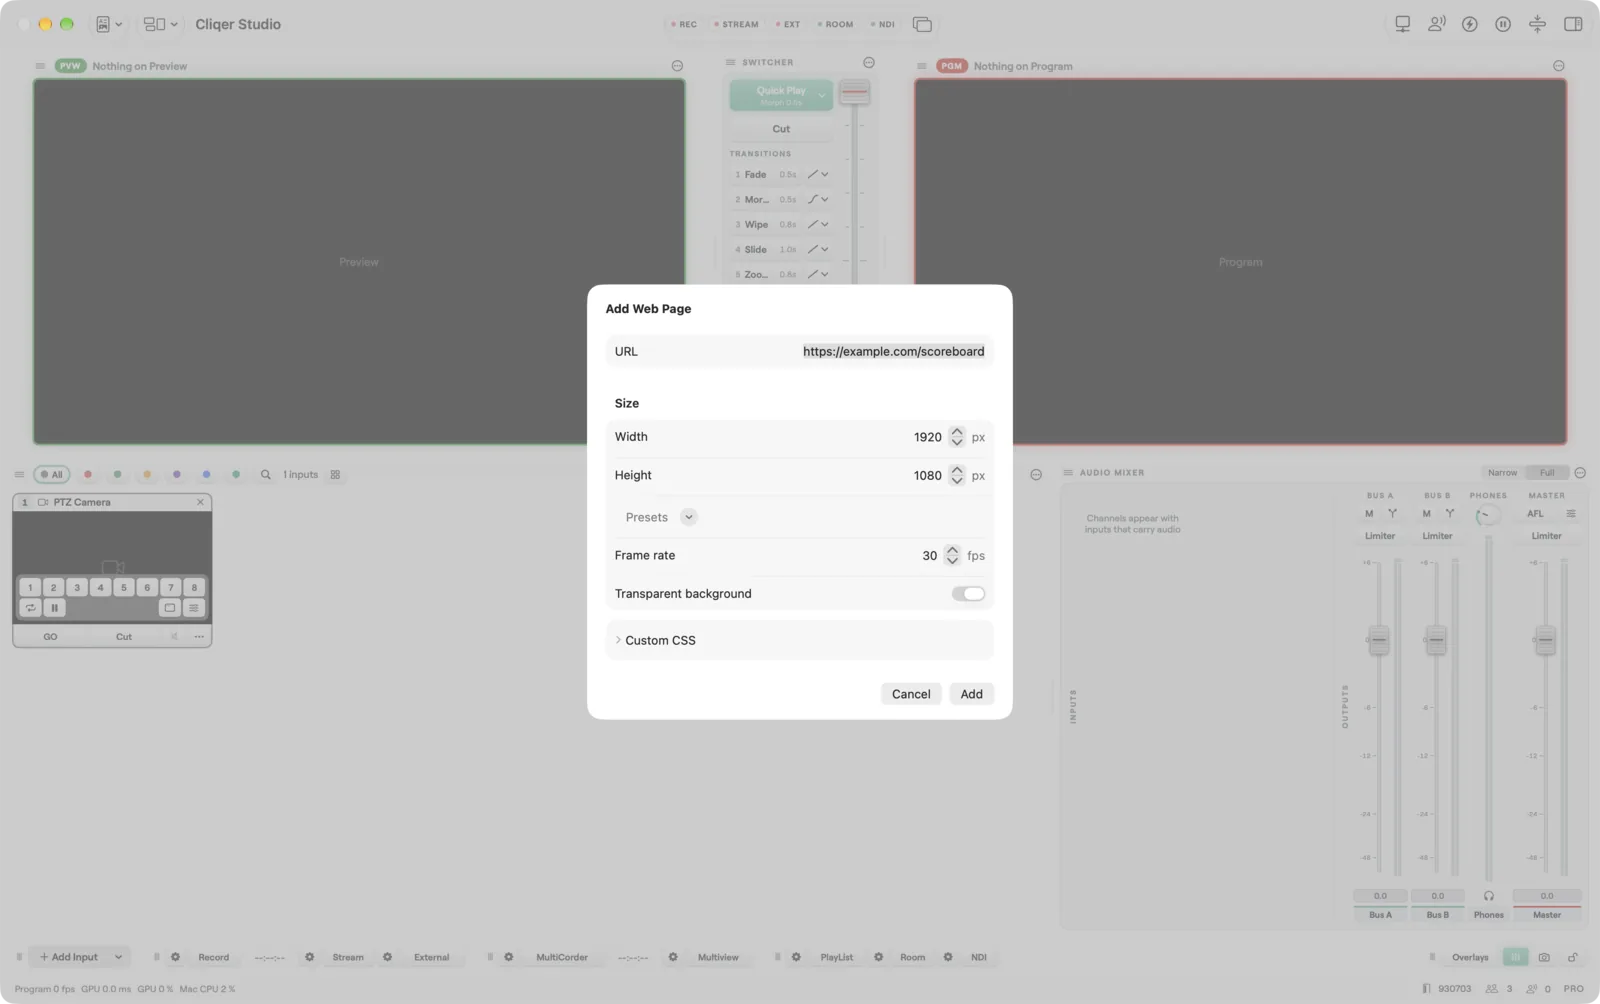
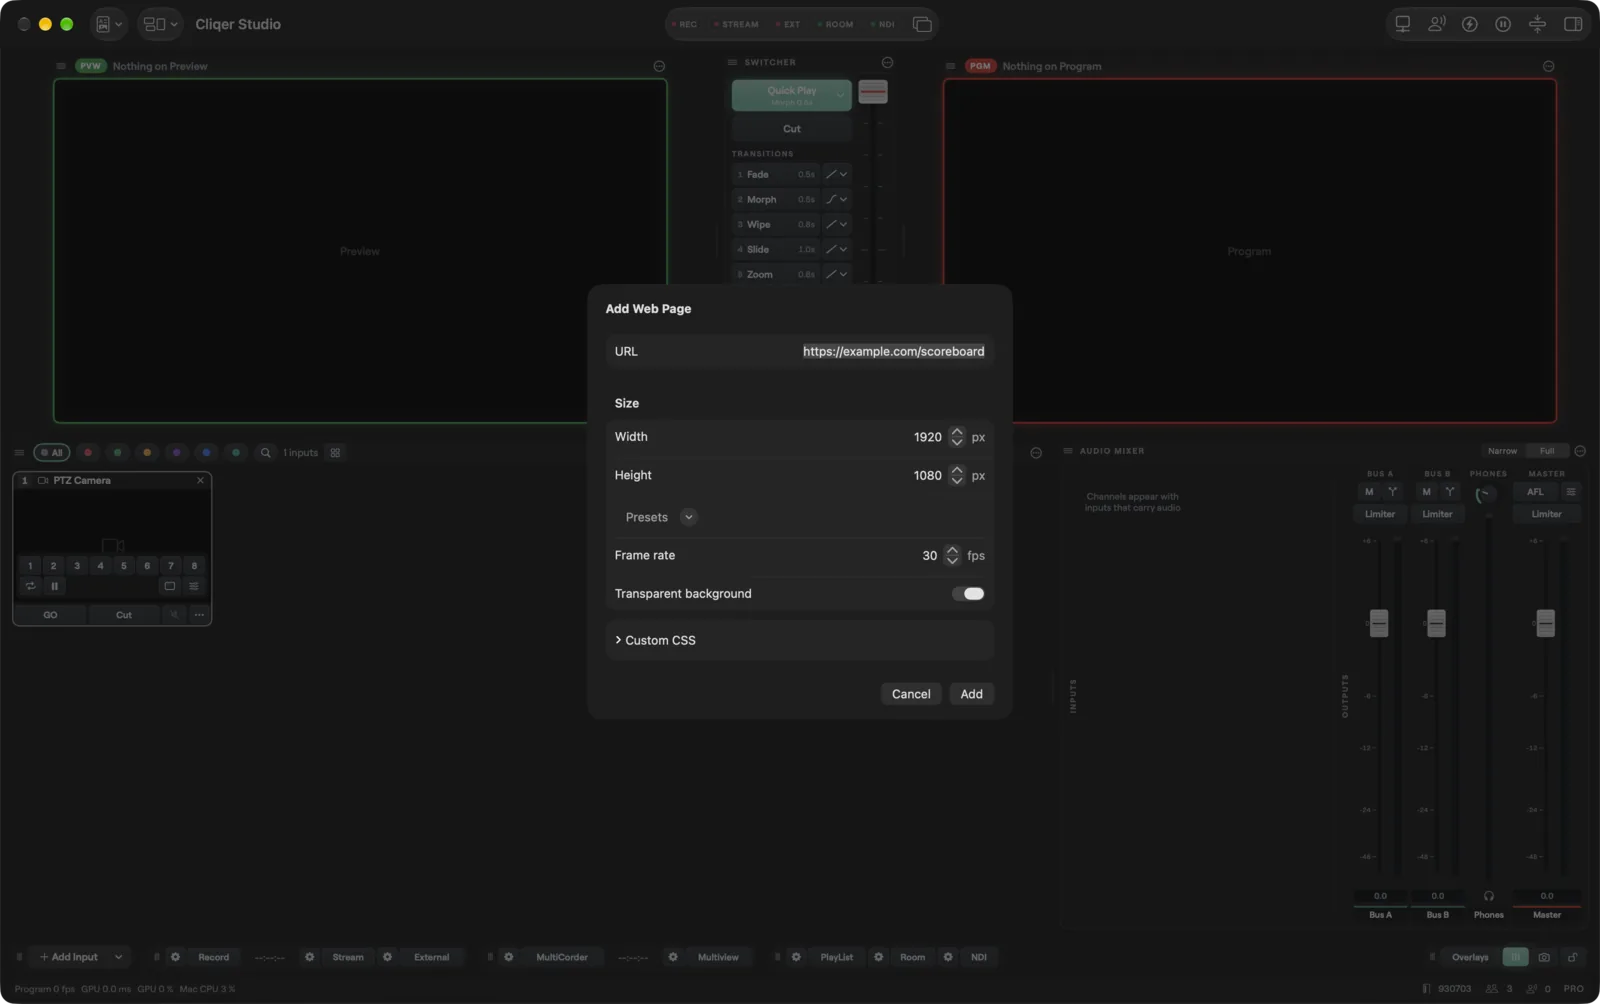
A web page input draws a web page as a picture, for graphics such as a scoreboard.
Web Page... opens Add Web Page: the URL, the page size (Width, Height and a Presets menu), the Frame rate, Transparent background and Custom CSS. Afterwards the input's inspector has a Web page section (URL with Go, Reload, Status, the page Title and any error) and a Page size section with the same size, frame rate, transparency and CSS settings (Apply and Reset to Default for the CSS).
Web page... opens the Add web page card with a Name, the URL, Width, Height, Frame rate, Transparent background and Advanced: custom CSS, then Add. Choose Web page... in the input menu to edit the same settings later, to Apply them, or to Reload. The card shows the page phase (Loading, Loaded, Failed or Closed), the page title and any error.
A web input loads http, https, file or data URLs. The page size runs from 16 by 16 up to 3840 by 2160 pixels (to start, 1920 by 1080 at 30 frames per second, from 1 to 60). With Transparent background on, what the page leaves unpainted is keyed out so the picture can sit over others. The default custom CSS makes the page background transparent and hides scroll bars; the page still scrolls (use Interact with Page). An older stored default is upgraded when the show loads, so there is nothing to change. Web page inputs need a plan that includes them.
Interact with a page
To click, scroll or type into a page while it is live (to press a button on a scoreboard, scroll a feed or fill in a field), right-click the web input's tile, the Preview monitor or the Program monitor where it shows and choose Interact with Page, or use the interact toggle on that monitor. The monitor gets an accent border and an Interacting badge; while it is on, clicks, drags and scrolls on the monitor go to the page under the pointer, and keys you type go to the page. Press Esc, choose Stop Interacting or use the toggle again to go back to ordinary clicks. A page on Program changes on air as you use it, so practise on Preview first. What you do on a page is not saved with the show and is not part of undo.
Colour inputs
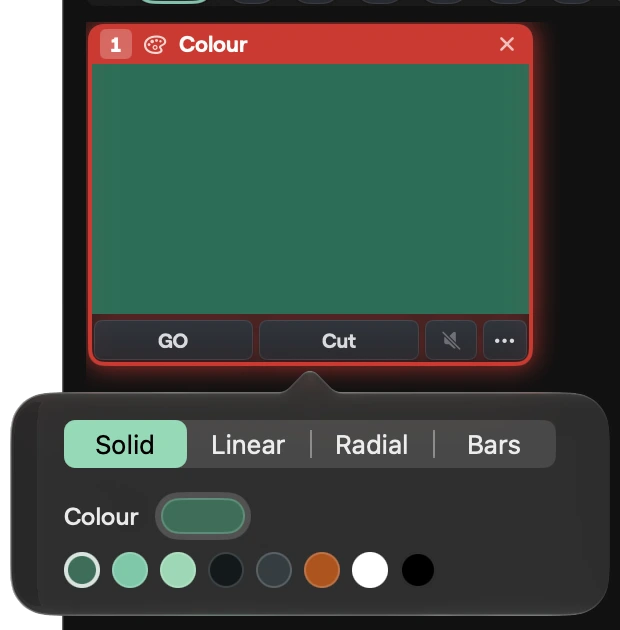
A colour input fills its picture with a colour, a gradient or test bars. Colour in Add Input makes one called "Colour", solid Cliqer green to start, and opens its editor at once. Open the editor again with Colour... in the input menu.
The editor has a Fill choice: Solid (Colour), Linear (From, To and an Angle of 0 to 360 degrees), Radial (Centre and Edge) or Bars (SMPTE colour bars at 75%). A swap button (Swap Colours on macOS, Swap colours on Windows) exchanges the two ends of a gradient. Each colour has a colour picker and eight swatches: Cliqer Green, Cliqer Mint, Cliqer Light Mint, Cliqer Dark, Cliqer Grey, Amber, White and Black. Every change applies at once, and the input keeps its place on Program while you edit.
Effects
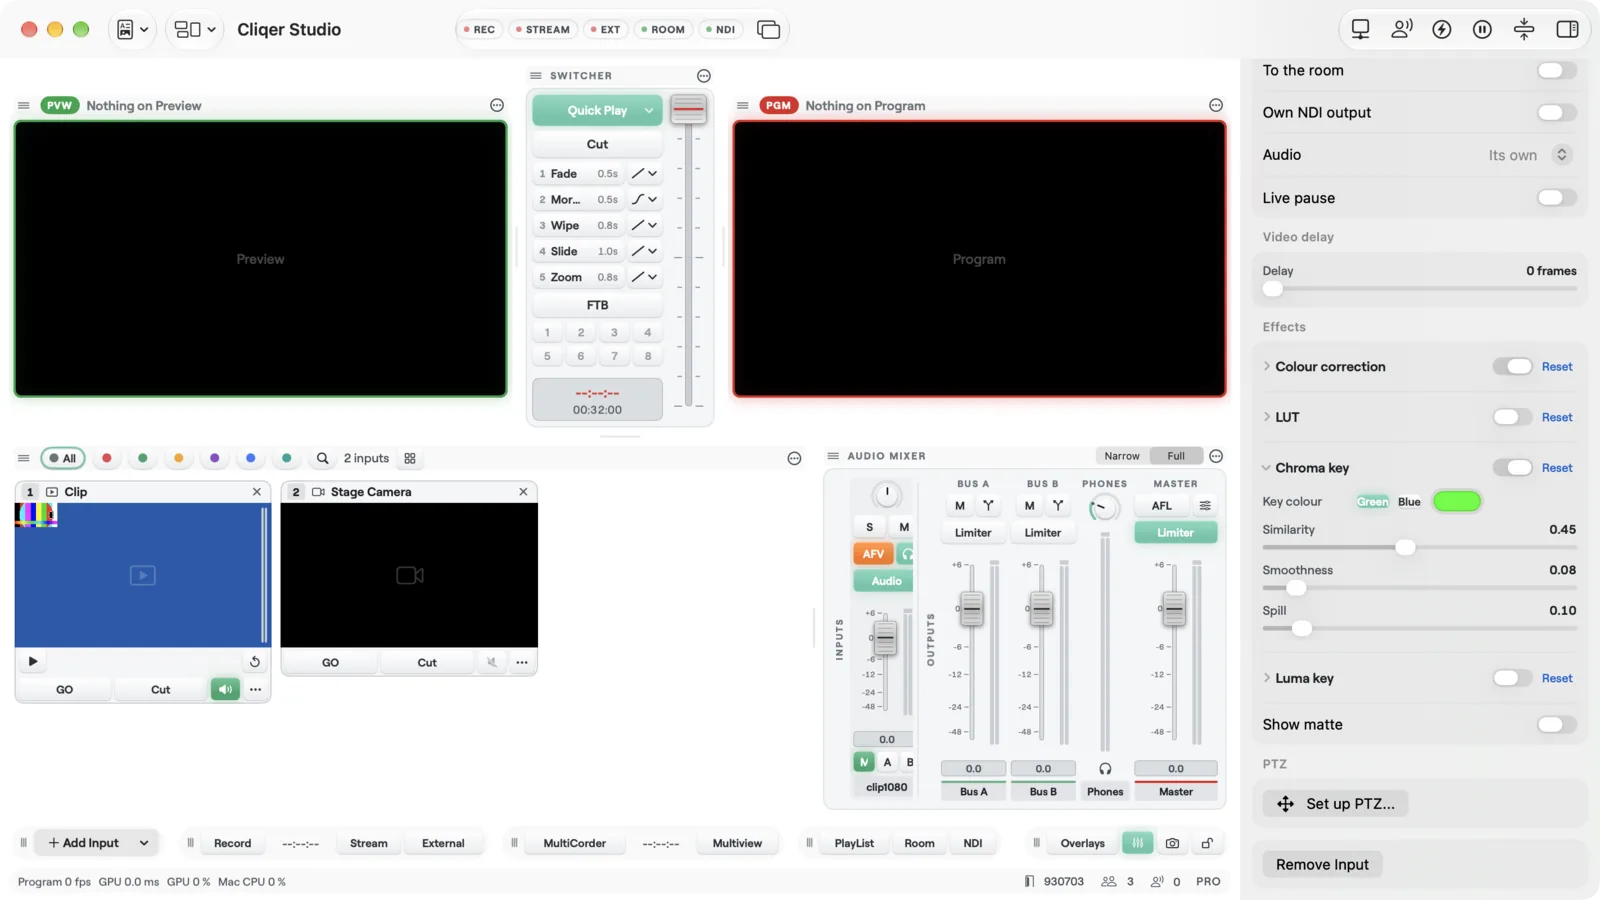
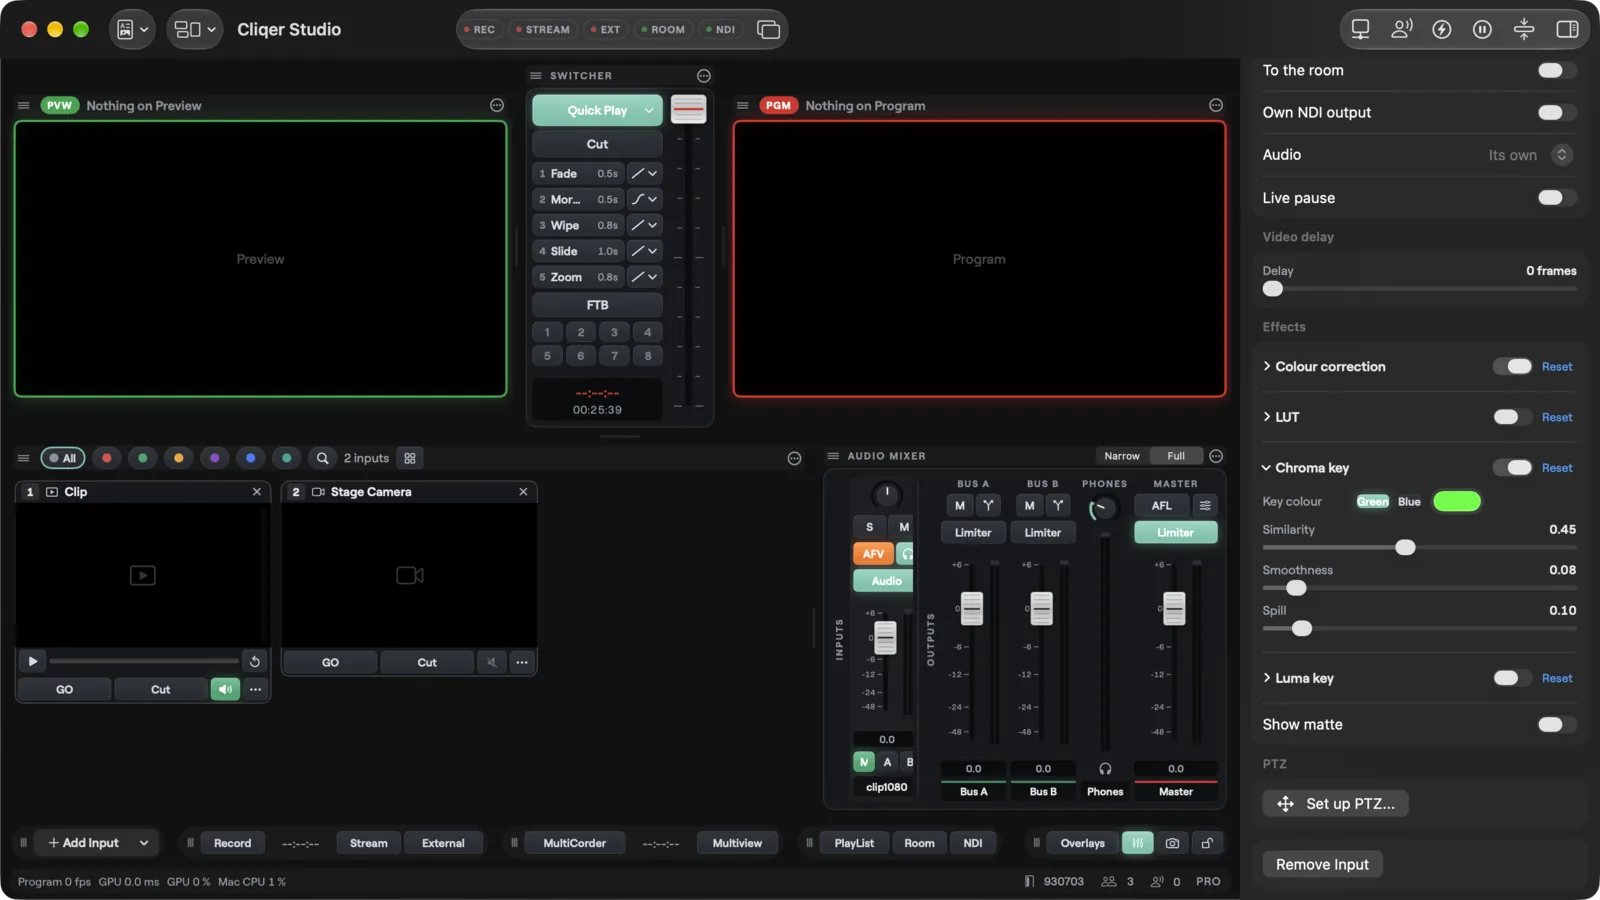
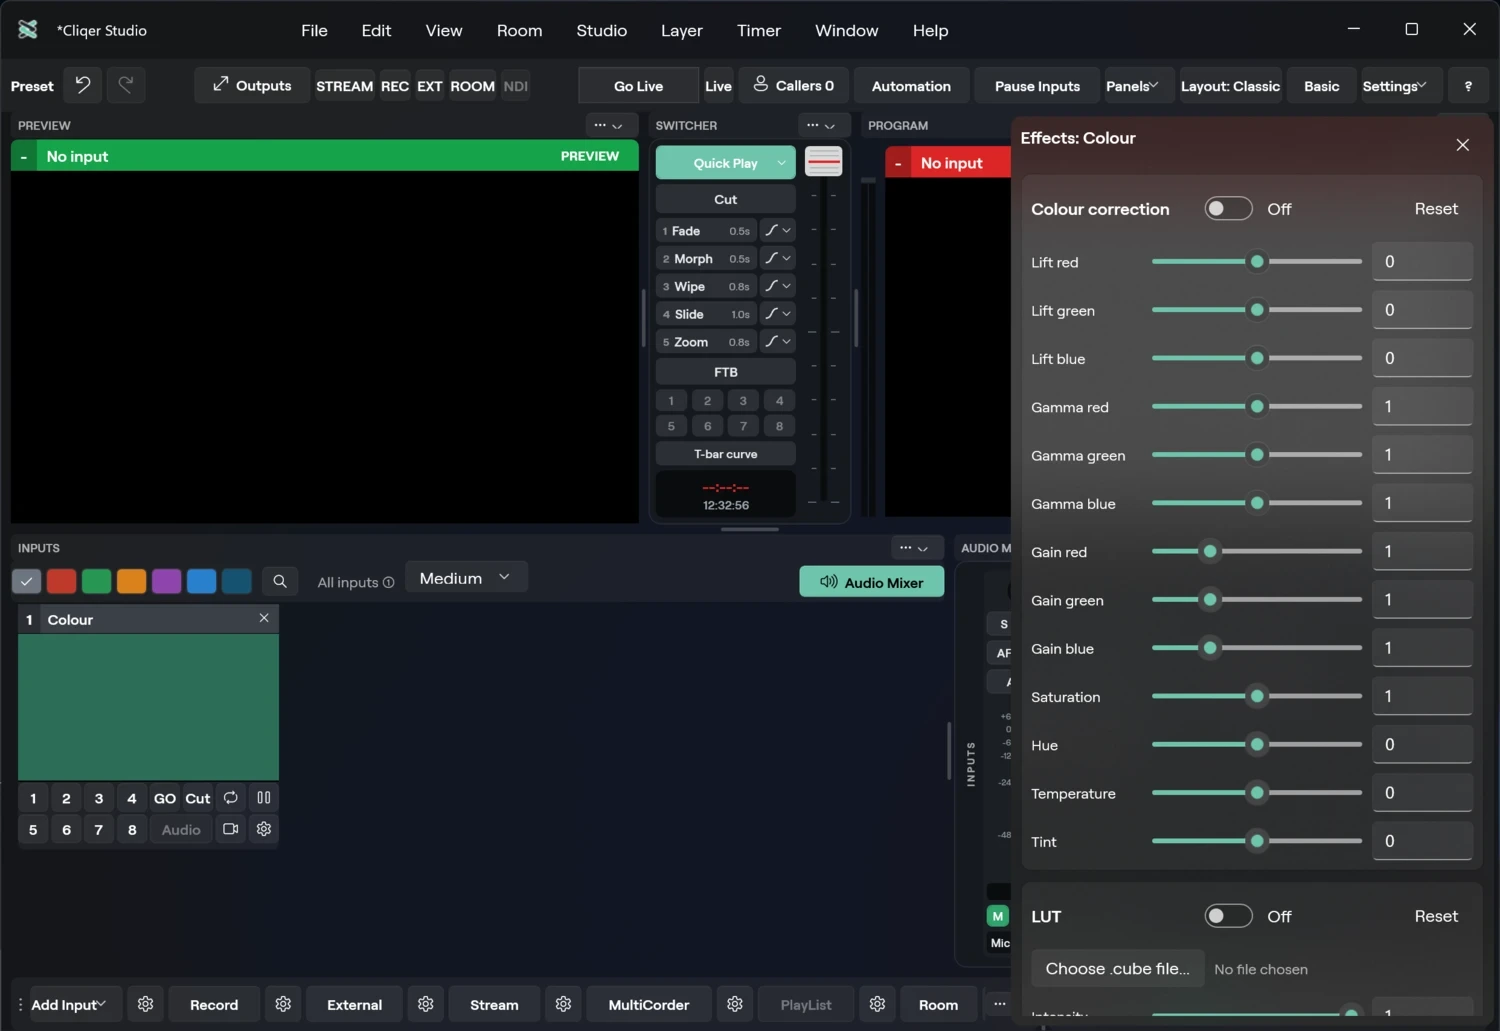
Effects change the picture of one input. Mirror and Sharpen are free on every Studio plan. Keys, colour correction and LUTs are on the Ultra, Studio and Enterprise plans and the free trial. Deinterlace is on the Studio and Enterprise plans. Without the plan their controls are greyed out and an effect can only be switched off. A deinterlace you turned on keeps running after a downgrade.
Open the Effects section of the inspector (every input except a scene).
Choose Effects... in the input menu to open the Video effects card.
| Effect | Controls |
|---|---|
| Colour correction | Lift, Gamma and Gain, each with Master, Red, Green and Blue, then Saturation, Hue (-180 to 180 degrees), Temperature and Tint |
| LUT | Choose a .cube file and set the Intensity |
| Chroma key | Key colour (Green, Blue or any colour), Similarity, Smoothness and Spill |
| Luma key | The minimum and maximum brightness to keep, each with its own smoothing |
| Show matte | Shows the keys as black and white instead of the picture: white is kept, black is keyed out |
Each effect has its own on switch and a Reset button. A camera input also has a Video delay of 0 to 10 frames to line its picture up with its sound (part of Pro audio).
Picture
Three one-switch fixes and a sharpener, in a Picture group. They work on every Studio plan and are never greyed out.
| Control | What it does |
|---|---|
| Mirror horizontal | Flips the picture left to right, everywhere the input is shown: Program, Preview, every scene layer that uses it and Multiview |
| Mirror vertical | Flips the picture top to bottom, the same way |
| Deinterlace | Blends the two fields of an interlaced picture to remove combing. Each line is averaged with the lines above and below it, at the cost of a little vertical softness. It needs no field order. Studio and Enterprise plans: without them the switch is greyed out unless it is already on |
| Sharpen | Its own switch and Reset, with one slider: Amount, 0 to 1, starting at 0.5. At 1 it is a classic sharpen, at 0 it does nothing |
Mirror horizontal, Mirror vertical, Deinterlace and Sharpen come first in the Effects section, above Colour correction. Each mirror and Deinterlace is a plain switch; Sharpen has its own switch and Reset.
In the Video effects card the Picture group (with its own Reset, which switches all three off) and the Sharpen group sit after Show matte, above Background.
A mirrored input is mirrored for crop, fill and clicks on the picture too, so what you see is what you edit.
Background
Camera, caller and NDI inputs can cut the person out of the picture and change what is behind them. It is on the Ultra, Studio and Enterprise plans and the free trial: without them the controls are greyed out with a note, and the effect can only be switched off.
The Background section of the inspector has a Background effect switch and:
| Control | What it does |
|---|---|
| Mode | Remove, Blur or Replace |
| Blur | How strong the blur is (Blur mode only) |
| Backdrop | Another input to show behind the person, or None (Replace mode only) |
| Edge softness | How soft the edge of the cut-out is |
| Quality | Fast, Balanced or Accurate. Accurate follows hair and edges more closely and takes longer |
The Effects... card has a Background group with a switch and the same Mode (Remove, Blur or Replace), Blur (Blur mode only), Backdrop (Replace mode only, starts at None) and Edge softness. There is no Quality picker on Windows yet. Background removal works in every Windows build, on x64 and Arm: it uses Windows ML with a small segmentation model that installs with Cliqer. If it cannot start on a computer, the group stays switched off and a line beside it says why, for example "Background removal could not start on this computer. Reinstall Cliqer, or update Windows." It needs Windows ML, which comes with Windows: if the line appears, reinstall Cliqer or update Windows.
PTZ cameras
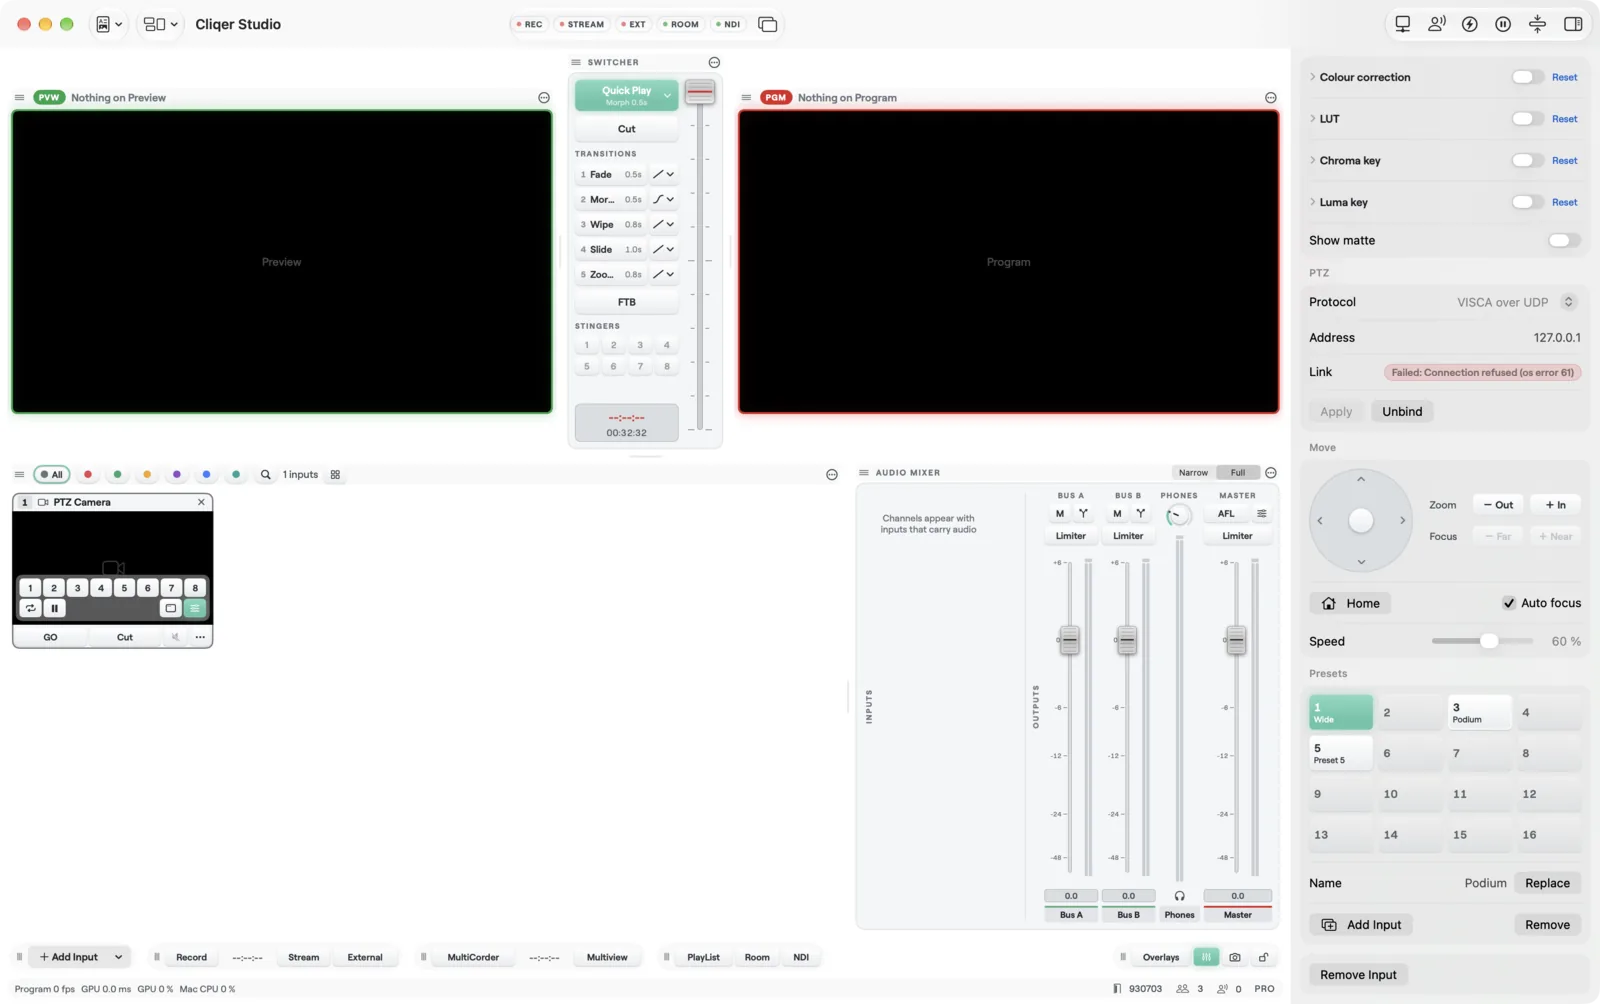
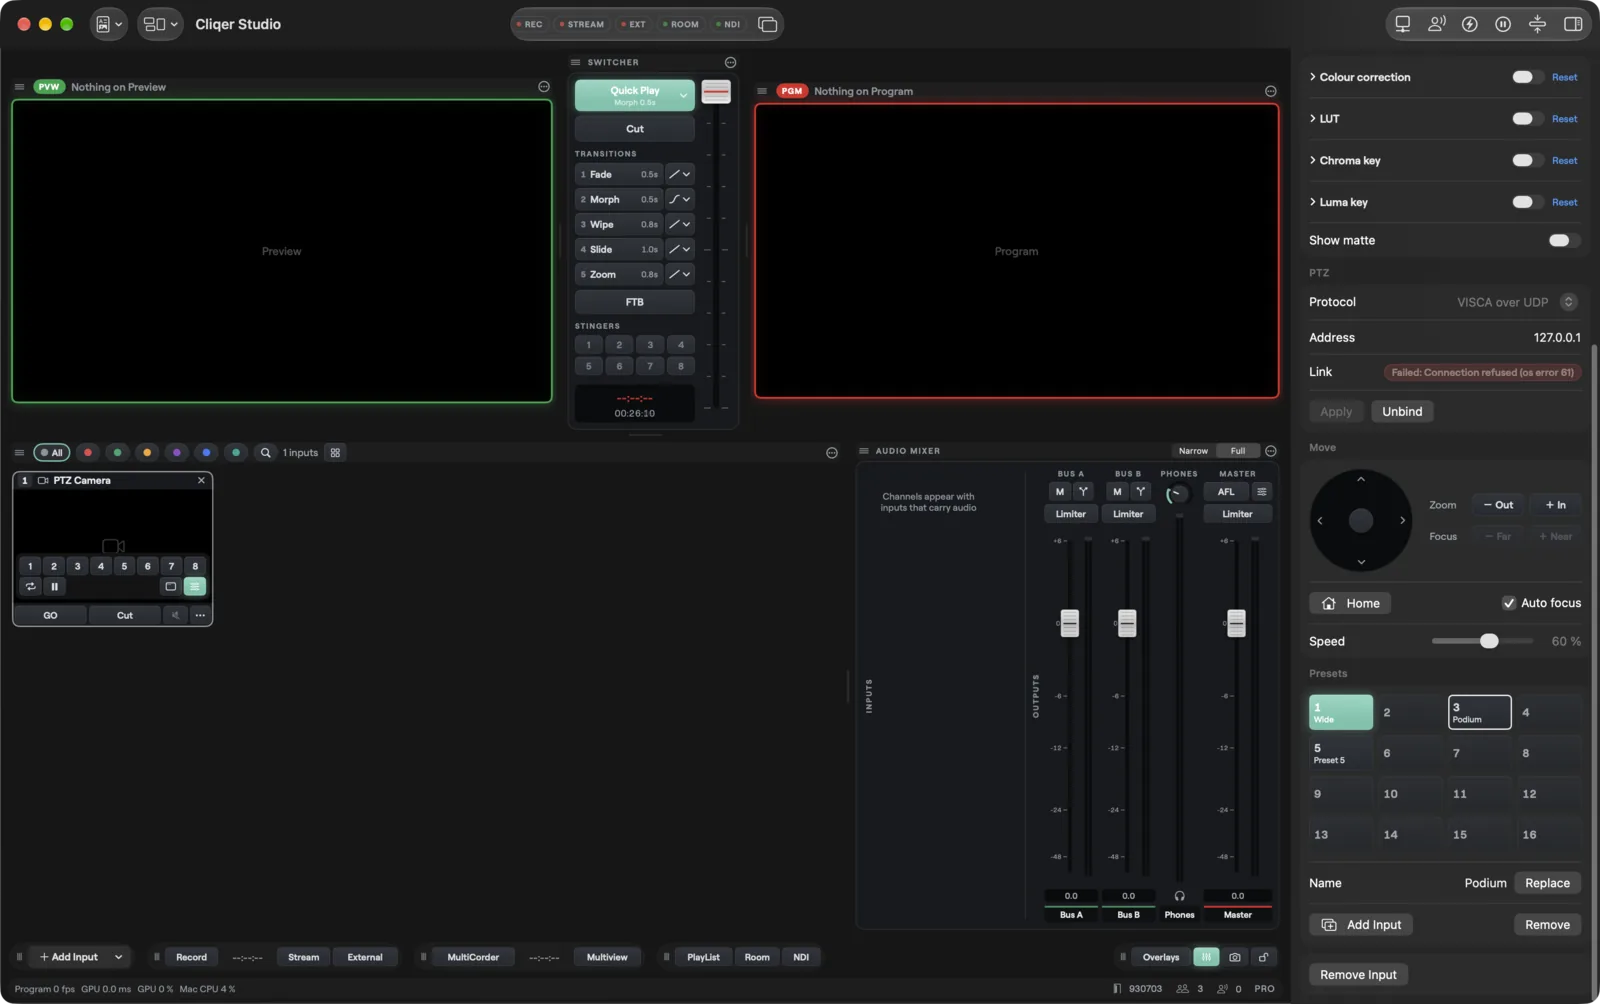
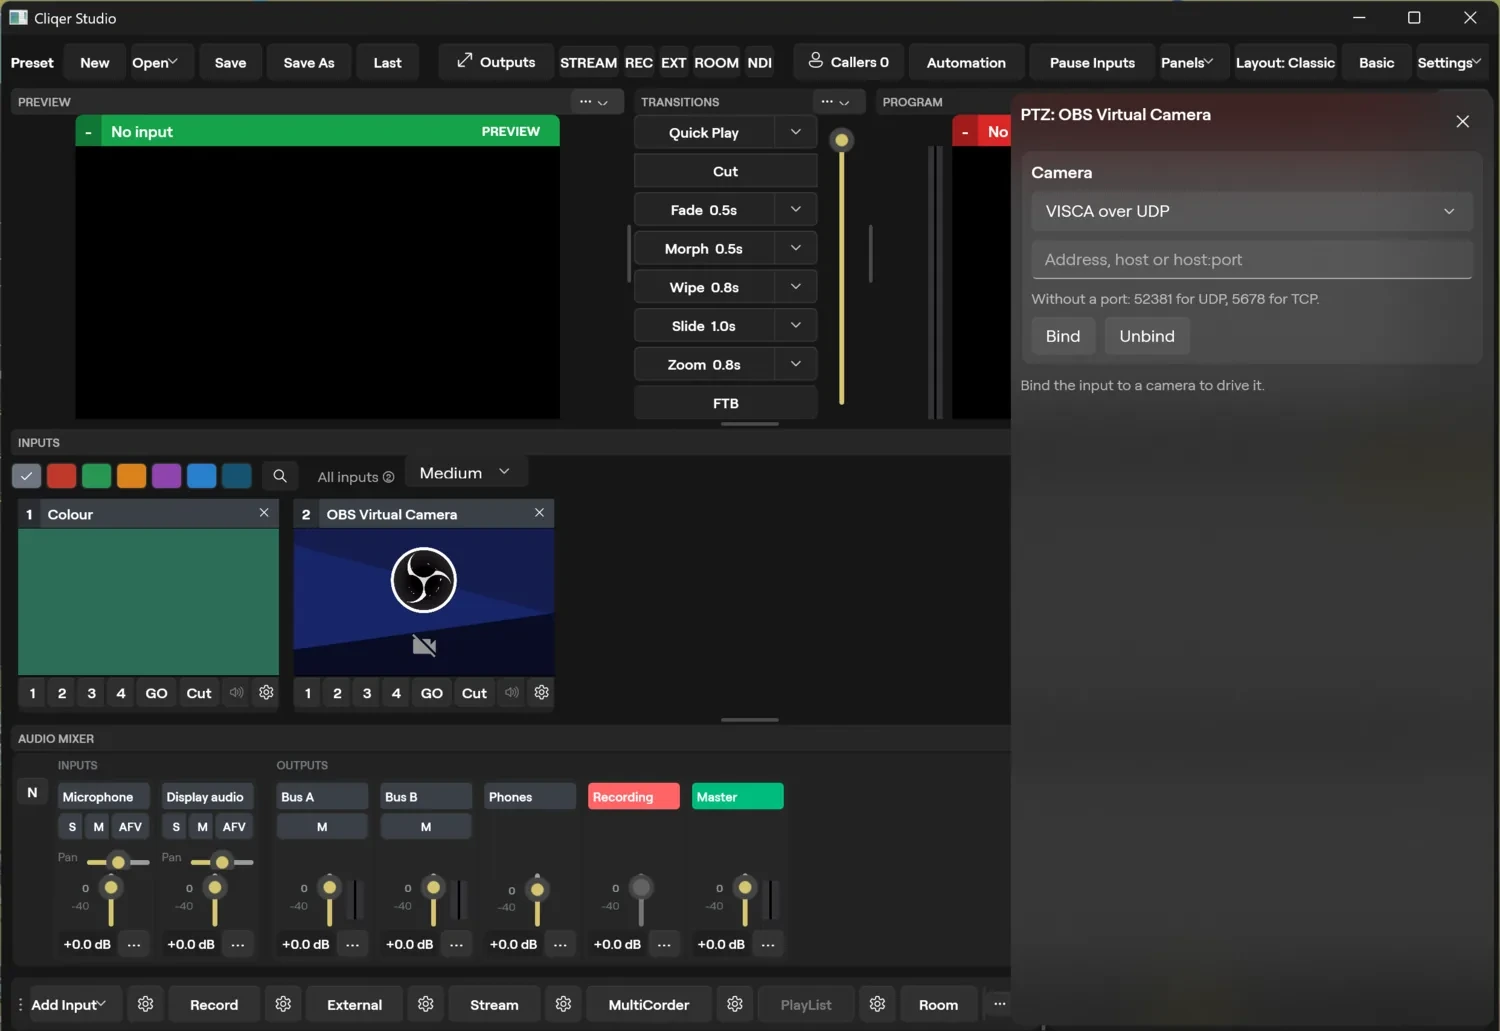
A camera input or an NDI input can drive a PTZ camera. Choose Set up PTZ... in the PTZ section of the inspector (macOS), or PTZ camera... in the input menu (Windows), then pick a Protocol and Bind. Apply changes the binding later and Unbind removes it.
| Protocol | Address |
|---|---|
| NDI (NDI inputs only) | None: the input's own NDI receiver carries the commands |
| VISCA UDP | Host or host:port, port 52381 if you give none |
| VISCA TCP | Host or host:port, port 5678 if you give none |
The link shows as Idle, Ready, No reply or Failed on macOS, and as Waiting for the camera, Connected, No reply from the camera or Failed on Windows. Once bound you get a pan and tilt pad (further from the middle is faster), Zoom and Focus keys that act while held, Home, Auto focus and a Speed (5 to 100%). Sixteen presets hold stored positions: pick a stored slot to recall it, pick an empty slot to store where the camera is now, name it, or remove it. On macOS Add Input on a stored preset adds a scene of the camera that recalls that preset on Preview. PTZ needs a plan that includes it.
Titles
A title is a graphic Studio draws for you: a lower third (a name and a role), a lower third read from a data file, a timer or a clock. It is an input, so it sits in the grid like any other. Titles need a plan that includes them.
The kinds are Lower Third, Lower Third from Data, Timer and Clock. The styles are Classic, Brand, Minimal, Glass and Accent. A Lower Third has Name and Role fields. A Lower Third from Data takes its words from a CSV or JSON file: choose the Data file, then pick the Name column and the Role column. Add stays off until a data lower third has a file and a name column.
Title... in Add Input opens Add Title with a Template and a Style picker, then the starting fields of the template, then Add. The sheet is for adding only. When you press Add, the Title Designer window opens on the new title, and that is where you edit it afterwards. Browse Templates... in the sheet opens the template gallery (see Templates and text styles).
Open the Title Designer on any title input in one of three ways:
- Choose Edit Title... in the title's tile menu.
- Double click the title's tile.
- Press Add in Add Title (it opens by itself).
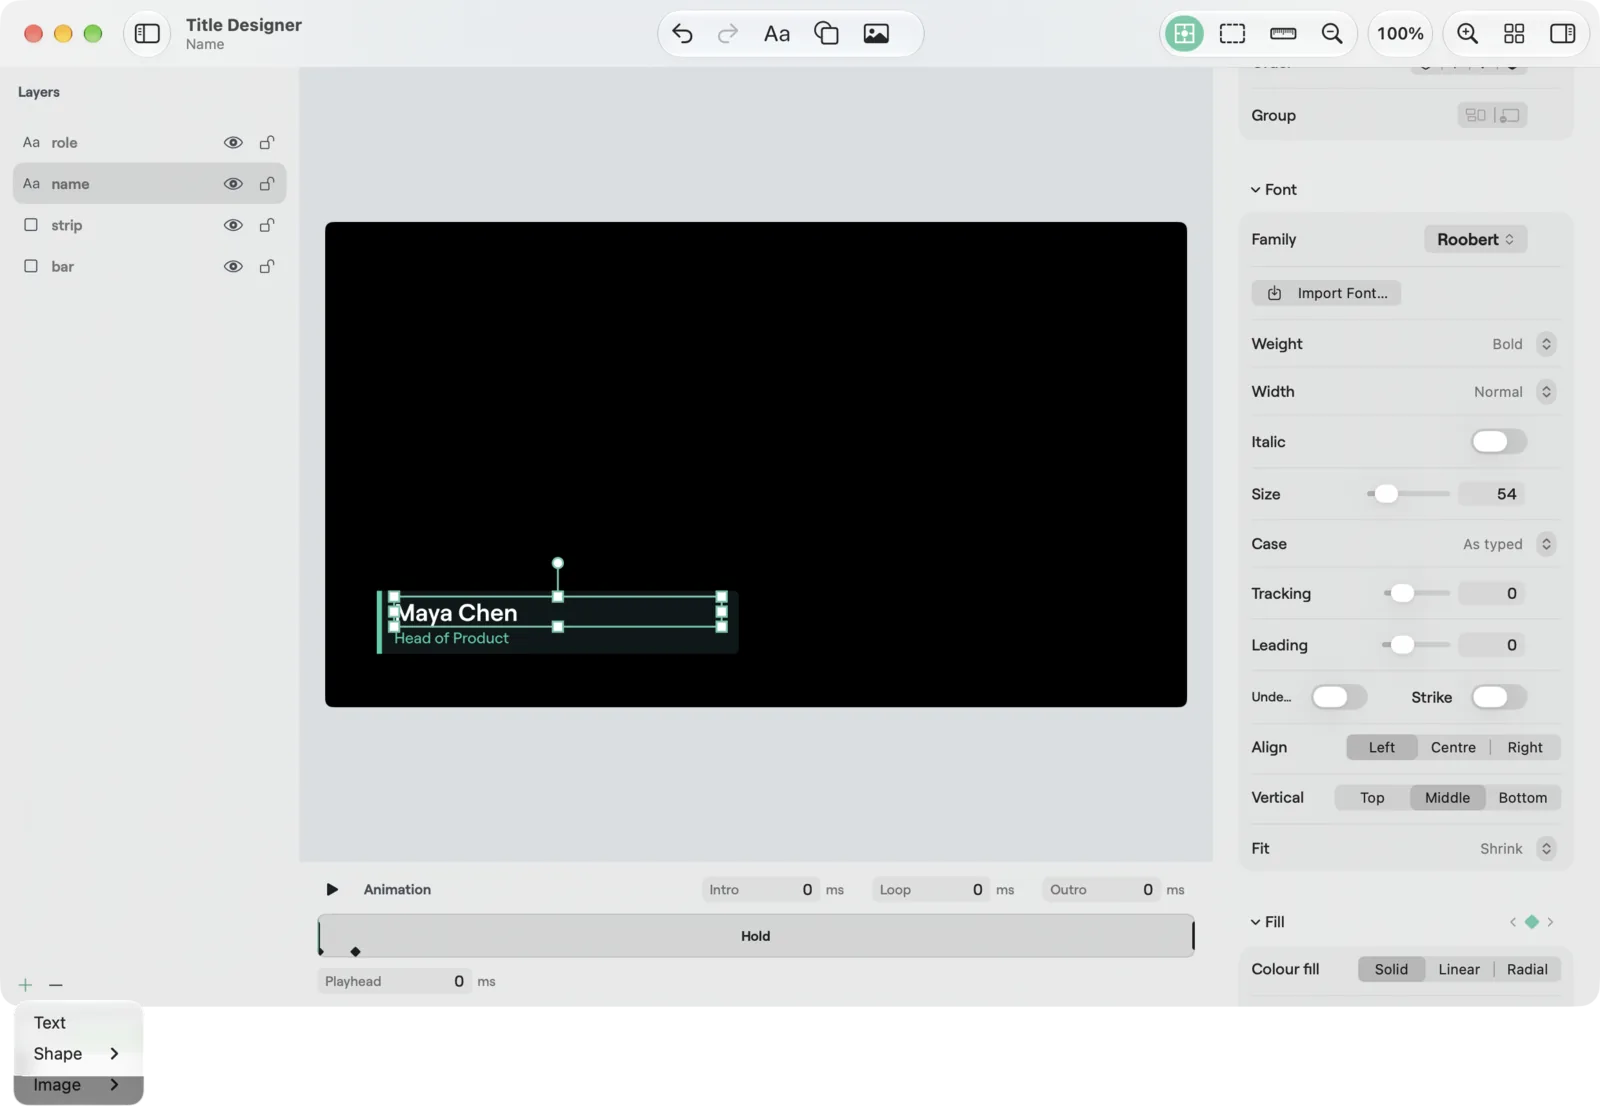
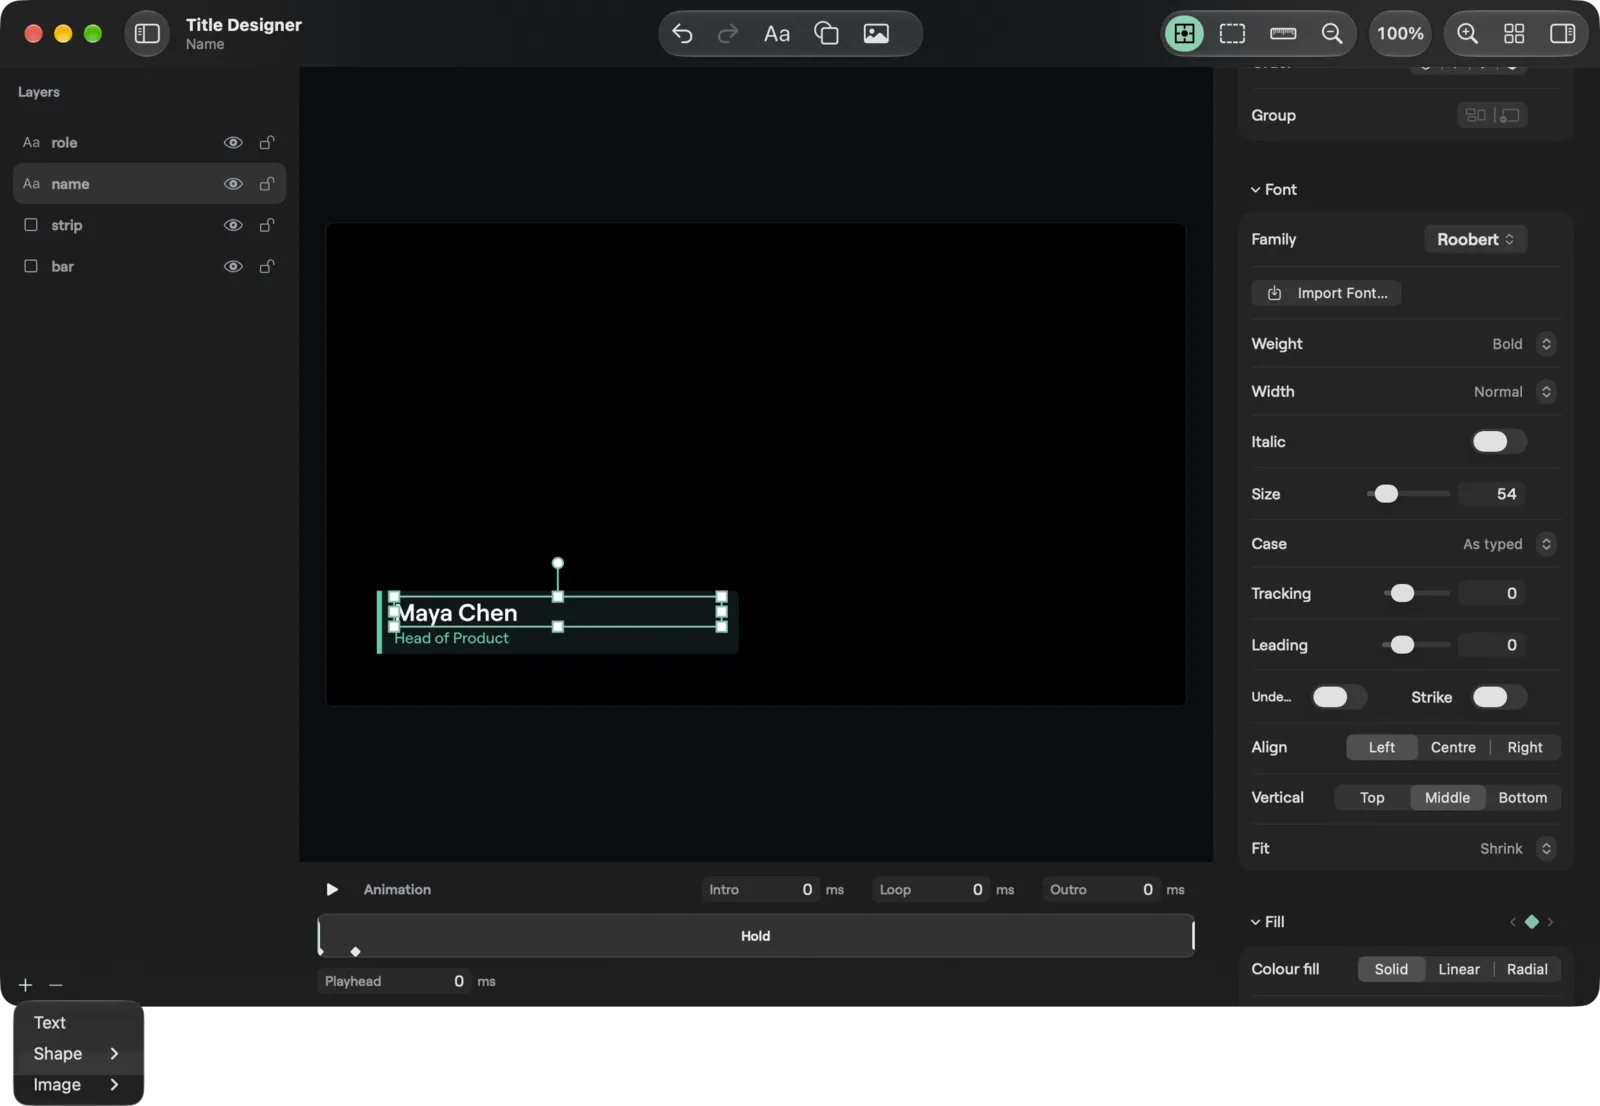
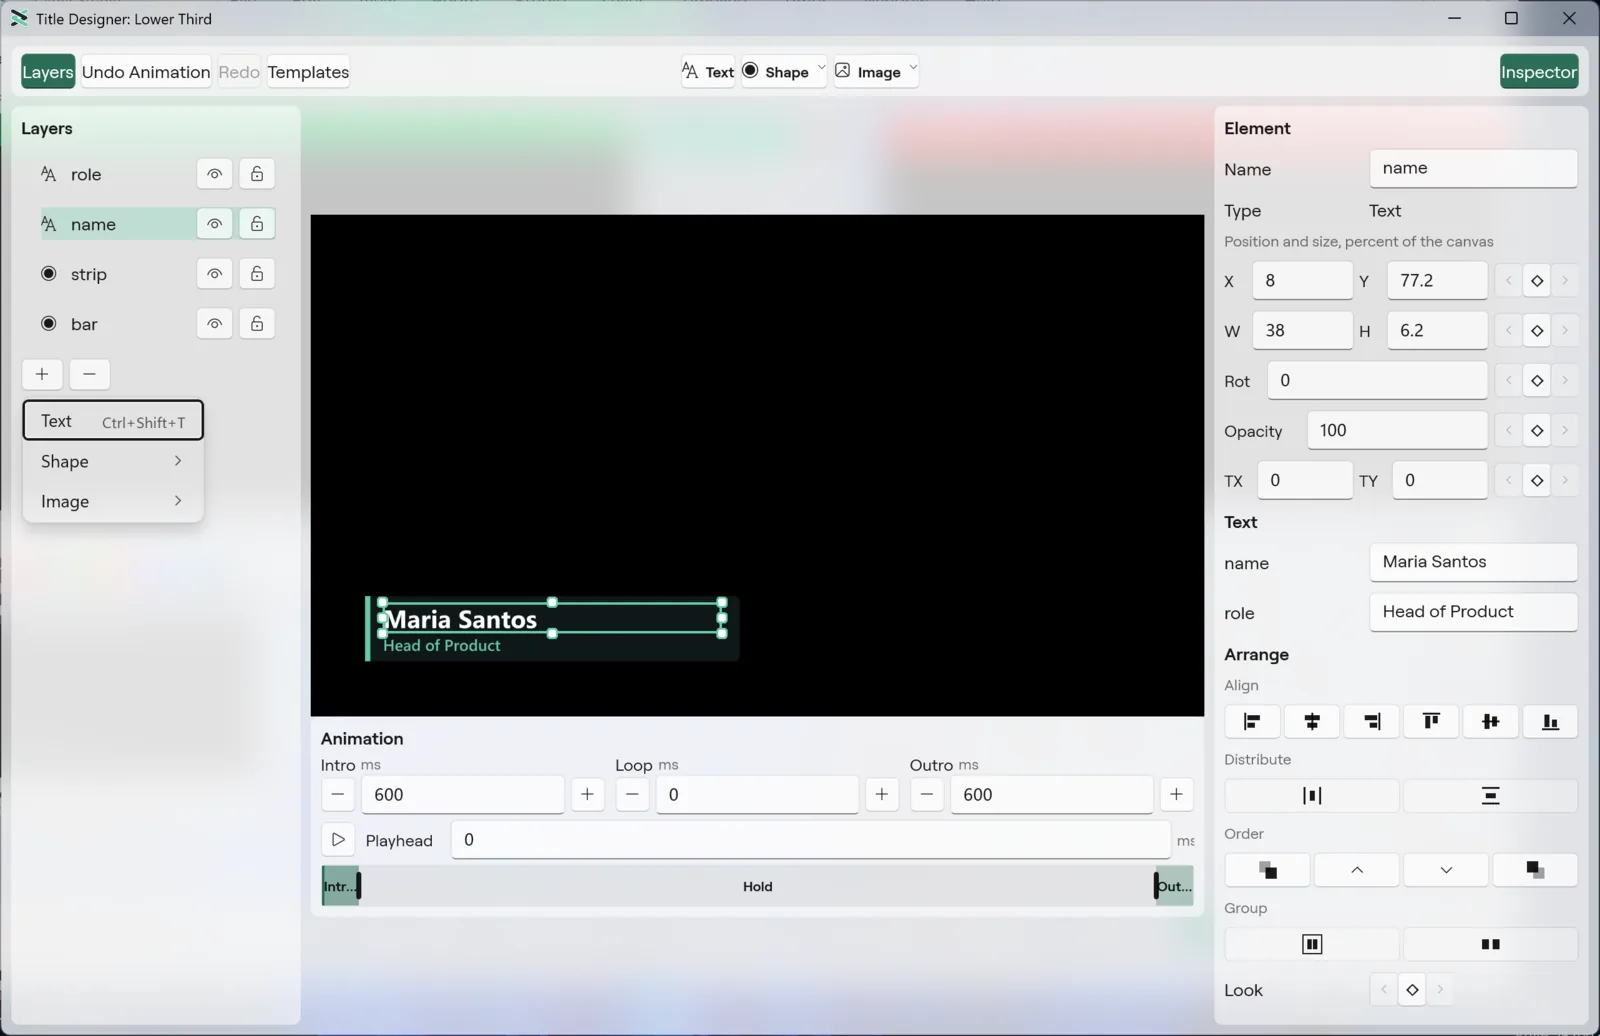
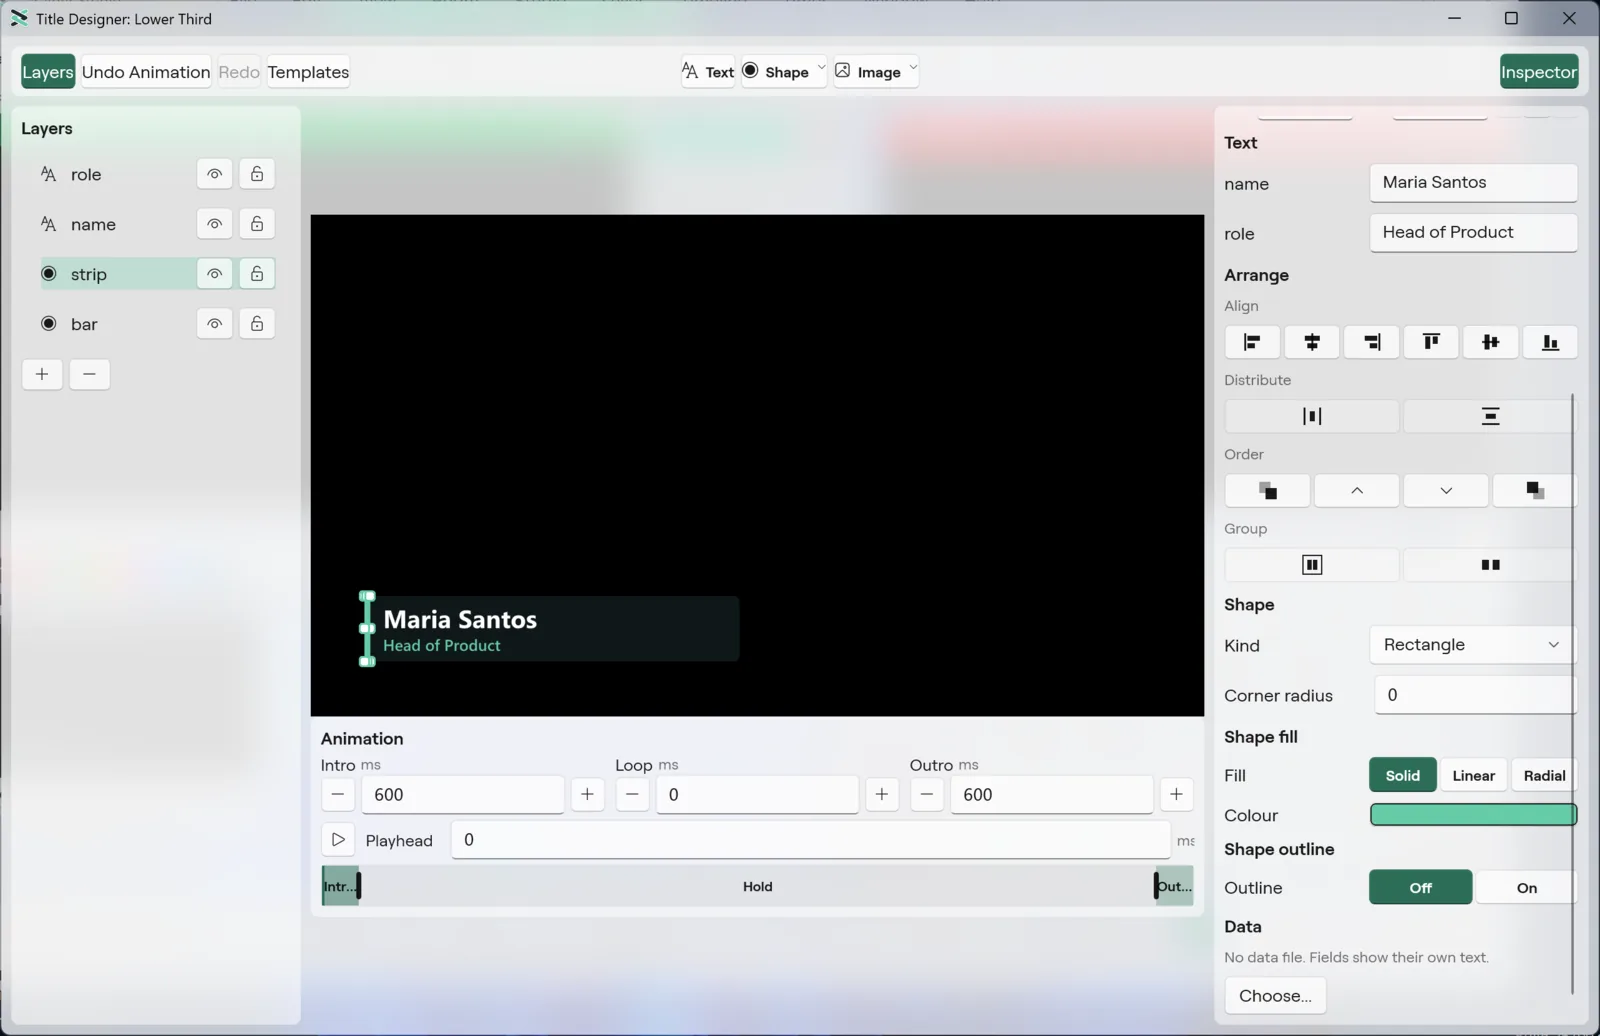
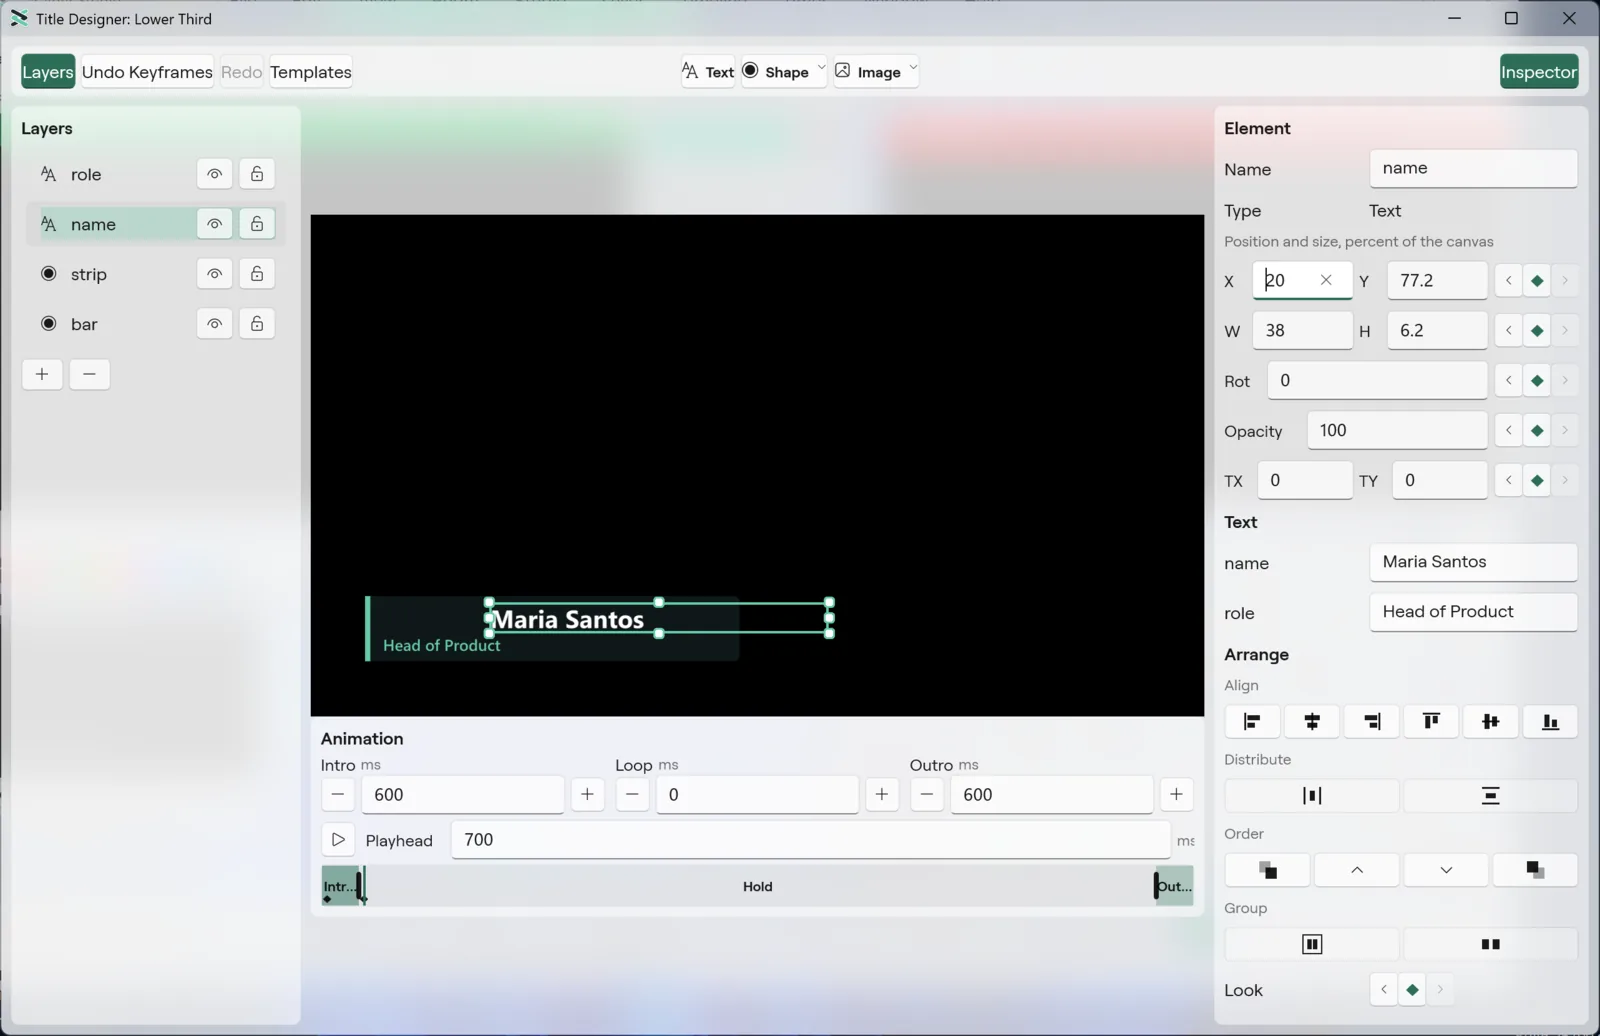
The window has three panes, with the animation strip under the canvas (see Animation and keys). Its toolbar has a Layers and an Inspector button that hide or show the side panes, Undo and Redo buttons that name the step they act on (for example "Undo Title"), the Text, Shape and Image buttons that add an element, a Templates button, the toggles Snap Guides, Show Safe Areas and Rulers, and the zoom buttons Zoom Out, the zoom percentage (Actual Size fits the window) and Zoom In. The menu bar has an Insert menu while a Designer is open, and the Edit and Layer menus carry Delete and Duplicate. A title edit is one step in Studio's undo history, and a whole drag is one step.
- Layers (left): the elements of the title, front first. Each row has an eye button to hide the element and a lock button to lock it. Click a row to select that element. A locked element does not move when you drag it on the canvas. Under the list, a foot bar of three icon buttons: + (Add Layer) opens a menu to add a Text, Shape or Image element, Duplicate Layer copies the selection and Delete Layer deletes it.
- Canvas (centre): the real render of the title, drawn by the same engine that draws it on air, with the selection drawn on top. Rulers adds a ruler on each edge in percent of the picture, and Show Safe Areas draws the safe areas. Zoom with the buttons, Cmd -, Cmd 0 (actual size) and Cmd =, or pinch.
- Inspector (right): the settings of the selection, described below.
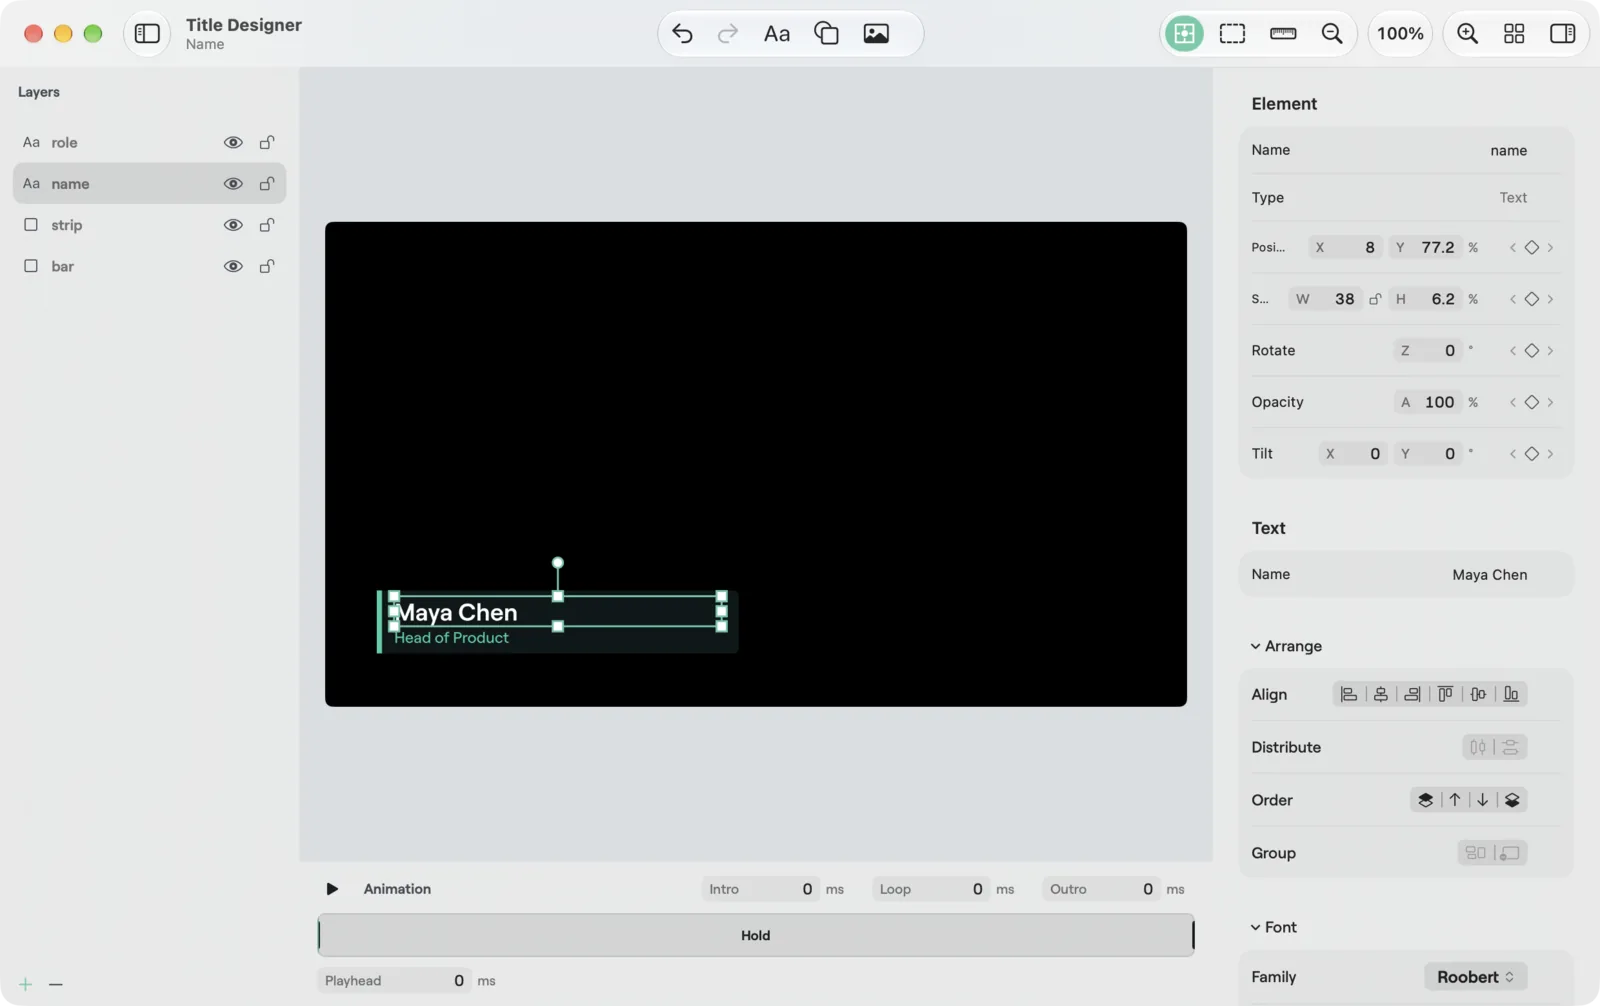
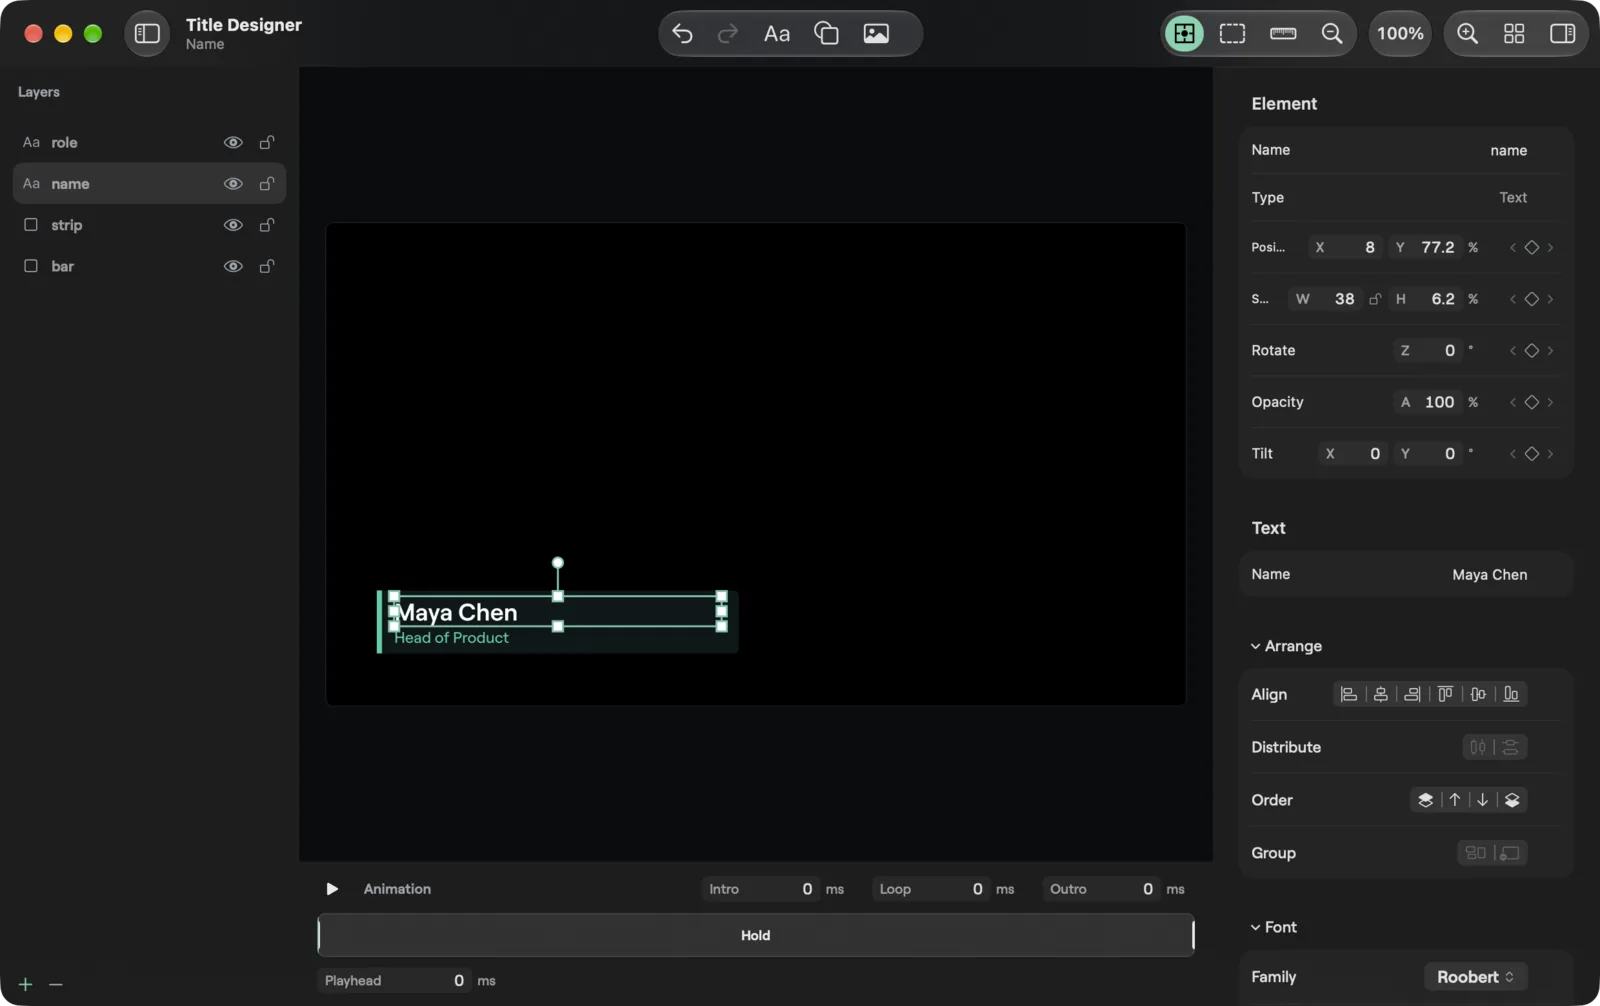
Edit on the canvas
- Click an element to select it. Shift-click adds it to the selection or takes it out. Click empty canvas to clear the selection.
- Drag on empty canvas to draw a selection box around several elements. Hold Shift to add them to the current selection.
- With several elements selected, one box surrounds them. Drag inside it to move the set, or drag a handle to scale the set together (text size follows the height). There is no rotate handle for a set: the Rotation field in the Inspector turns the whole set as one piece.
- Drag an element to move it. Drag a square handle to resize it. Drag the round handle to rotate it.
- Shift locks a move to one axis, and turns a rotation in 15 degree steps. Control switches snapping off for that drag. With Snap Guides on, an element snaps to the guides and shows them while you drag.
- While you resize, Shift keeps the proportions and Option resizes from the centre. Hold both for both. Guides show on a resize too.
- The arrow keys nudge the selection, and Shift with an arrow nudges it further.
- Delete removes the selection. Right click an element for Duplicate, Delete and the four stacking commands (bring to front, bring forward, send backward, send to back). Every one is one undo step.
- Right click a row in Layers gives the same menu.
Inspector
- Element (one element selected): the Name of the element, its Type, and its X, Y, Width and Height as percentages of the picture, Rotation in degrees, a Tilt pair that turns the element in depth around each axis, and Opacity. Type a number and press Return. With several elements selected the section says "n elements selected".
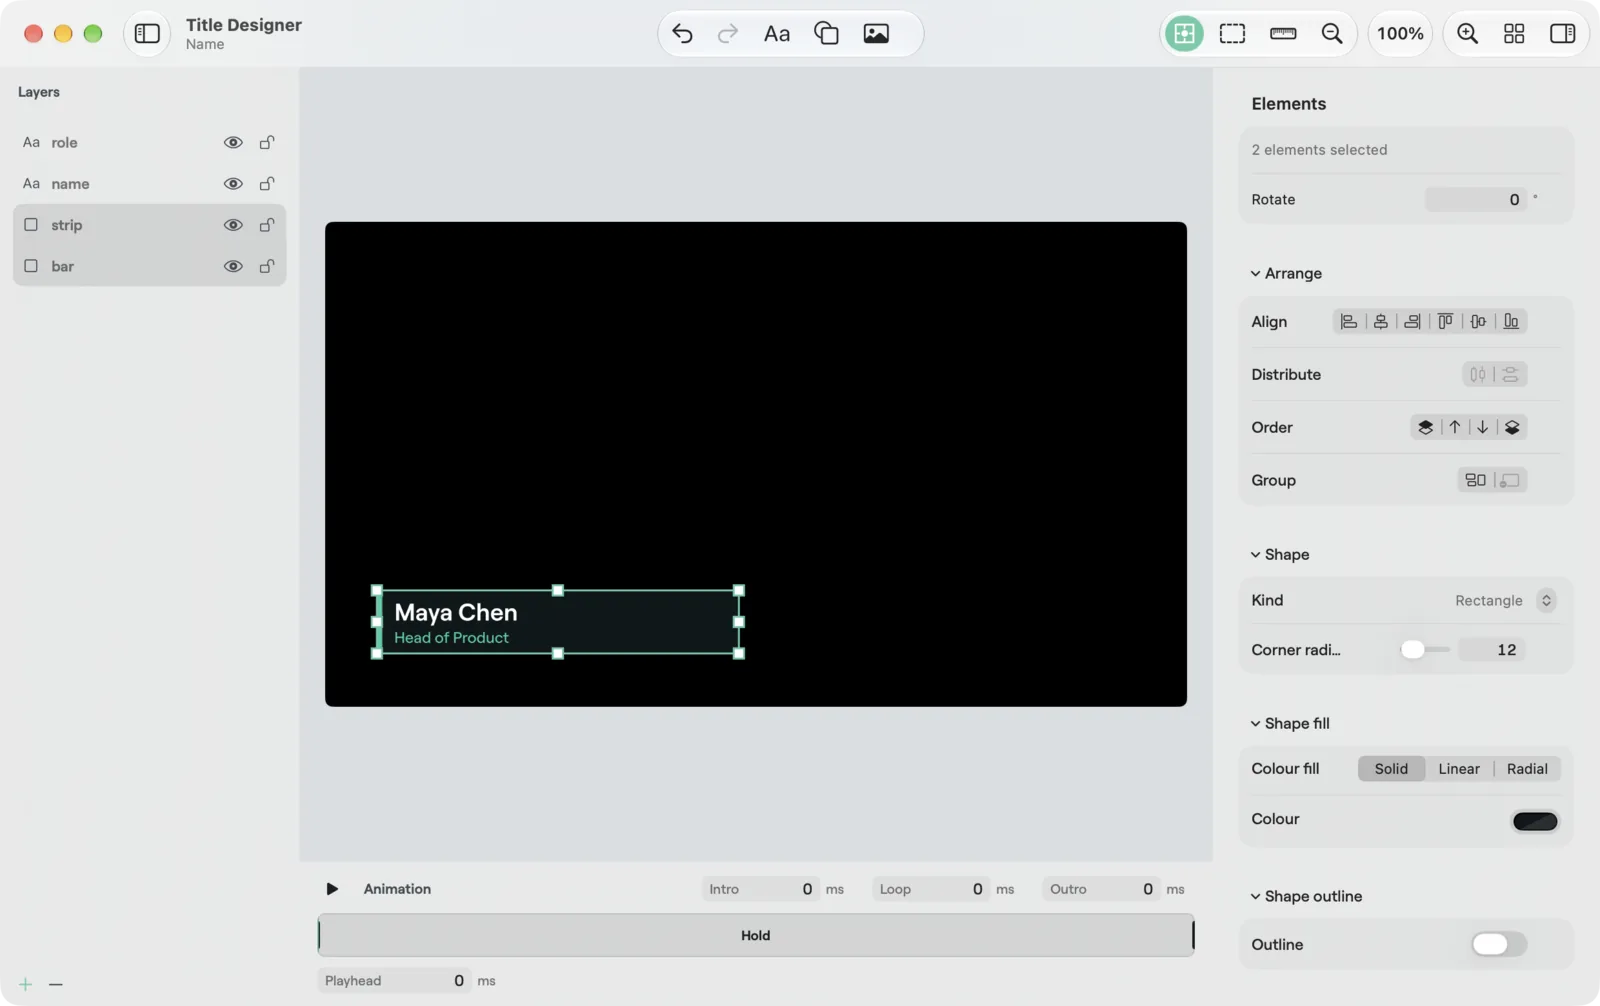
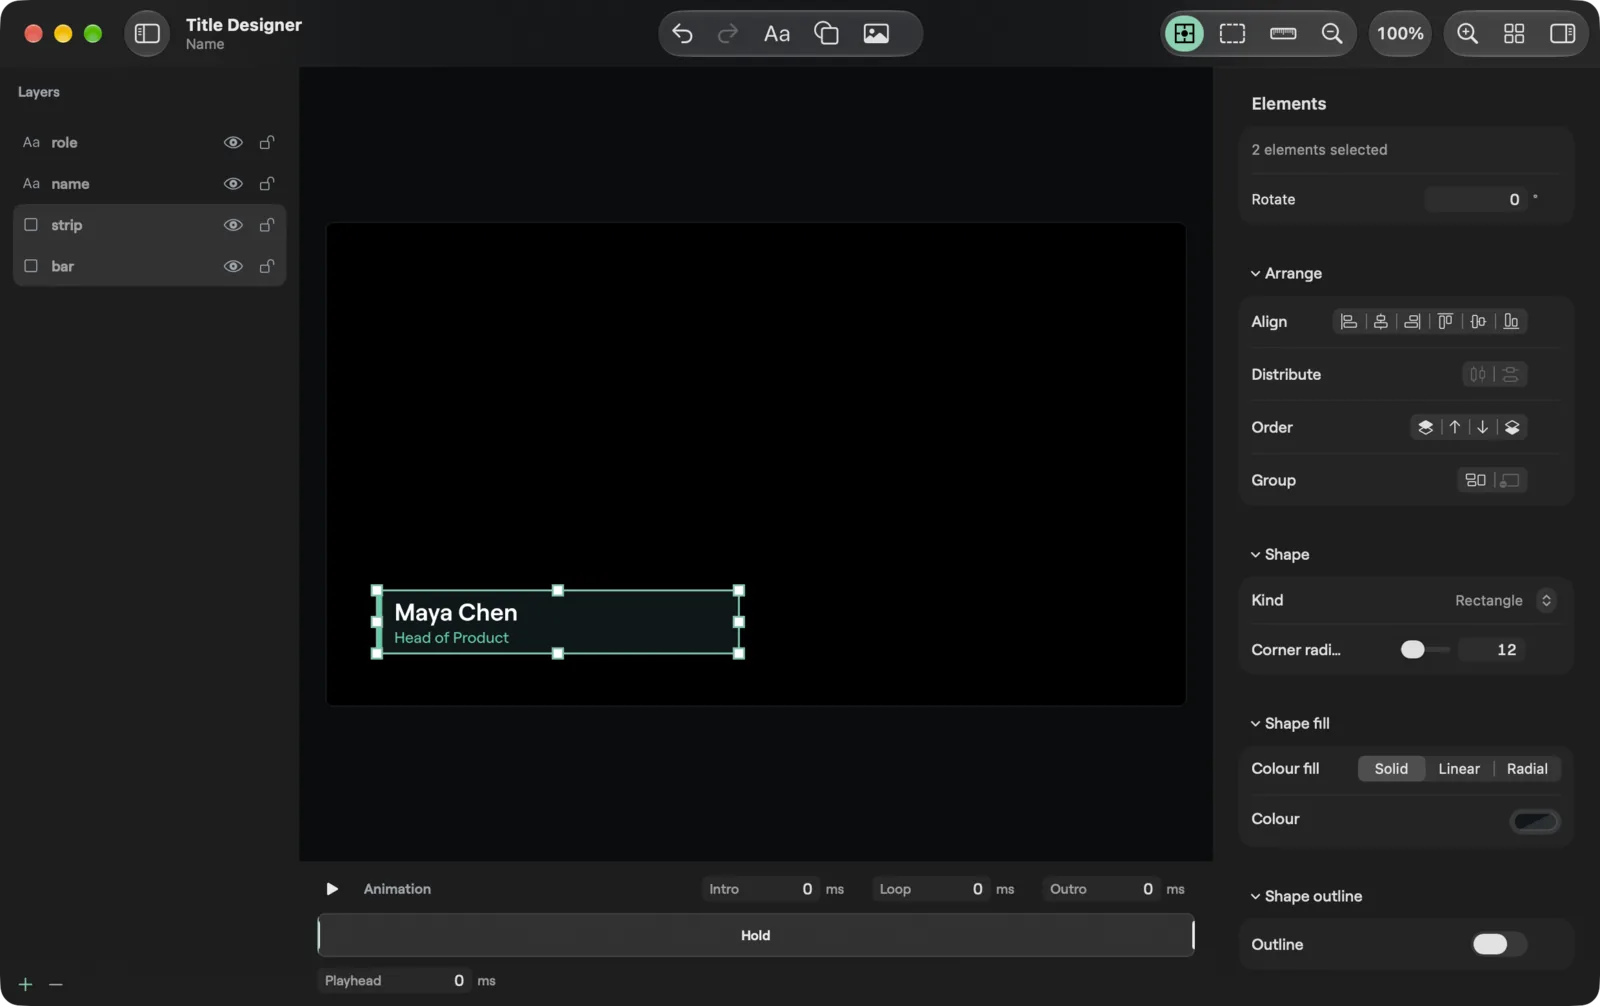
- Elements (several selected): Rotate turns the whole selection as one piece and says Mixed when the angles differ. A whole group turns as one piece too.
- Text: one field for each piece of text in the title.
- The text look sections show for a text element. With several text elements selected they show the first one's values and every change goes to all of them:
- Font: the font family (press the family field for the font picker), Weight (Thin to Black), Width (Ultra Condensed to Ultra Expanded), Italic, Size (4 to 2048, so the slider follows text that a box resize has scaled up), Case (As typed, Upper, Lower, Title, Small caps), Tracking, Leading, Underline, Strike, Align (Left, Centre, Right), Vertical (Top, Middle, Bottom) and Fit (Shrink, Wrap, Wrap and shrink, Overflow).
- Fill: Solid, Linear or Radial. A solid fill has a Colour. A gradient has colour Stop rows, each with a position, Add Stop (up to 8) and a remove button (down to 2), and a linear gradient has an Angle.
- Strokes: Add Stroke (up to 4). Each stroke has a colour, Width and Position (Outside, Centre, Inside).
- Shadows: Add Shadow (up to 2). Each shadow has a colour, Offset X, Offset Y, Blur and Spread.
- Glow: the Glow switch, then Colour, Radius and Strength.
- Text Box: Box behind text, then the Box fill (the same Solid, Linear, Radial choice), Padding, Radius and Each line.
- Text Styles: save the look of the selected text, apply a saved look to the selected texts, or delete one (see Templates and text styles).
- Look keys: the Fill, Strokes and Shadows headers (and Shape fill and Shape outline on a shape) each carry a key diamond with previous and next arrows. One look key holds the whole look of the element, so one diamond serves all its sections. With a whole group selected, the Group section has a pose diamond and a Look diamond, so one key moves or restyles every member.
- Build In and Scroll (a text element selected): see Animation and keys.
- Shape and Image (a shape or an image selected), and Arrange (any selection): see Shapes, images and arrange.
- Data file: File (the name, or "None"), Choose..., and Remove once a file is set; each piece of text then has a picker: Own text or one of the file's columns. Row has a Row picker ("Row 1 of 12"), Previous Row and Next Row step through the file, and the title shows that row. An empty file says "The file has no rows yet."
In the title's tile menu, Title on Overlay n (ticked while it shows) also puts the title on its overlay channel or takes it off.
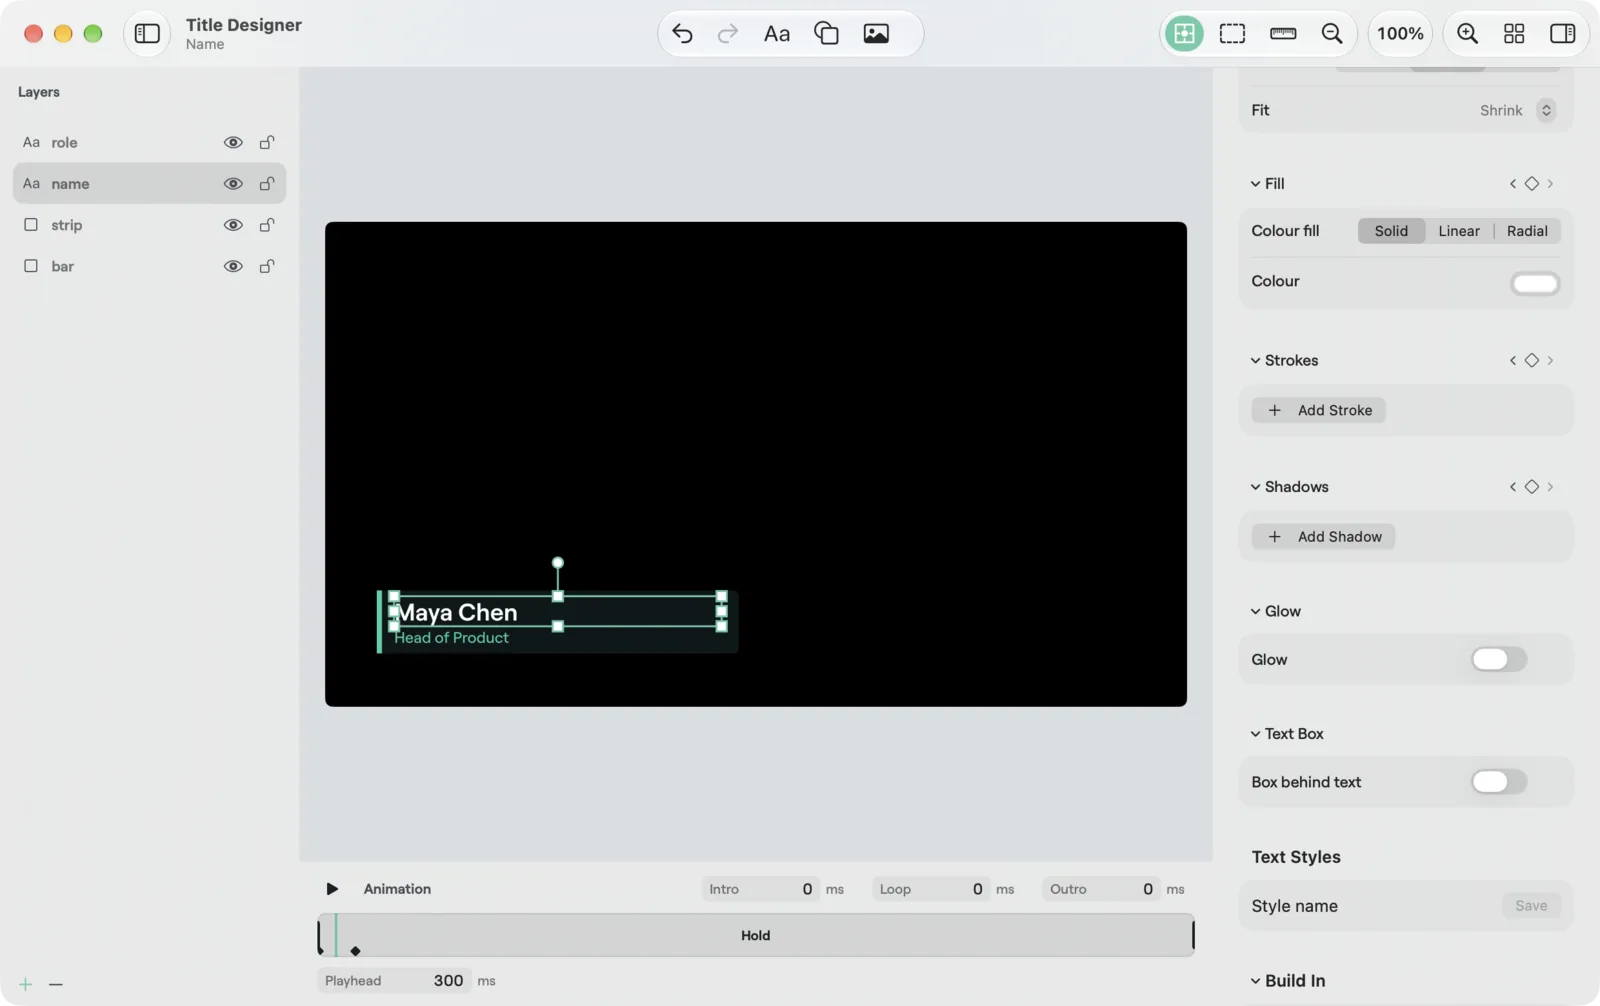
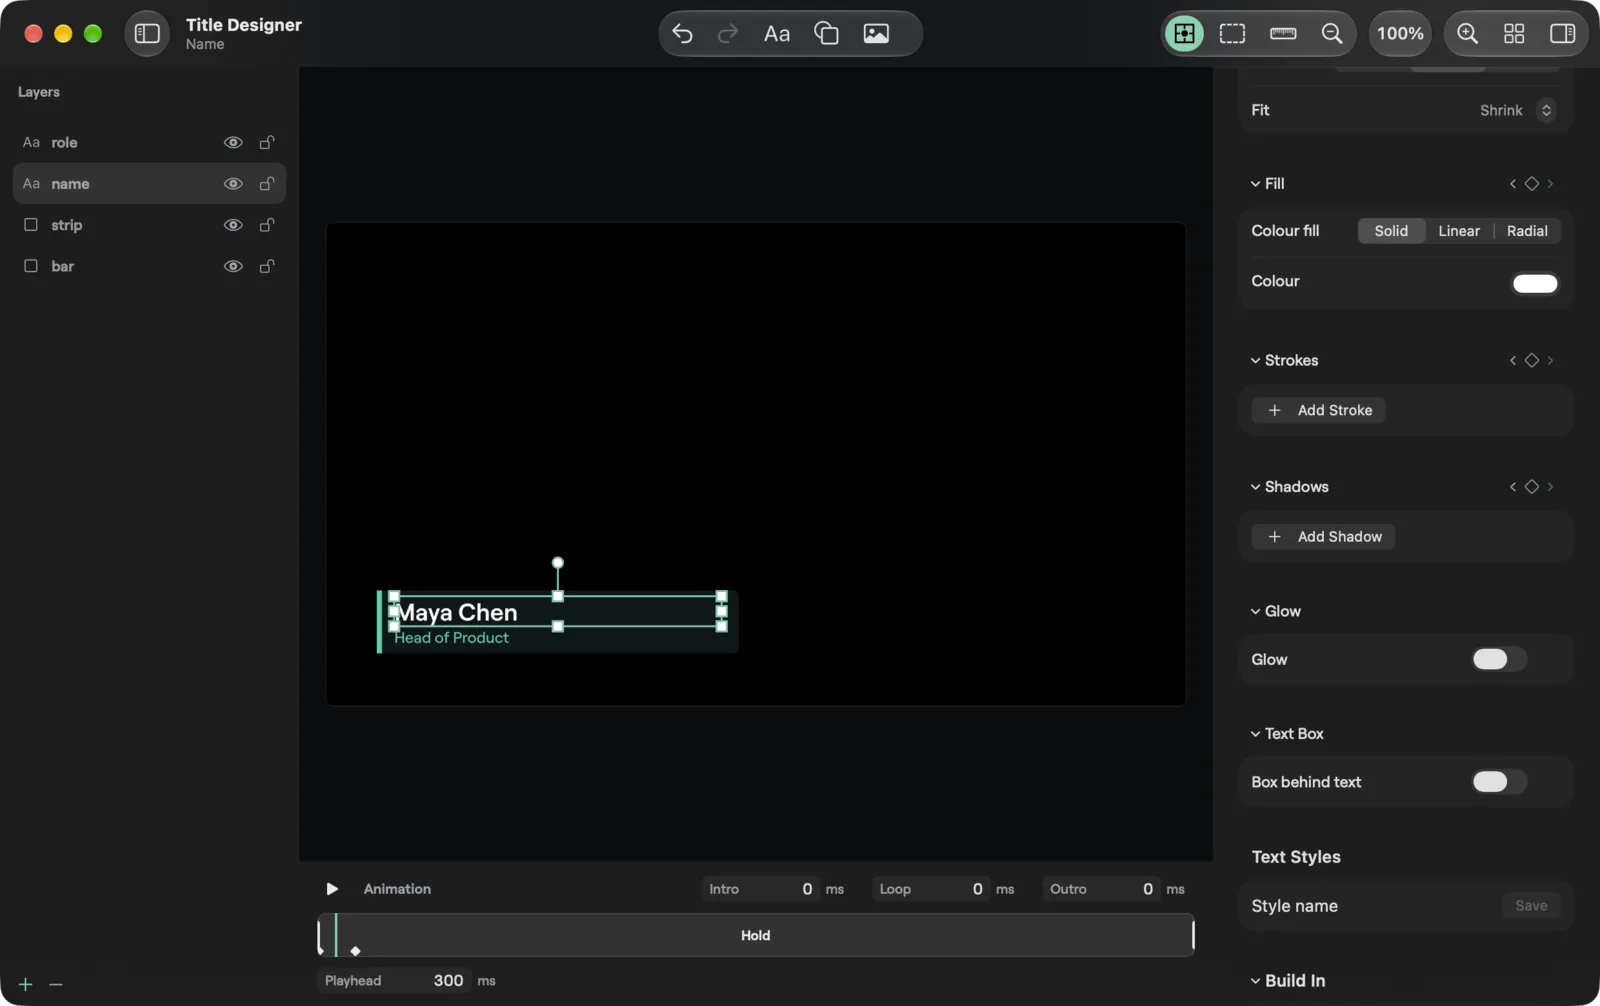
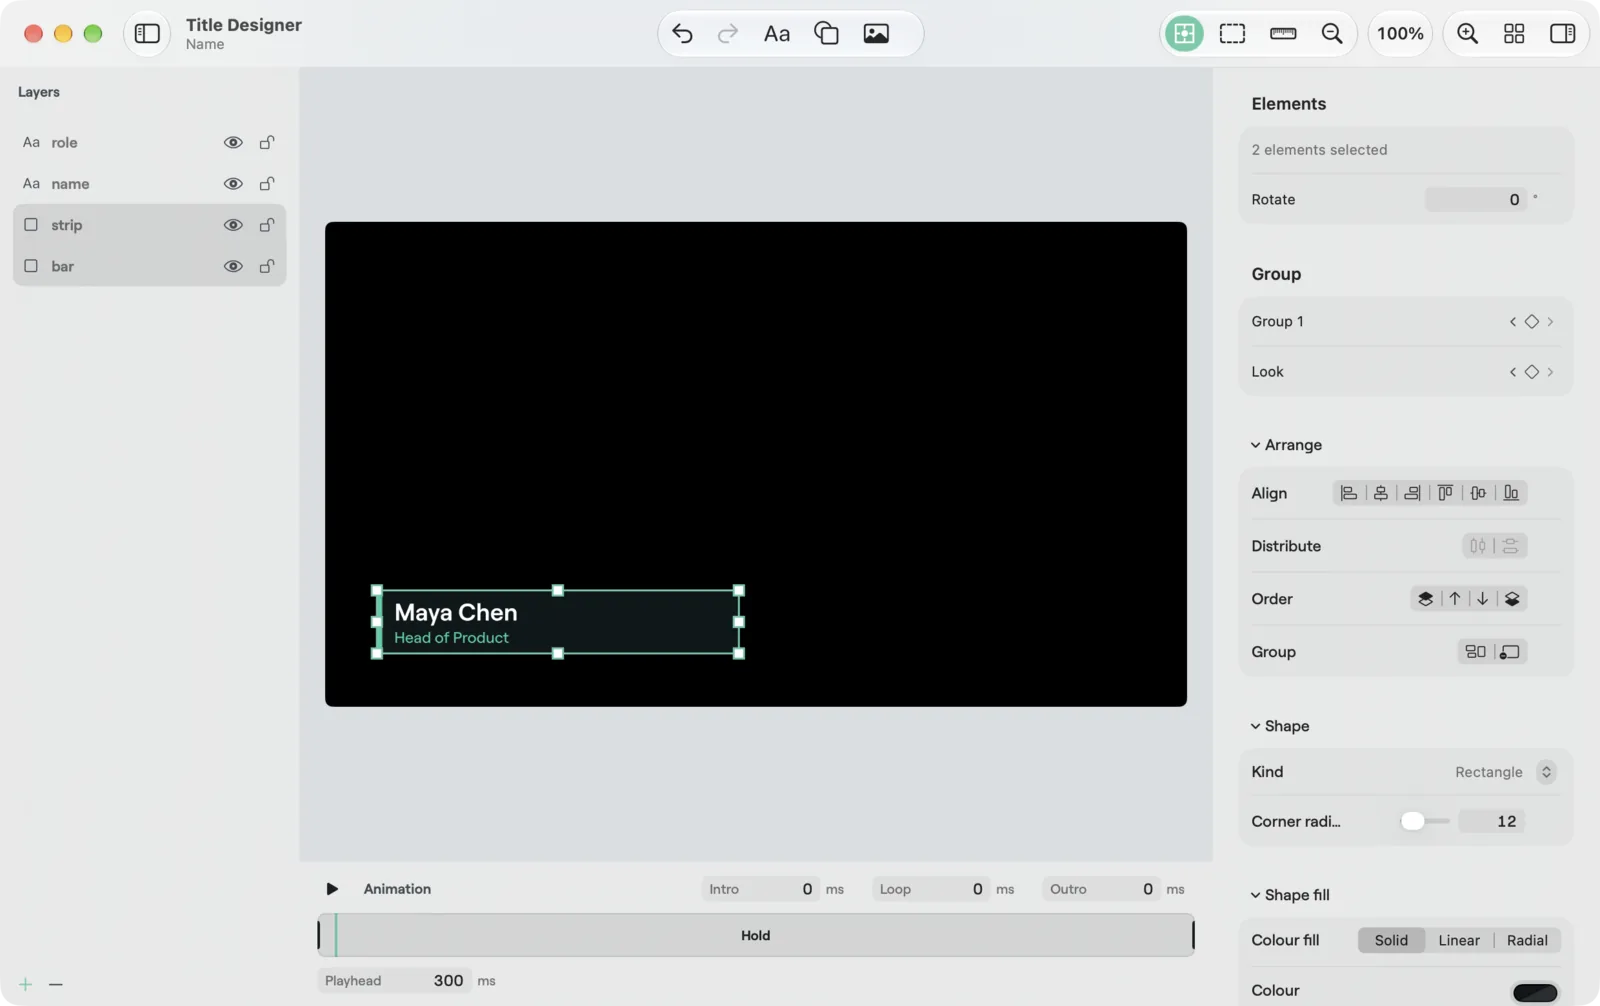
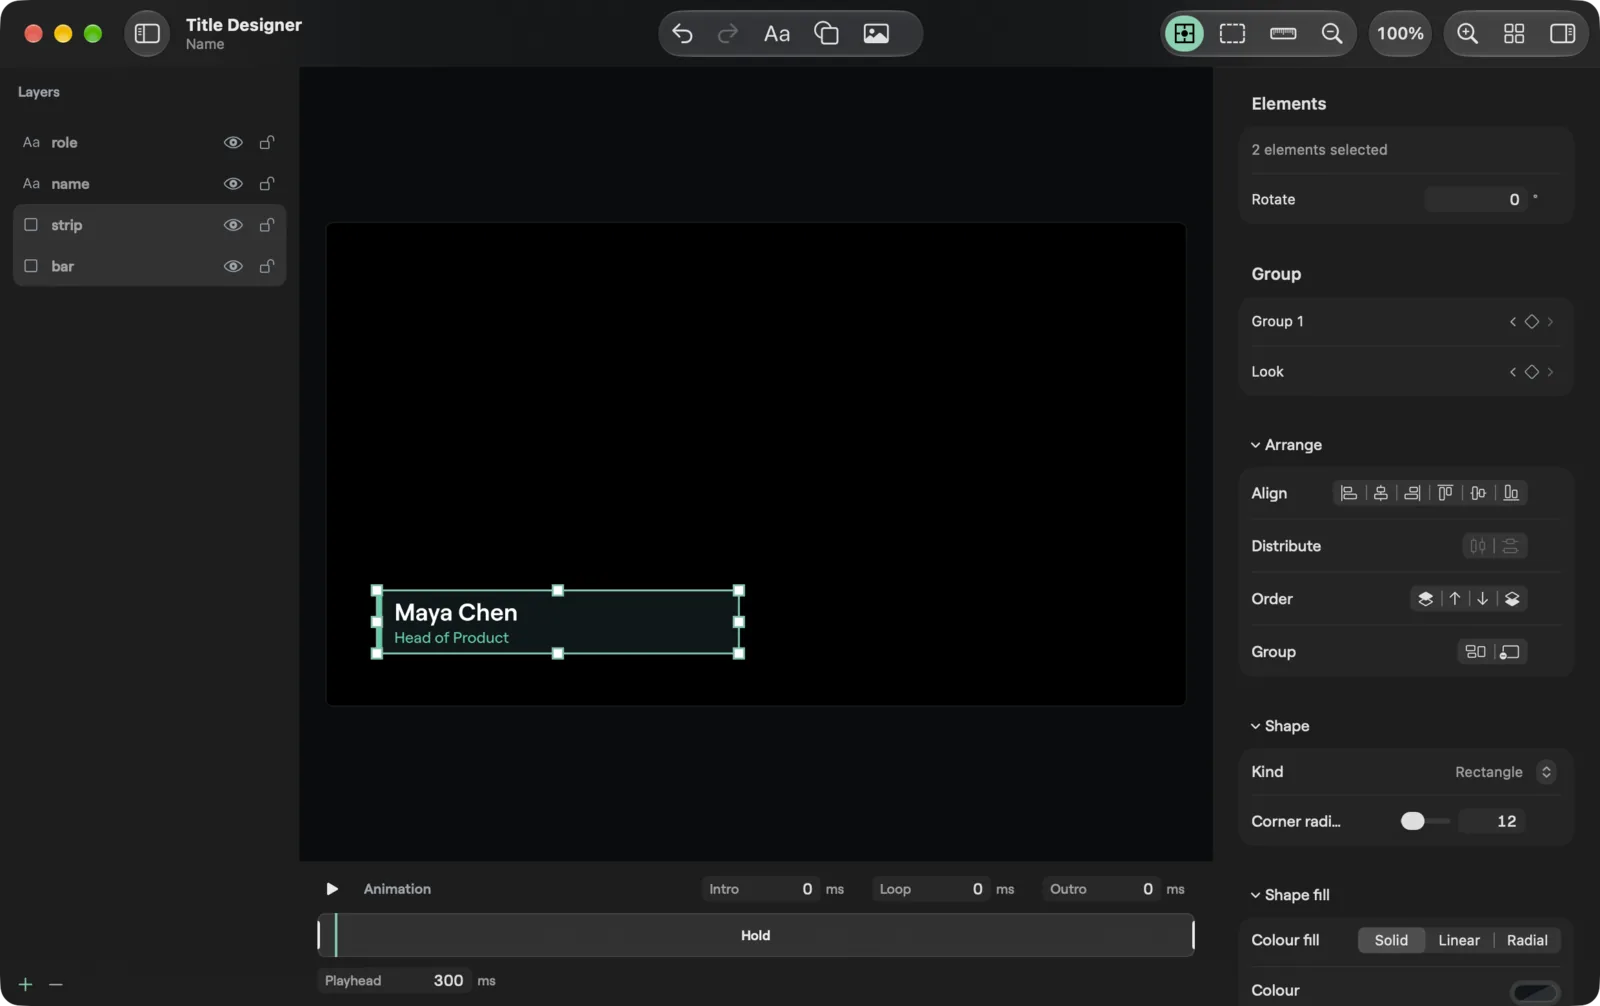
Title... in Add Input opens the Add Title dialog with a Title kind and a Title style box, then the fields of the kind, then Add (or Cancel). For a data lower third, Choose... picks the file, shows its name (or "None"), and the Name column and Role column boxes follow. Browse Templates... closes the dialog and opens the template gallery (see Templates and text styles).
Open the Title Designer on any title input in one of three ways:
- Choose Edit Title... in the title's tile menu.
- Double click the title's tile.
- Press Add in Add Title (it opens by itself).
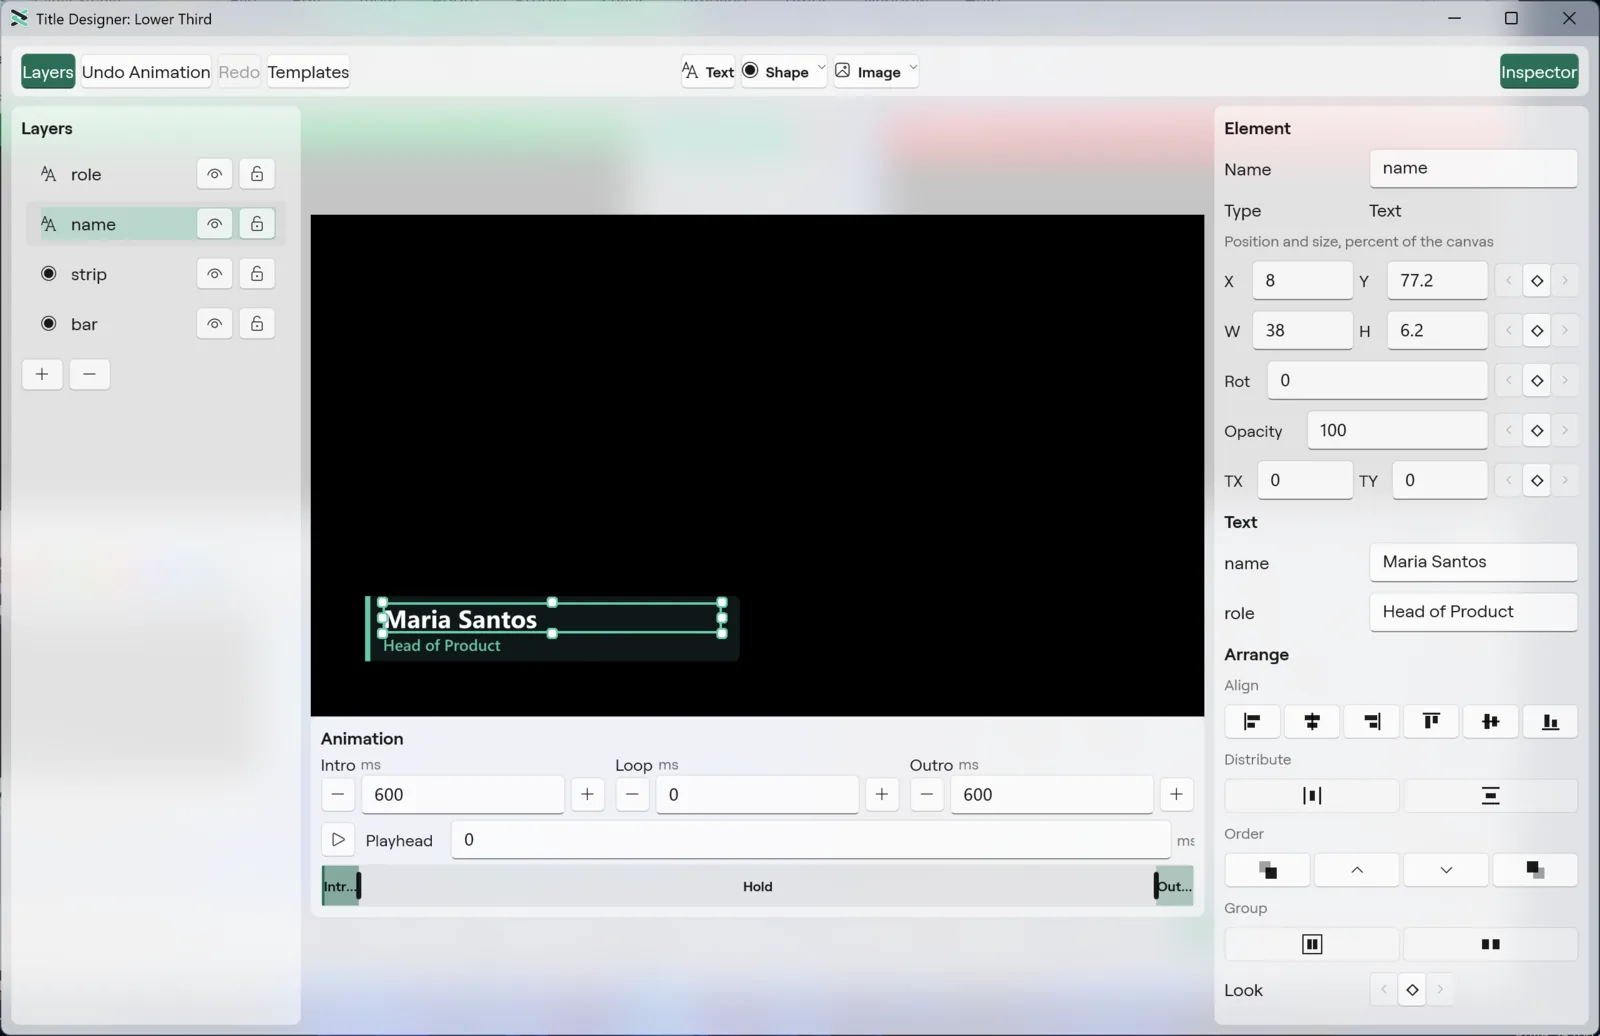
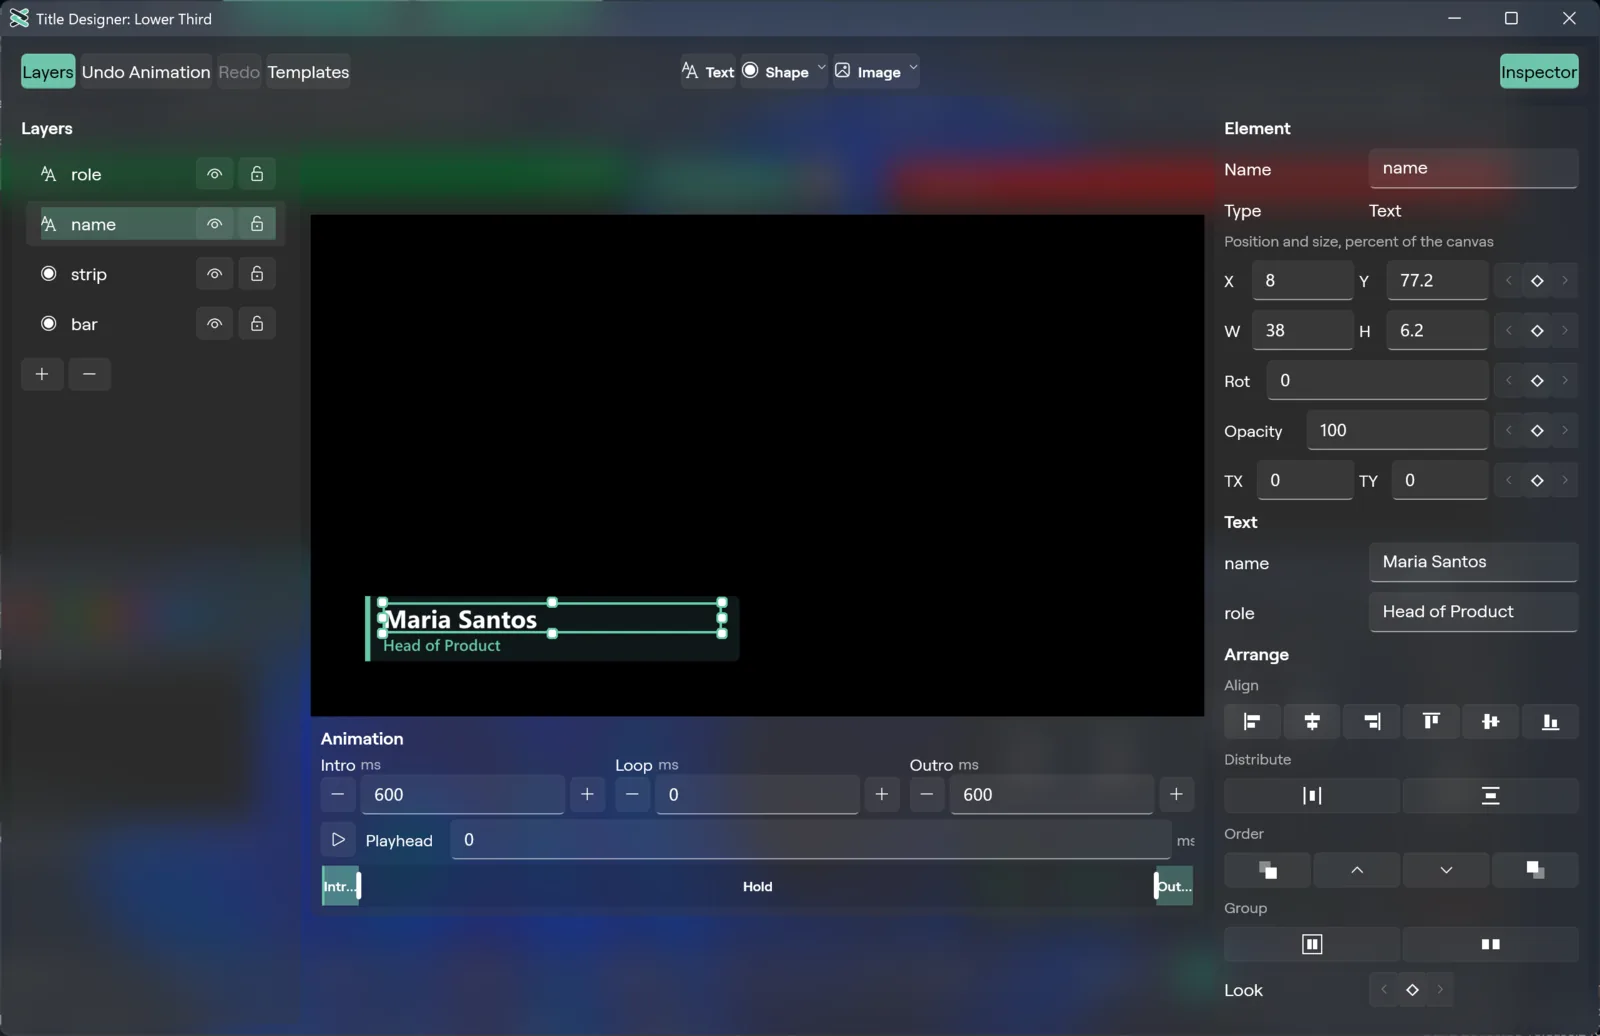
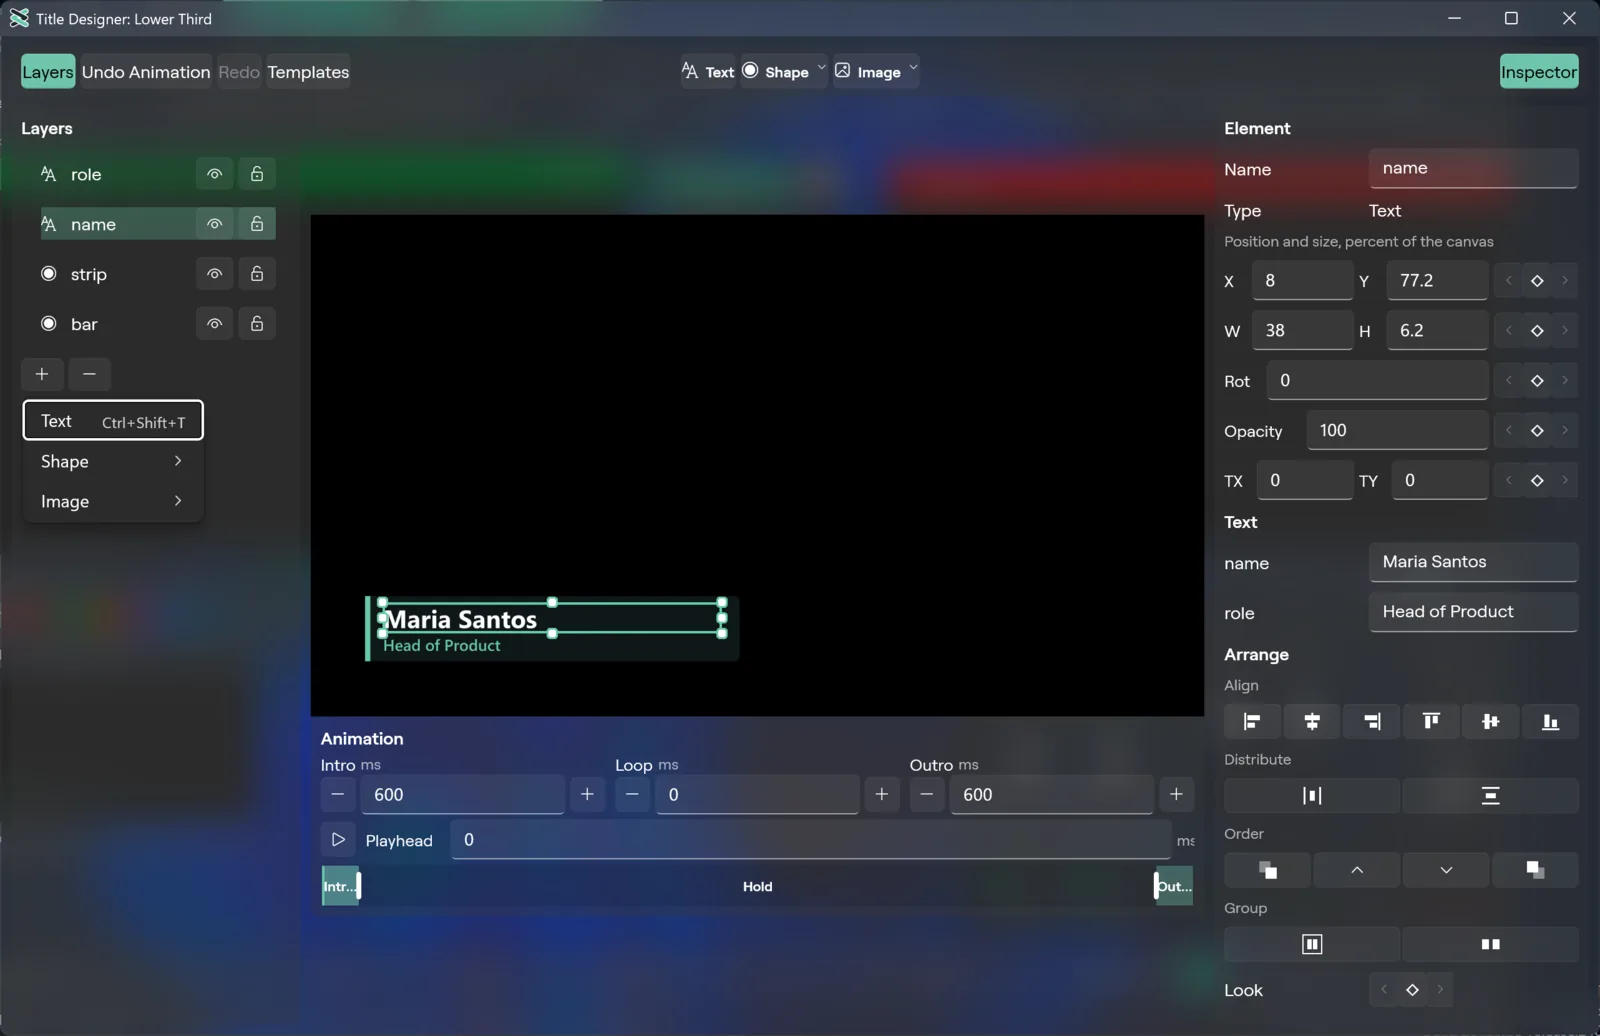
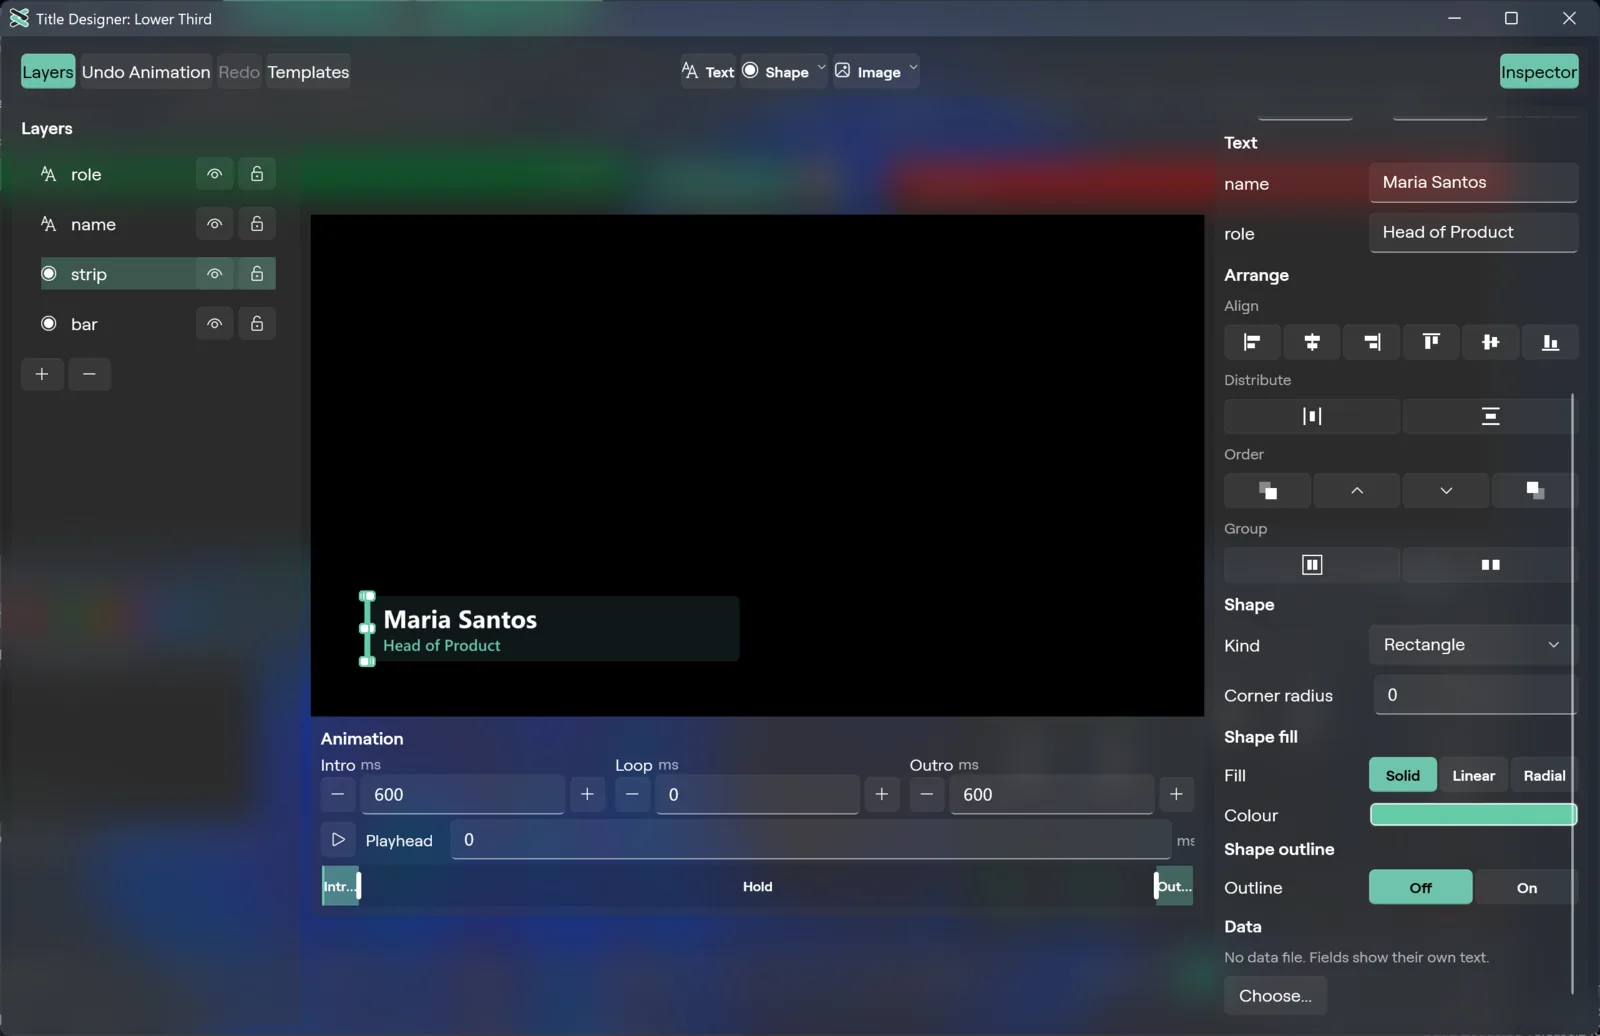
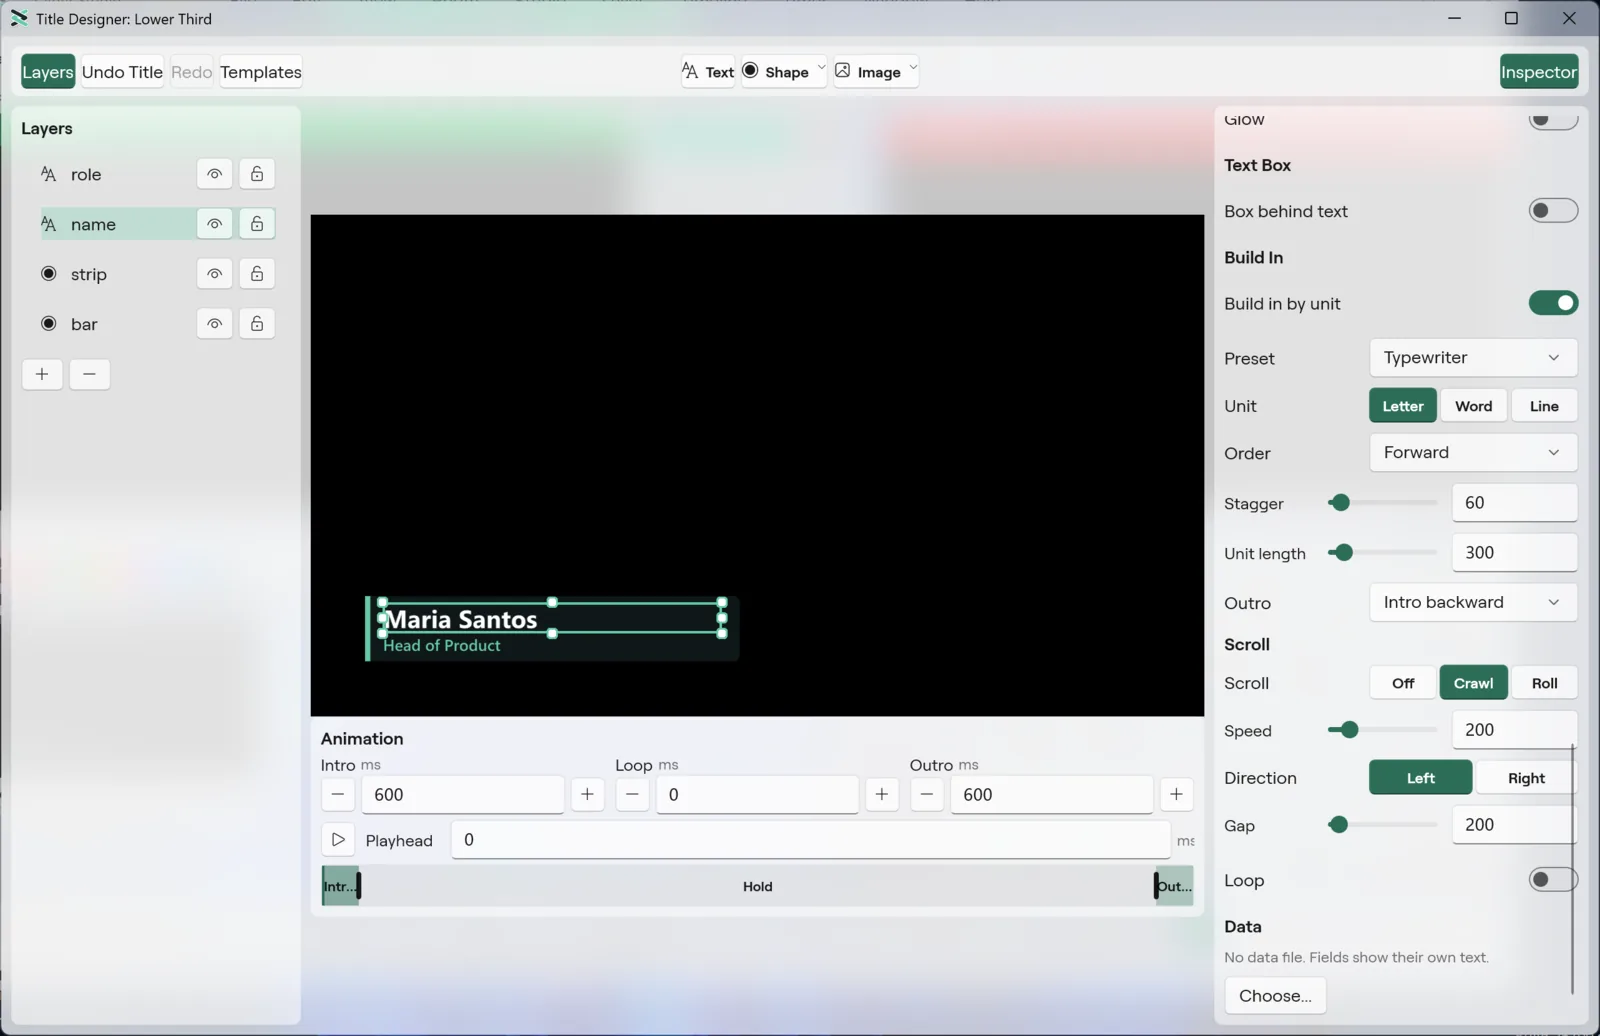
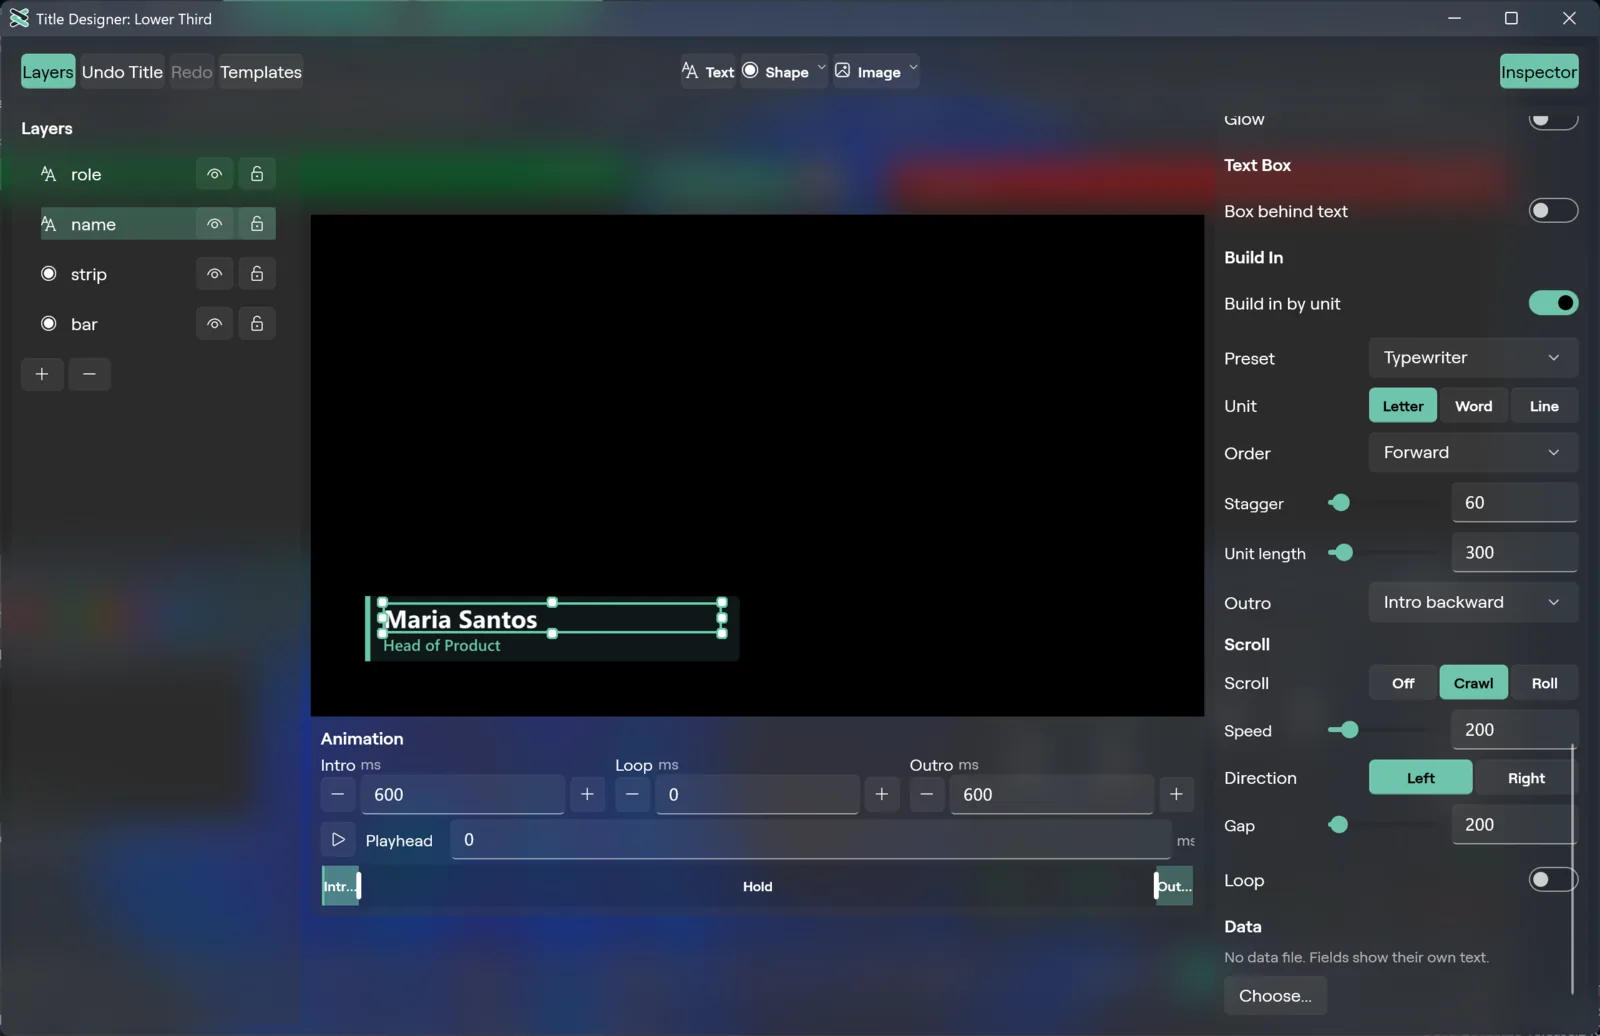
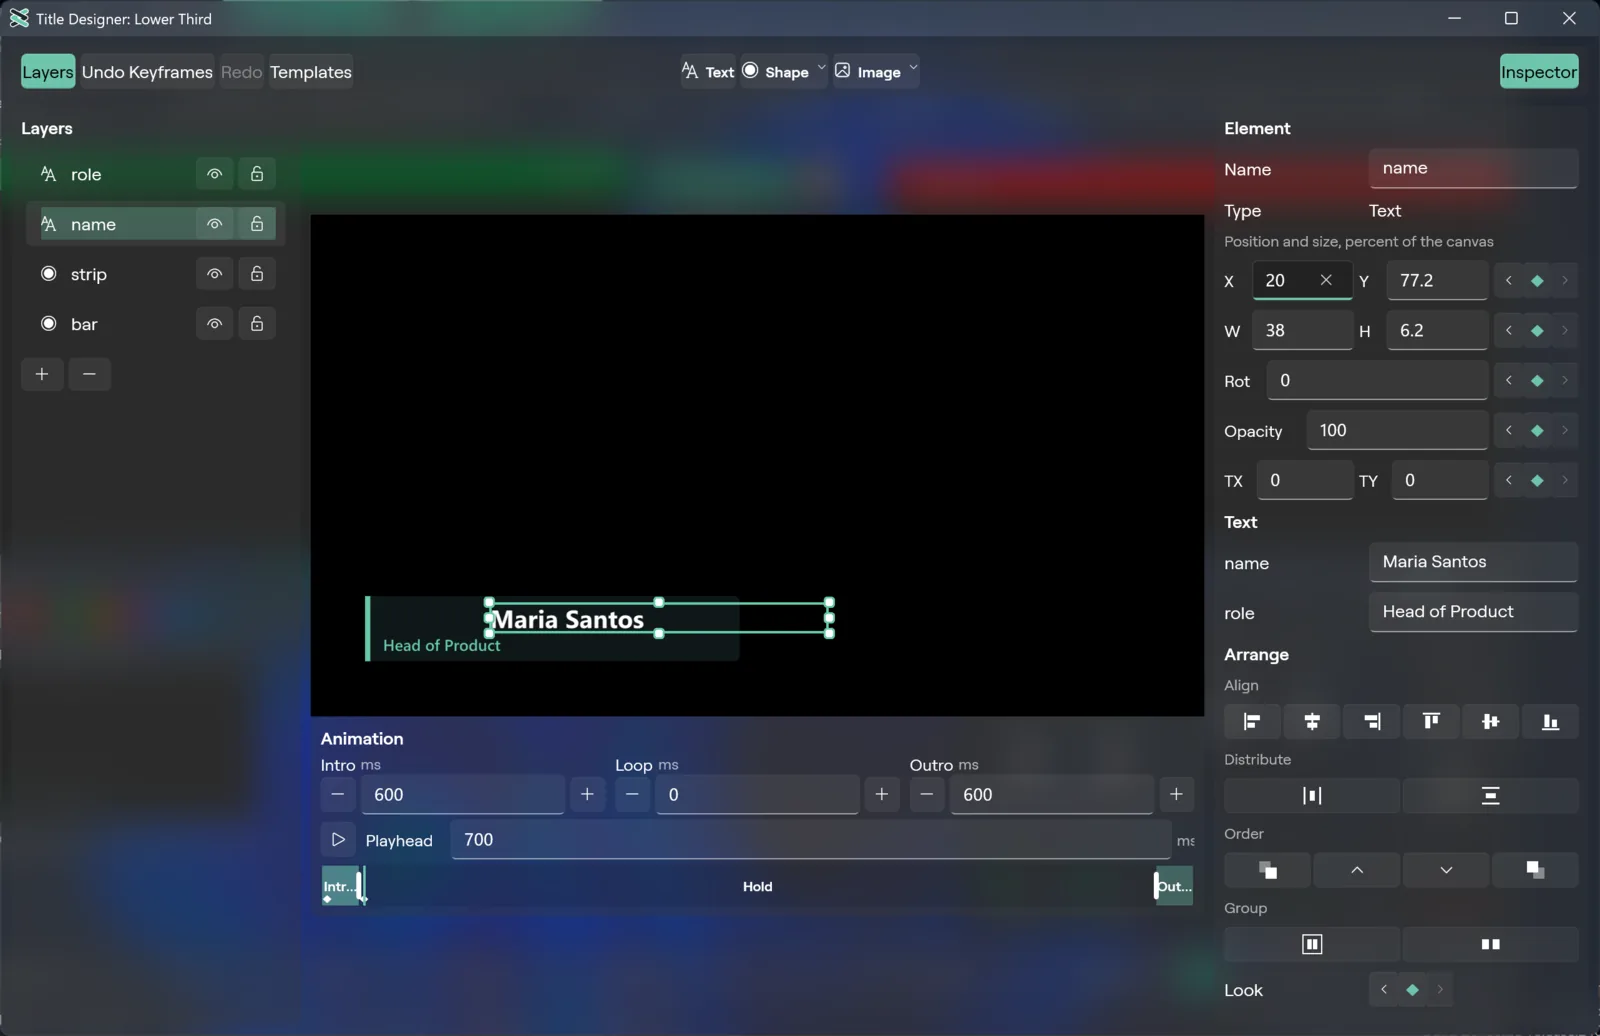
The window is called **Title Designer: ** and the name of the title, and has three panes, with the animation strip under the canvas (see Animation and keys). Its toolbar has a Layers and an Inspector button that hide or show the side panes, Undo and Redo buttons that name the step they act on (for example "Undo Title"), a Templates button, and in the middle the Text, Shape and Image buttons that add an element. The tooltips show Ctrl+Z and Ctrl+Y. A title edit is one step in Studio's undo history.
The Windows Designer has no menu bar. Everything a menu would hold is on the toolbar, in the + menu under Layers, or in the right click menu.
- Layers (left): the elements of the title, front first. Each row has an eye button to hide the element and a lock button to lock it. Click a row to select that layer. An empty title says "This title has no elements yet." Under the list, a foot bar of three icon keys: + (Add Layer) opens the insert popup, Duplicate Layer (Ctrl+D) copies the selection and Delete Layer (Delete) deletes it.
- Canvas (centre): the real render of the title, drawn by the same engine that draws it on air. The selected layer has an outline and square handles. Snapping is always on; hold Space during a drag to switch it off for that drag. There are no toolbar toggles for snap guides or safe areas.
- Inspector (right): the settings of the selection, described below.
Edit on the canvas
- Click an element to select it. Shift-click adds it to the selection or takes it out.
- Drag on empty canvas to draw a selection box around several elements. Hold Shift to add them to the current selection.
- With several elements selected, one box surrounds them. Drag inside it to move the set, or drag a handle to scale the set together (text size follows the height). There is no rotate handle for a set: the Rotation field in the Inspector turns the whole set as one piece.
- Drag an element to move it. Drag a square handle to resize it. There is no rotate handle: set Rotation in the Inspector. Picking one element of a group moves only that element.
- While you resize, Shift keeps the proportions and Ctrl resizes from the centre. Hold both for both. Guides show while you drag.
- The arrow keys nudge the selection, and Shift with an arrow nudges it further. Arrows and Delete do nothing while you type in an Inspector box.
- Delete removes the selection, from the canvas or from a Layers row. Ctrl+D duplicates it. Right click an element, or a Layers row, for Duplicate, Delete and the stacking commands. Every one is one undo step.
- Ctrl+Z and Ctrl+Y work in an Inspector number box too: they undo and redo the title, not the box's own text.
- Esc clears the selection when nothing is playing (while a title plays it stops the run). With a menu open it closes the menu first.
- On a keyed title, the selection box, handles and hit test follow the pose at the playhead, so the box stays on the moving element.
Inspector
- Element: says "Select a layer to edit it." until you pick a layer, then it has the Name, the Type, X %, Y %, Width %, Height %, Rotation, Tilt X, Tilt Y and Opacity % of the layer. The values may go below 0 or above 100, so an element can sit partly off the picture.
- Text: one box for each piece of text in the title.
- The text look sections show for a text element. With several text elements selected they show the first one's values and every change goes to all of them. A slider drag or a scrub is one undo step:
- Font: the font family (press the family field for the font picker), Weight and Width (Thin to Black, Ultra Condensed to Ultra Expanded), Italic, Size (4 to 2048, so the slider follows text that a box resize has scaled up), Case (As typed, Upper, Lower, Title, Small caps), Tracking, Leading, Underline, Strike, Align (Left, Centre, Right), Vertical (Top, Middle, Bottom) and Fit (Shrink, Wrap, Wrap and shrink, Overflow).
- Fill: Solid, Linear or Radial, with a Colour, or colour Stop rows with a position, Add Stop (up to 8), remove (down to 2) and an Angle for a linear gradient.
- Strokes: Add Stroke (up to 4), each with a colour, Width and Position (Outside, Centre, Inside).
- Shadows: Add Shadow (up to 2), each with a colour, Offset X, Offset Y, Blur and Spread.
- Glow: the Glow switch, then Colour, Radius and Strength. The radius is one value for both directions.
- Text Box: Box behind text, then the box fill, Padding, Radius and Each line.
- Text Styles: save the look of the selected text, apply a saved look to the selected texts, or delete one (see Templates and text styles).
- Build In and Scroll (a text element selected): see Animation and keys.
- Shape and Image (a shape or an image selected), and Arrange (any selection): see Shapes, images and arrange.
- Data: says "No data file. Fields show their own text." with Choose...; once a file is set it shows File, Remove, a box for each piece of text (Own text or one of the file's columns), a Row box ("Row 1 of 12") and Previous and Next buttons that step through the file, and the title shows that row.
In the title's tile menu, Title on Overlay n (ticked while it shows) puts the title on its overlay channel or takes it off.
Add and delete elements
A title holds Text, Shape and Image elements. Add one with the Text, Shape or Image toolbar button, from the + menu under Layers, or with Cmd+Shift+T (macOS) or Ctrl+Shift+T (Windows) for a text. The Shape button opens a grid of shapes. The Image button lists the images in the Library, and Choose File... picks one from disk. The new element is selected, and each add is one undo step. A title holds a limited number of elements.
Delete the selection with Delete, the Delete Layer button in the foot bar under Layers, or the right click menu. Duplicate (the Duplicate Layer button in the same foot bar) makes a copy of the selection.
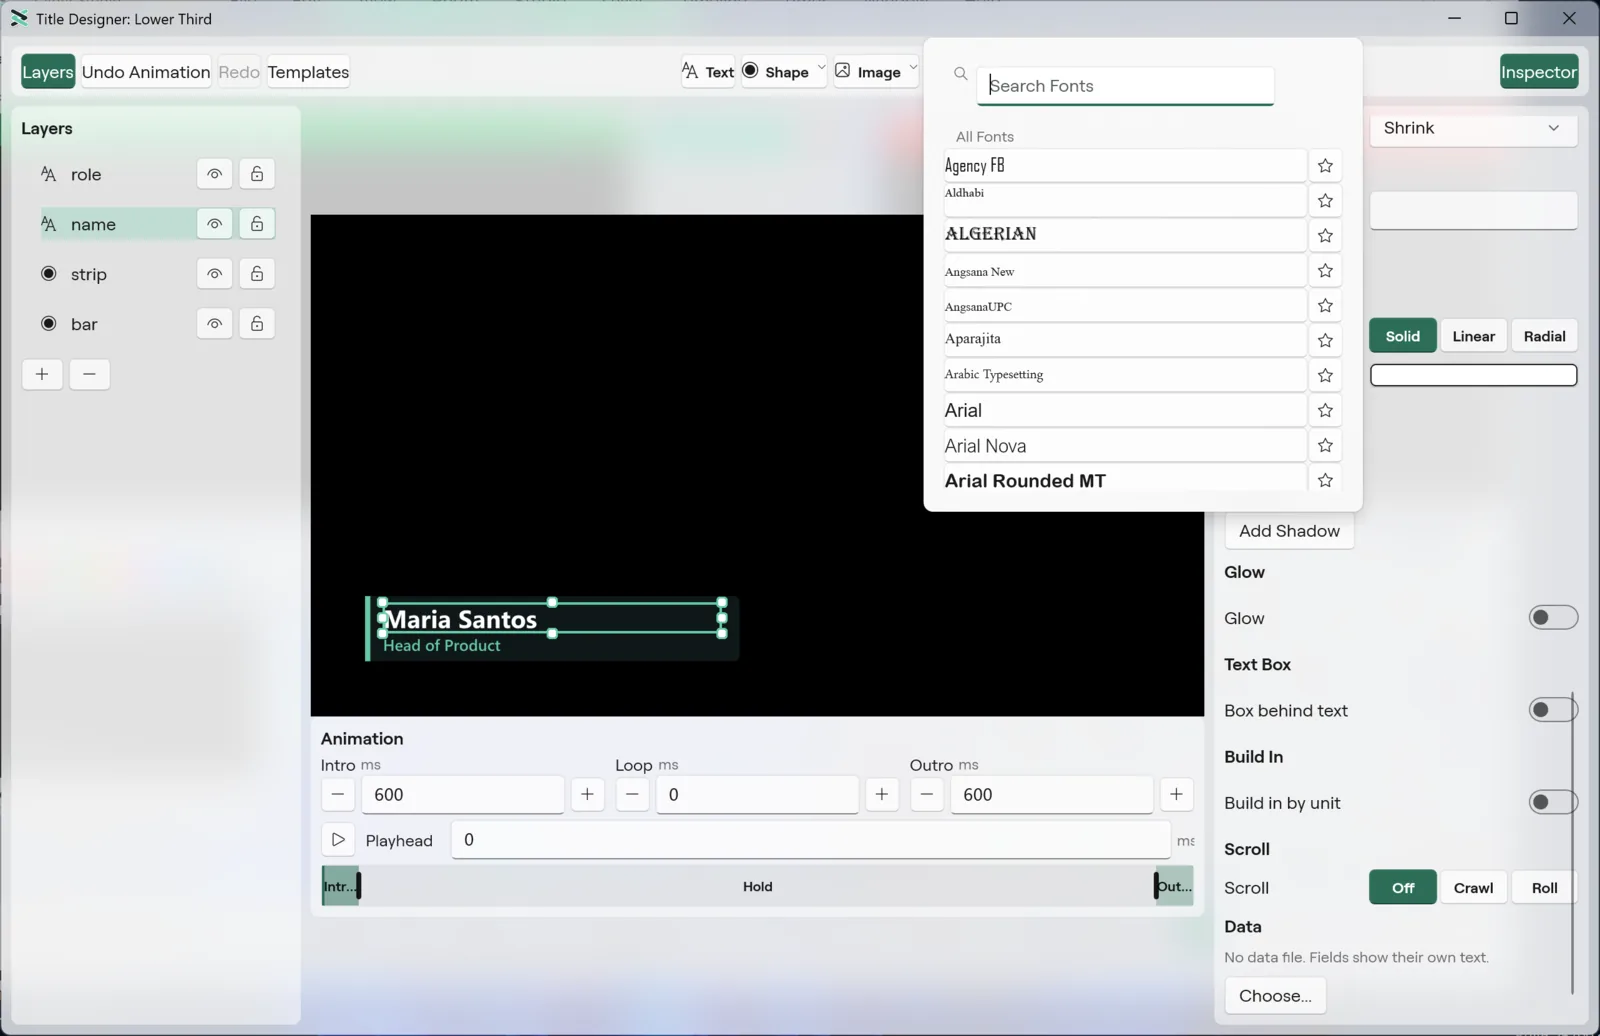
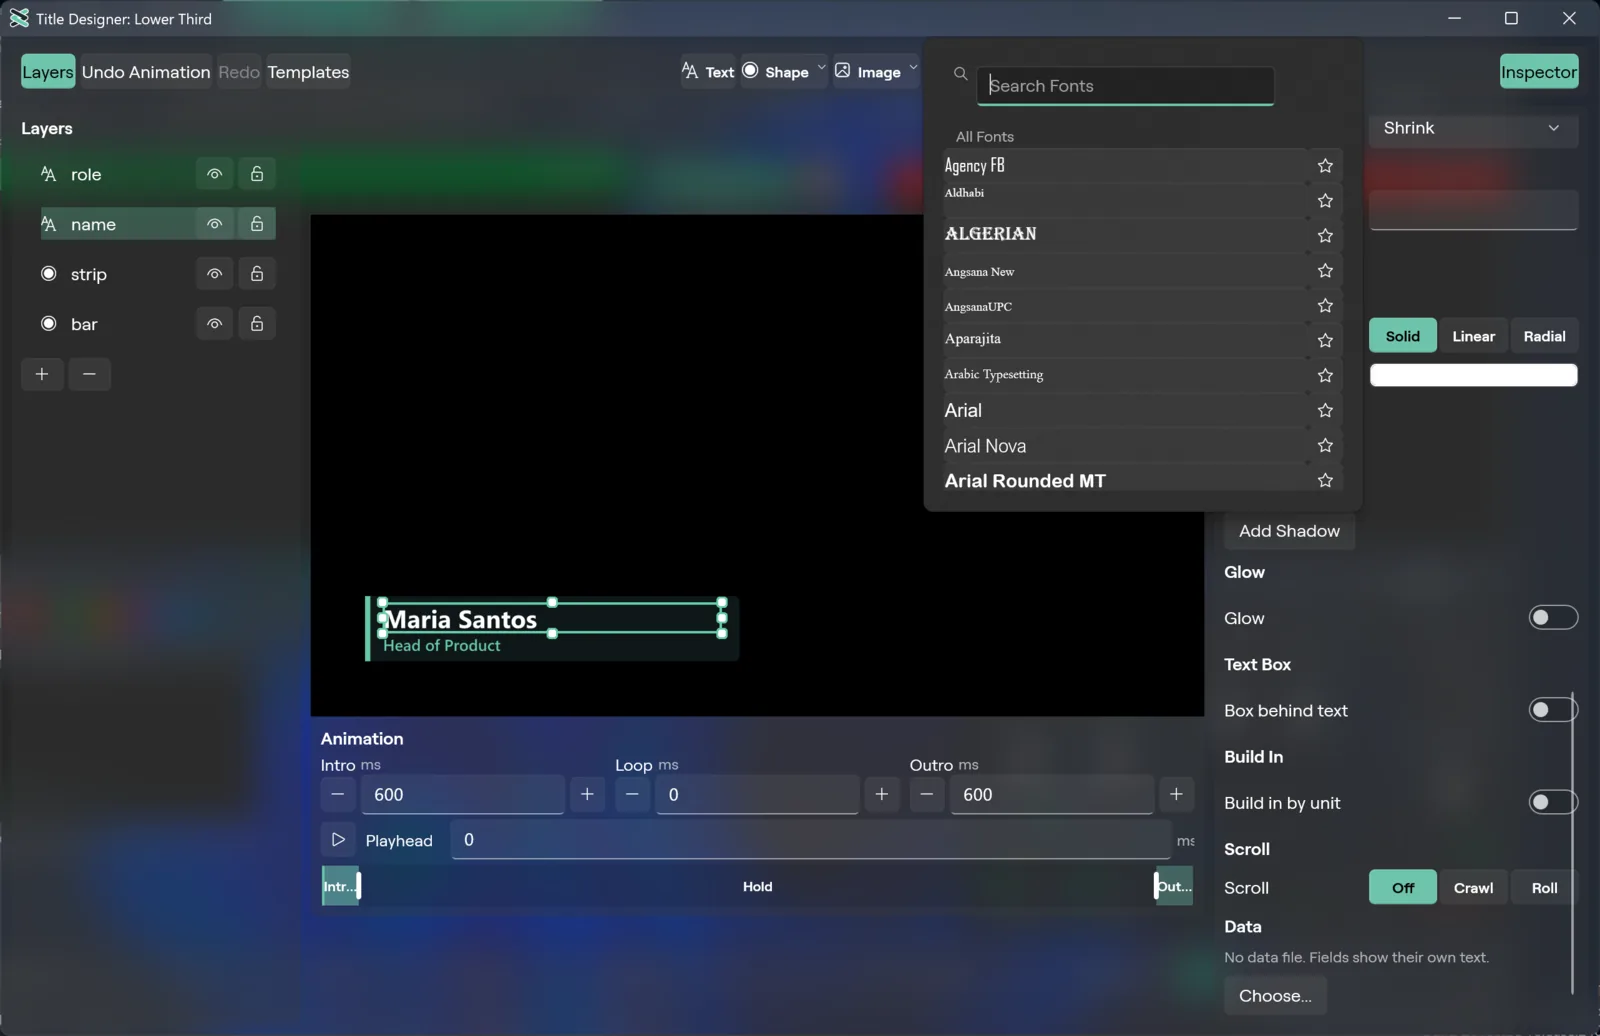
Fonts
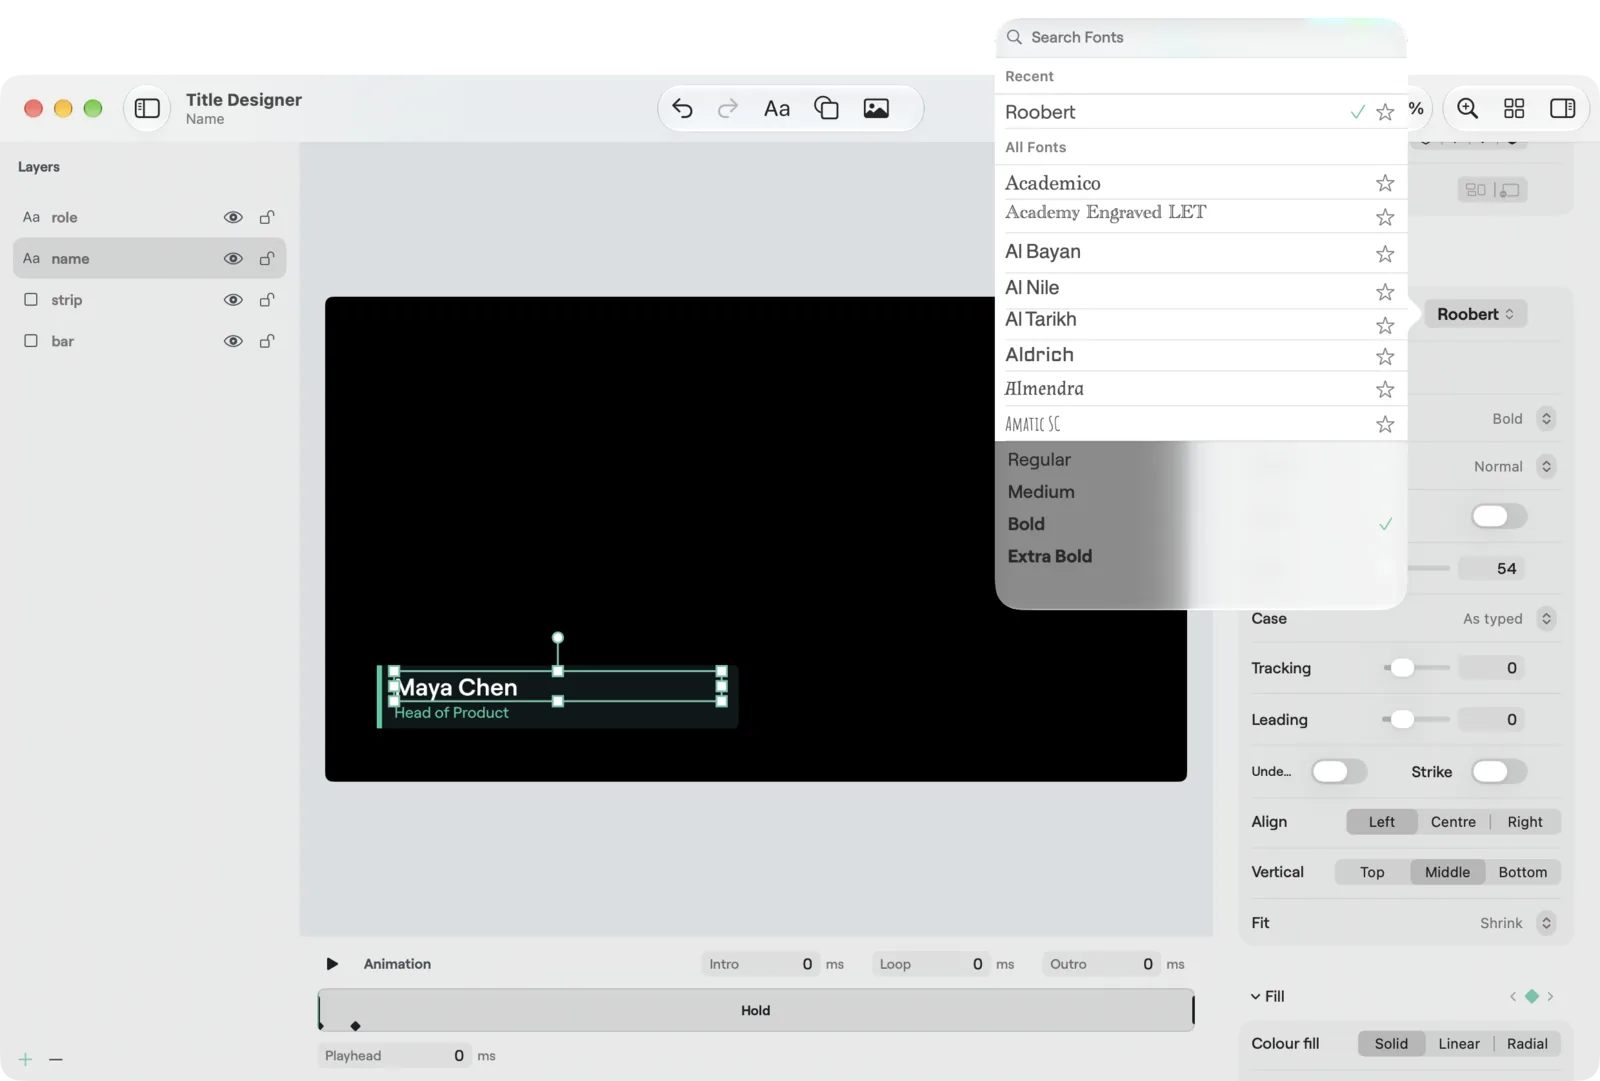
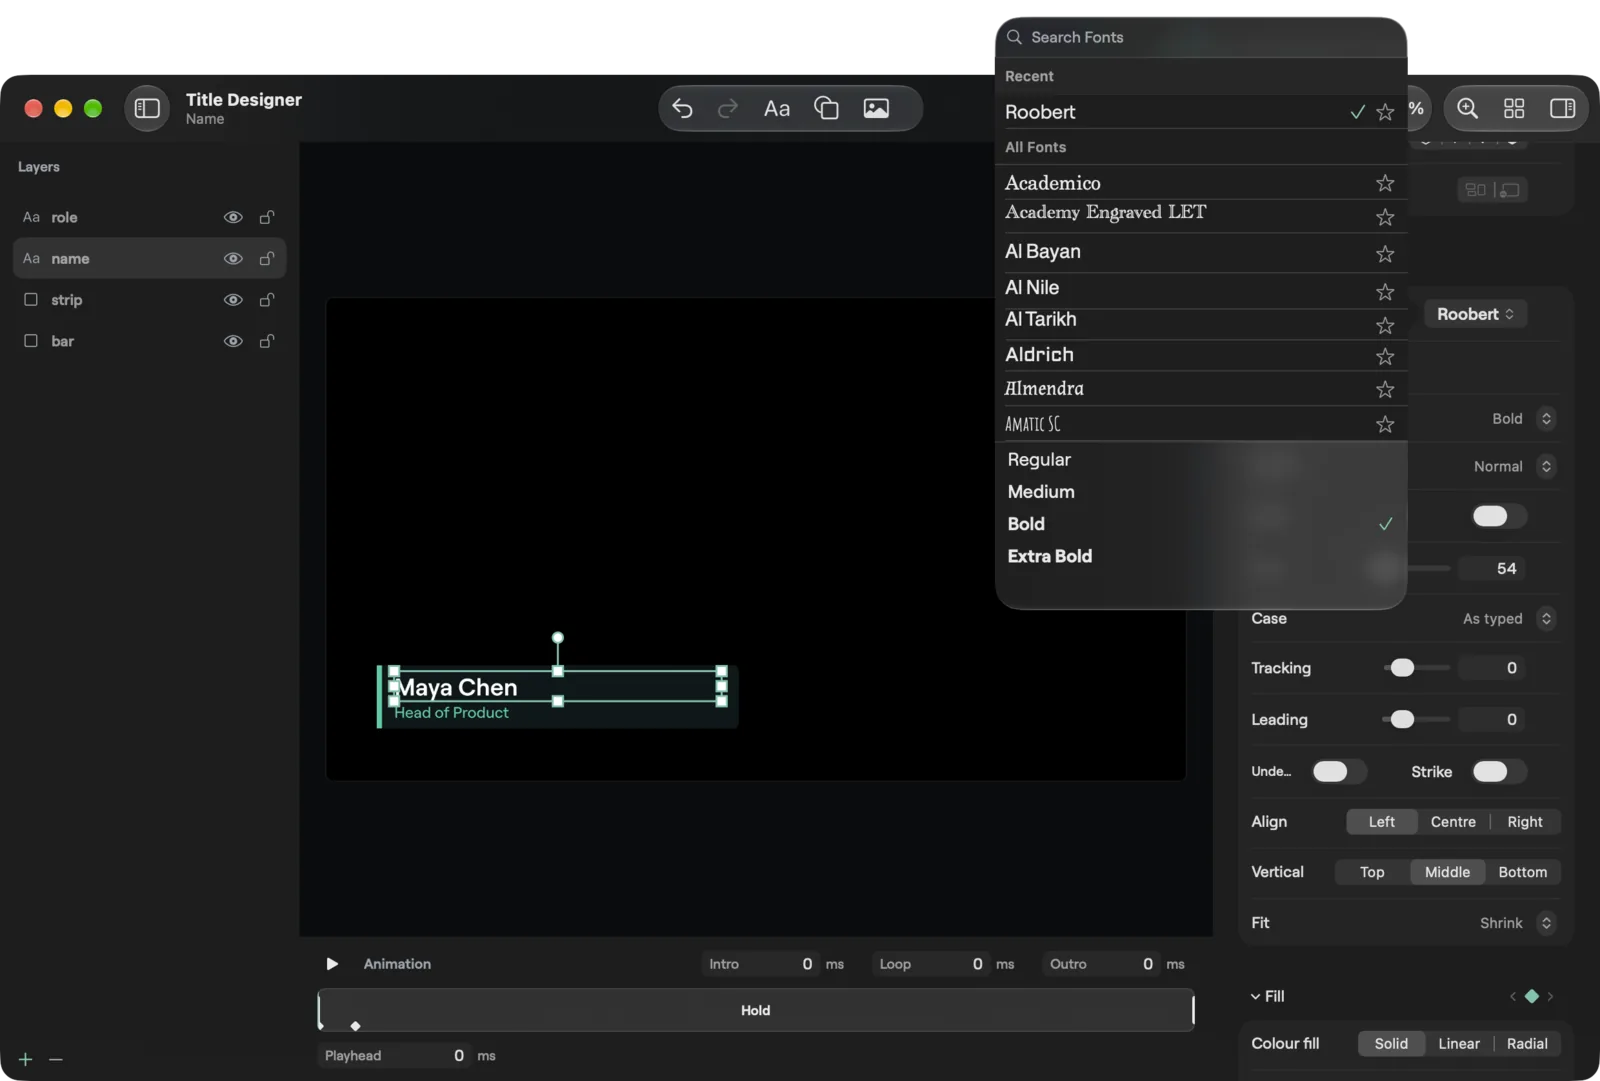
Press the family field in the Inspector to open the font picker. It has a search field, then Favourites, Recent and All Fonts, and every row is drawn in its own face. Pick a family to apply it in one undo step. Under the list the faces of the family are listed. The star on a row adds or removes it from Favourites. Import Font... installs a .ttf or .otf file for Studio. A font that is not installed on the computer shows a warning on the family field, and a notice offers Choose Substitute... (pick another font to replace it everywhere in the title, one undo step) or Keep System Font.
| macOS | Windows | |
|---|---|---|
| Picker | A popover | A flyout |
| Face rows | Drawn in their own weight, width and slant | Drawn in their own weight only, not width or slant |
Shapes, images and arrange
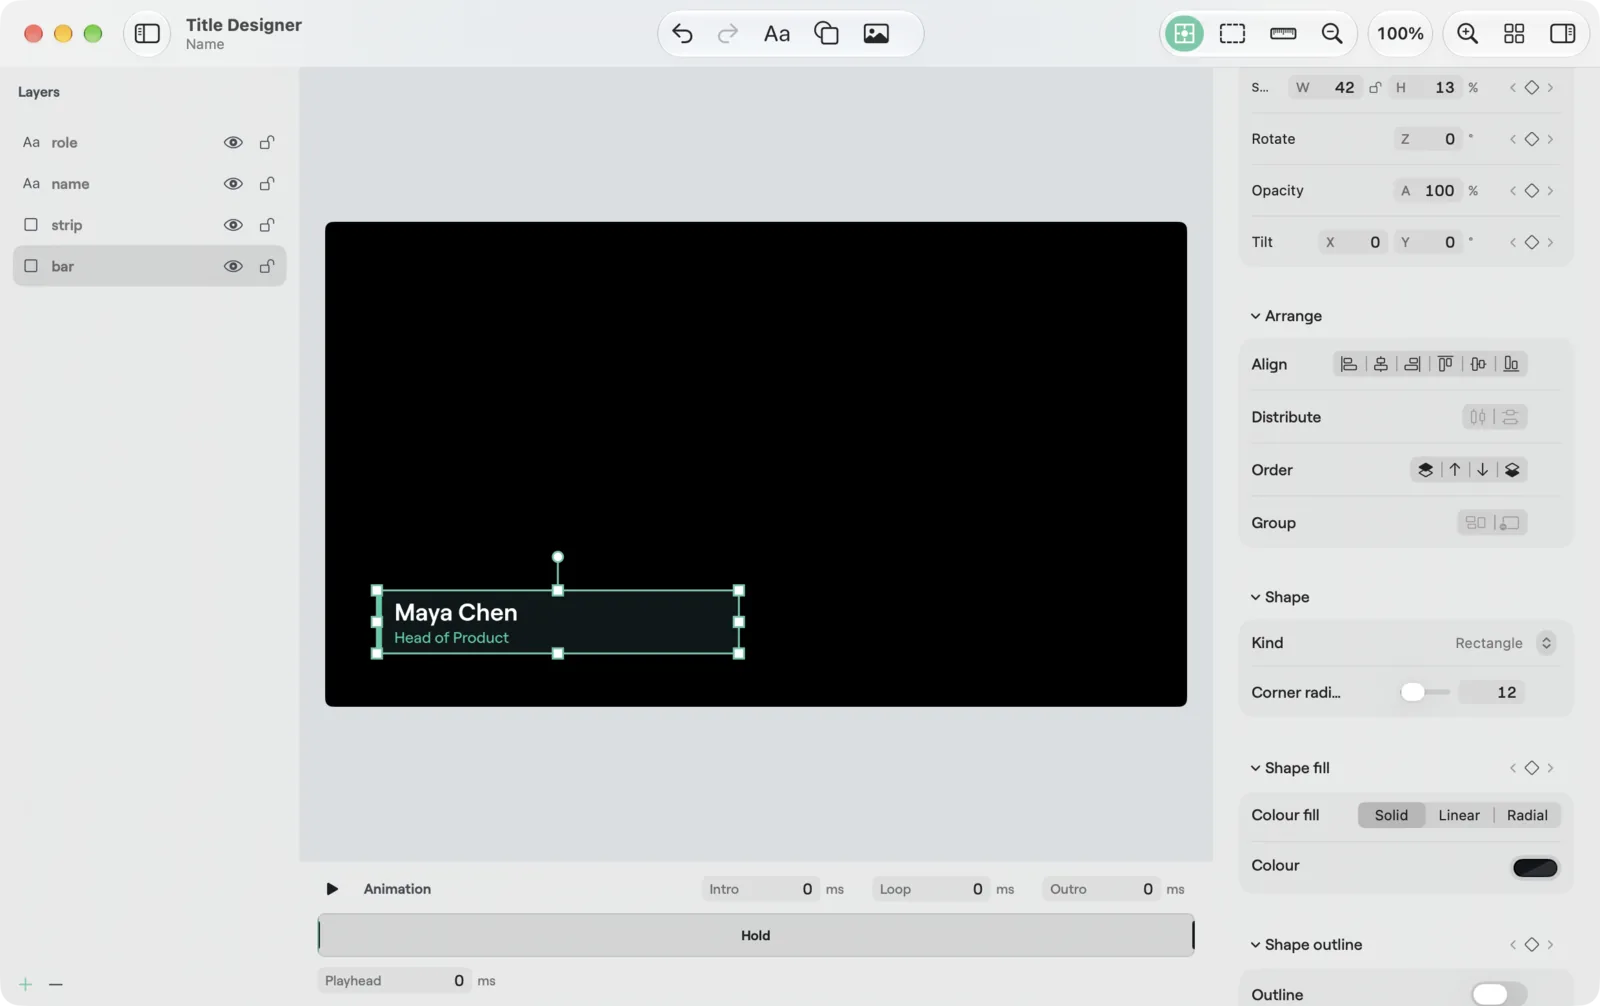
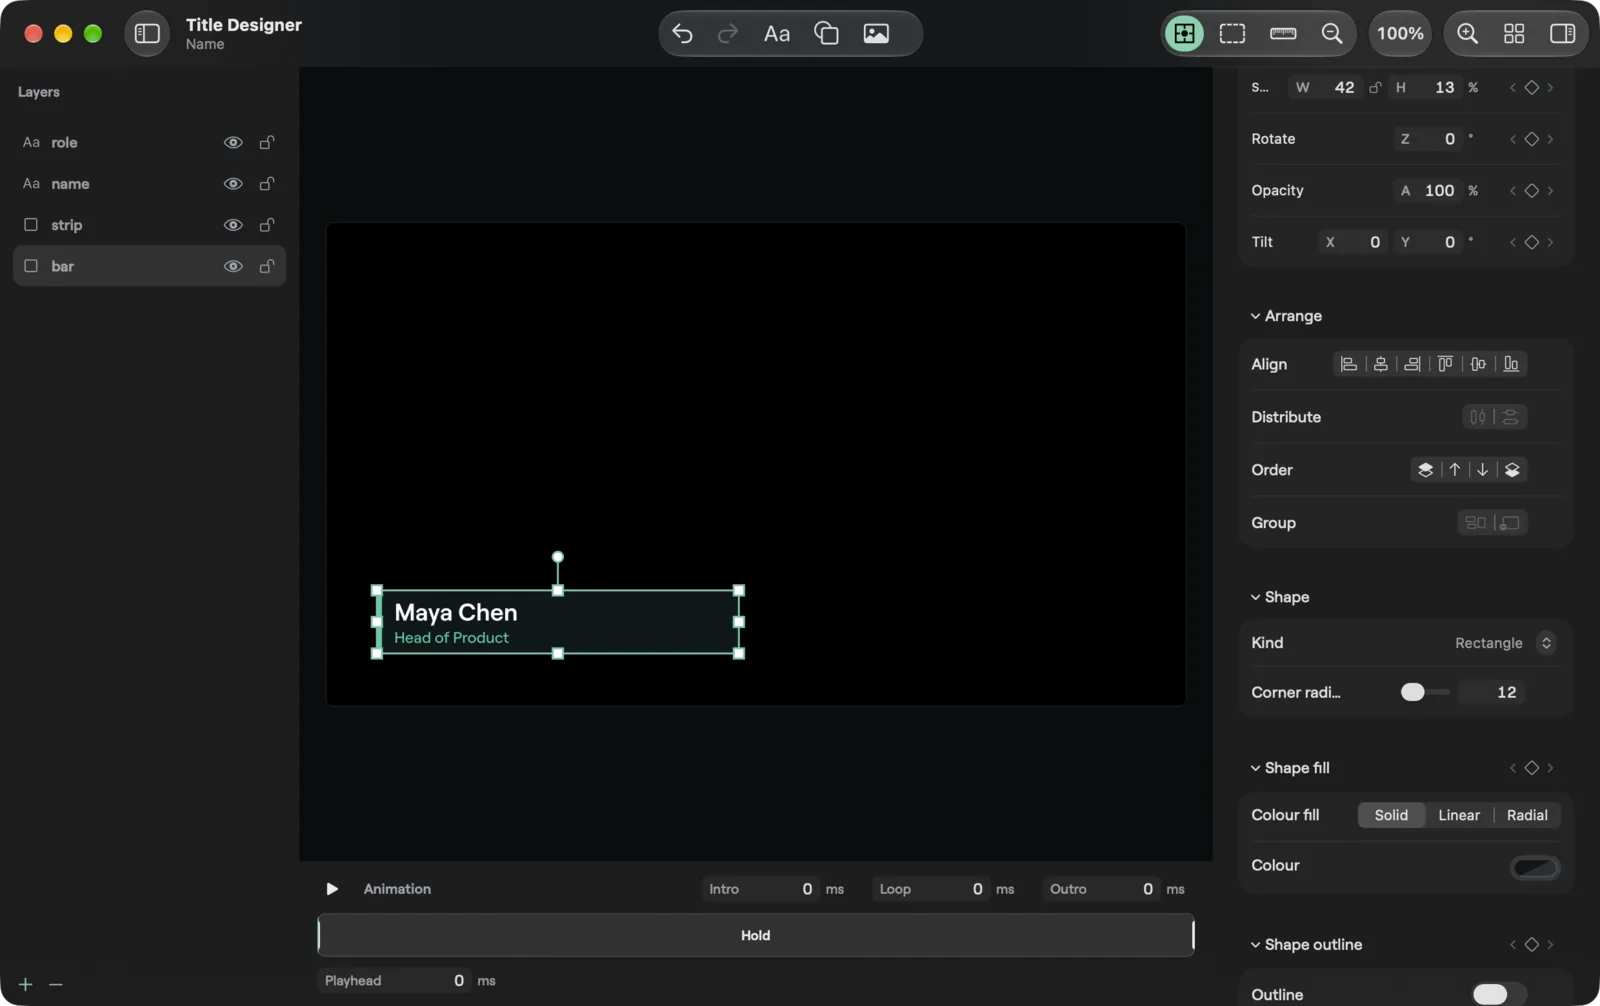
- Shape (a shape selected): the Kind, Sides for a polygon and a Star switch, Corner radius, a Fill (Solid, Linear or Radial with stops and an angle) and an Outline switch with Colour and Width. A shape has no shadow.
- Image (an image selected): Replace... swaps the picture, and Fit Box to Image resizes the box to the picture's shape.
- Arrange (any selection): Align (left, centre, right, top, middle, bottom), Distribute horizontally or vertically (needs three or more elements), the four stacking commands, Group and Ungroup. A button that does not apply is dimmed. Each is one undo step.
With a whole group selected, the Rotation field turns the group as one piece, on both platforms. The Inspector then shows a Group heading with the group's name and its own key diamonds (see Animation and keys).
Templates and text styles
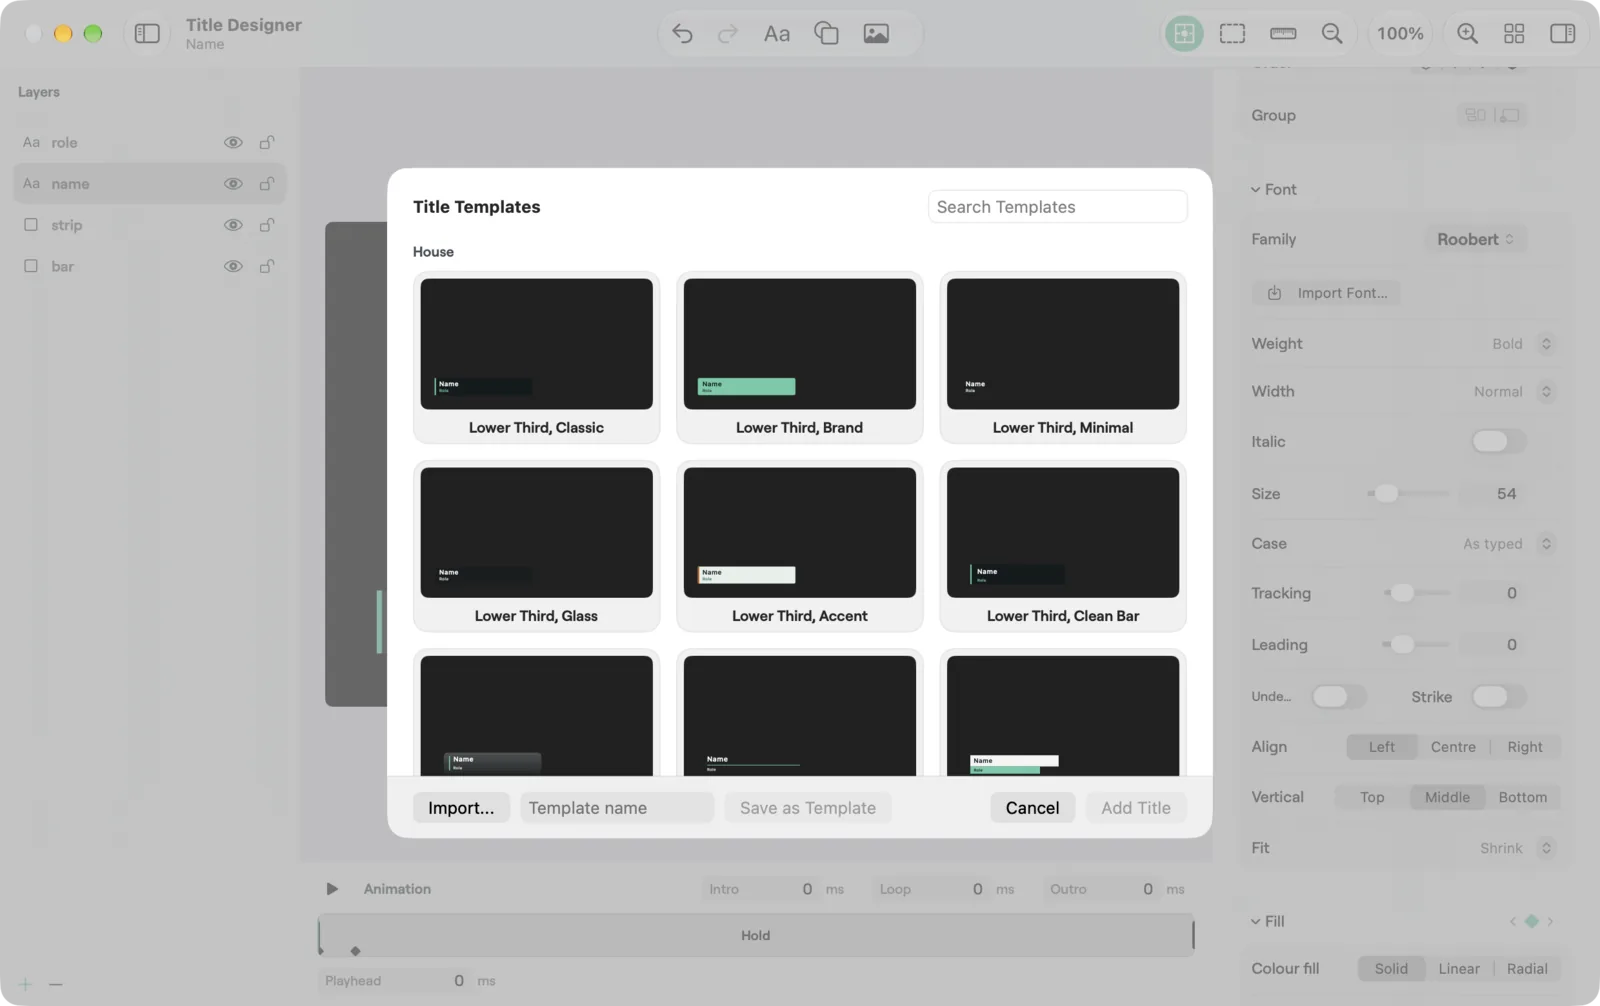
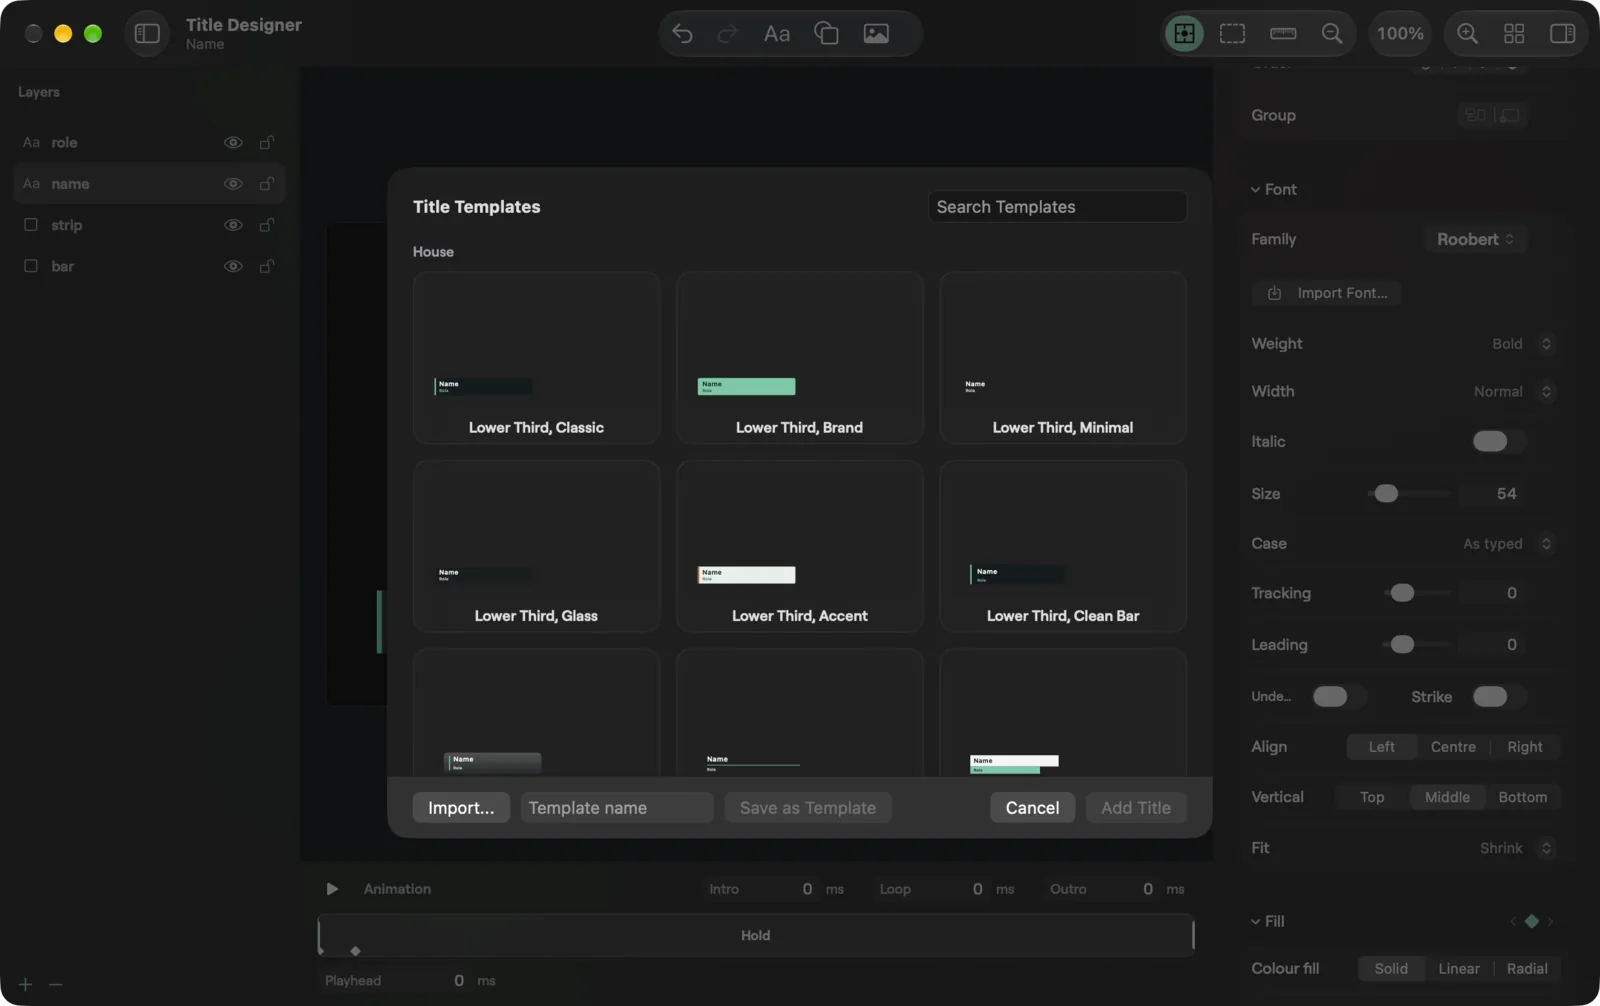
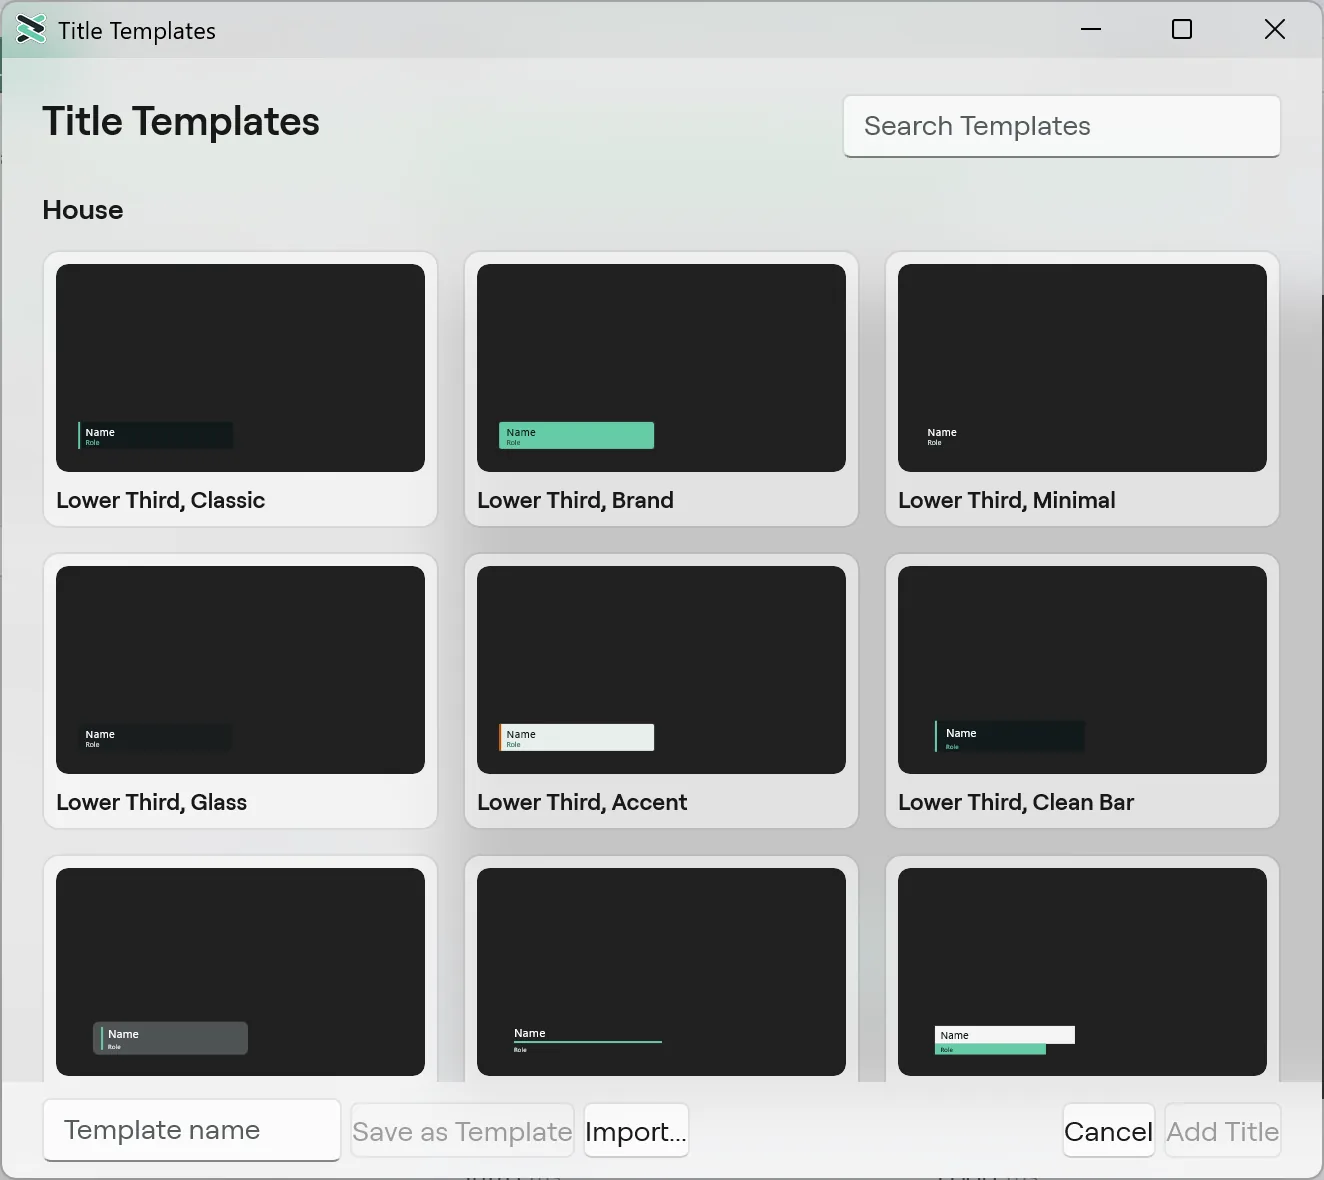
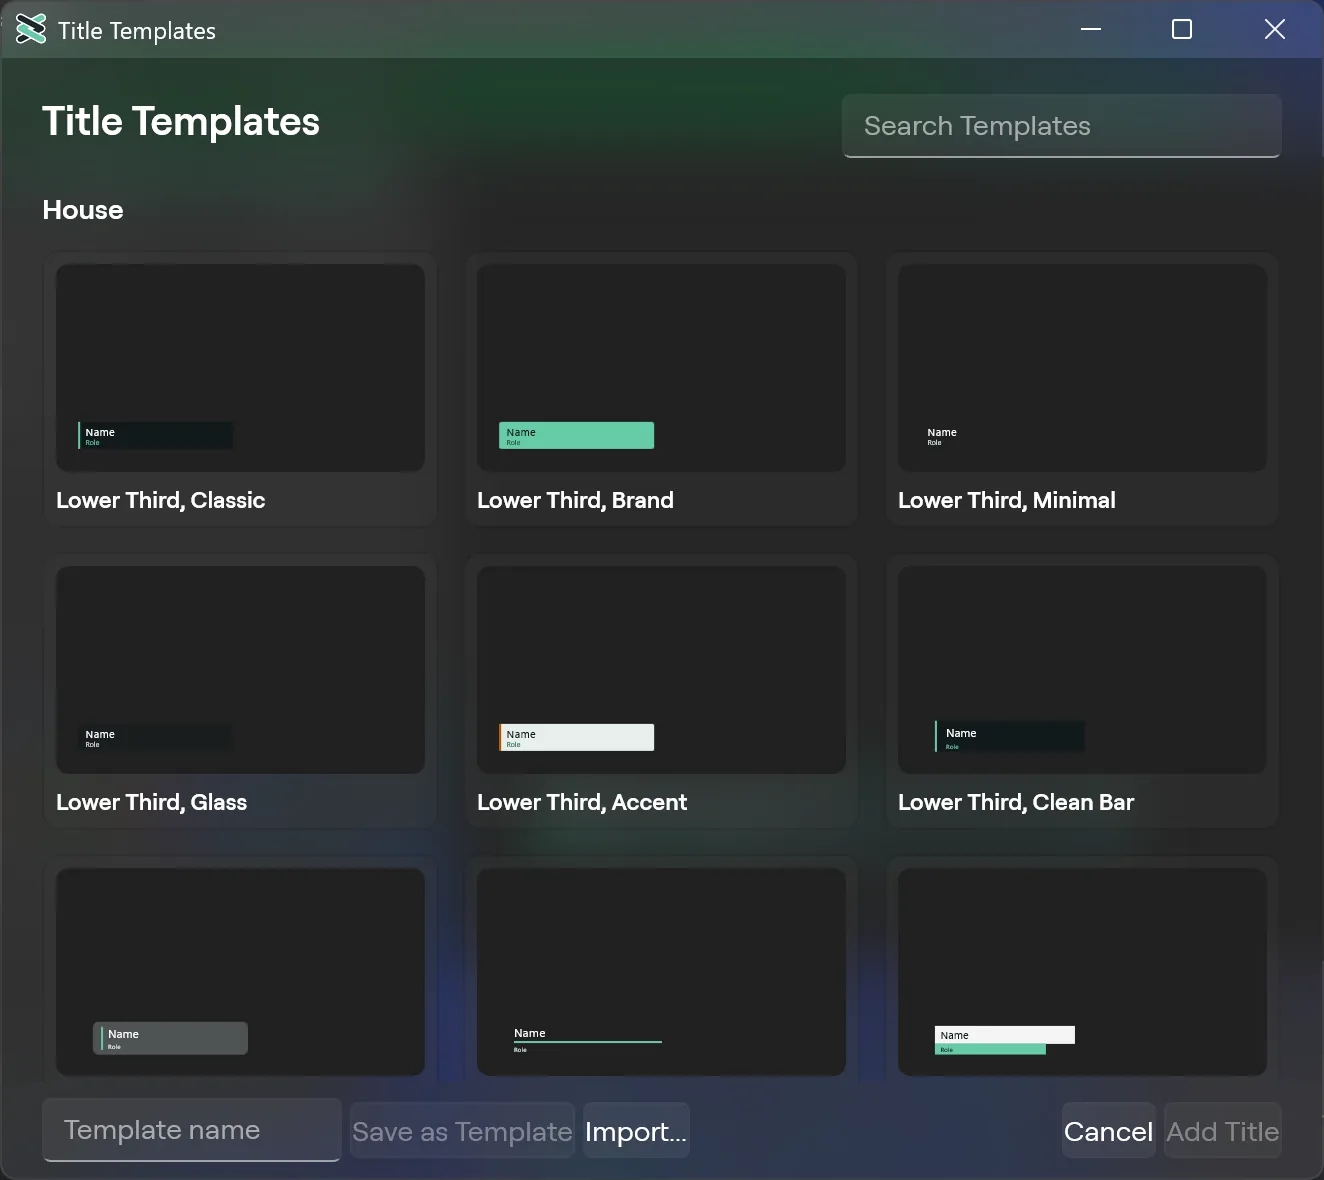
The Templates button in the Designer, and Browse Templates... in Add Title, open the gallery of Title Templates. It has House (the templates Studio ships with) and My Templates, a Search Templates field, and a thumbnail grid. Double click a template, or select it and press Add Title, to add a new title input from it; its Designer opens. Save as Template in the gallery saves the open title under a name you type. Export... writes a user template to a .cliqertitle file, Import... reads one, and Delete removes a template of yours. A title that uses a font that is not installed shows the missing-font notice after it opens.
Thumbnails are drawn from the title's boxes, fills and own text. They do not show gradients, strokes, shadows, glow or images.
Text Styles in the Inspector keeps the look of a text. Save stores the selected text's look under a Style name, Apply puts a saved look on the selected texts in one undo step, and Delete removes it.
| macOS | Windows | |
|---|---|---|
| Gallery | A sheet on the Studio window | Its own window, closed with the Cancel button (no Esc key) |
| Double click | A normal double click | Two presses within half a second |
| Thumbnails | Show rotation | Do not show rotation |
| Failed export or import | A message in Studio | A line of text in the gallery |
Animation and keys
The strip under the canvas shows the title in time as three regions, Intro, Hold and Outro, at a fixed scale of up to 5 seconds each side, so a drag never rescales it. Drag the two inner edges to change the intro and outro lengths (one undo step per drag). The Intro, Loop and Outro fields take milliseconds, and Shift steps ten times as far. A looping title says "Hold, loops N ms".
Build In (a text element selected) reveals the text piece by piece. Turn it on, then set the Preset, the Unit (what a piece is), the Order, Stagger, Unit length and the Outro, which can be Intro backward. With a random Order, the Seed and Shuffle give a new random order.
Scroll (a text element selected) moves the text: Off, Crawl or Roll, with Speed, Direction, Gap and Loop. Separator shows when the text is bound to a data file. Switching between kinds keeps the speed and the gap.
Key diamonds sit beside Position, Size, Rotate, Opacity and Tilt in the Inspector, each with a previous and a next arrow:
- Press a diamond to add a key at the playhead, or to remove the one there. A key holds the whole pose, so all five diamonds fill together. A diamond is filled when a key lies within one frame of the playhead. One undo step each.
- The arrows jump the playhead to the neighbouring key.
- A Look diamond heads the text look sections. It keys the look of the selected texts at the playhead, with its own arrows. At a look key, an edit of the look goes into that key.
- With a whole group selected, the Inspector adds a Group heading with two diamond rows: Position, size, rotate (one pose key for the group) and Look.
- With the playhead on a key, an Inspector edit goes into that key and the element's own pose stays as it was. Away from a key, an edit changes the element's own pose.
- The playhead is a line in the strip. Drag in the strip, or type in the Playhead field, and the canvas shows the title at that time. The keys of the selected element show as small diamonds in the strip.
- Press Play to run the title from the playhead (from the start if it is at the end). The button turns to Pause. The run stops at the end of the title, and closing the Designer stops it.
Keys cannot be set on a single property by itself, and key easing is not in the Designer yet.
Shortcuts in the Designer
| Action | macOS | Windows |
|---|---|---|
| Add a text | Cmd+Shift+T | Ctrl+Shift+T |
| Delete the selection | Delete | Delete |
| Duplicate | Layer, Duplicate or right click | Ctrl+D or right click |
| Nudge | Arrow keys, Shift further | Arrow keys, Shift further |
| Resize keeping proportions | Shift | Shift |
| Resize from the centre | Option | Ctrl |
| Both | Shift+Option | Shift+Ctrl |
| Play and pause | Space | Space |
| Stop and rest | Escape | Escape |
These keys act on the canvas. They do nothing while you type in a text field, and on Windows Space presses the button that has the focus.
Timer titles
A Timer title is a title whose text shows a countdown. Add one with Timer in Add Input, or choose the Timer kind in Add Title. A new one is one big text that fills the frame (size 1200, Fit set to Shrink, with a small margin at each side), and it opens the Title Designer at once.
- Its own clock. A new Timer input runs its own countdown from 5:00. It is not running until it goes on air. It does not follow the Timer window of the room (the app timer).
- It starts when it goes on air. A Timer title whose clock is stopped above 0:00 starts the moment it goes on air: on a Program (the main one or a screen's), on an overlay, or inside a scene or Mix that is on air. A cut, a fade or the end of the T-bar start it. Preview does not start it, a running clock is left alone, a clock at 0:00 stays, and leaving Program does not stop it. Start, Pause, Reset and Set time still work by hand, and they go straight to air.
- Source. In the Title Designer Inspector, the timer text has a source: App timer (follows the room's timer) or Own clock (macOS: Source in the Timer section; Windows: Clock). A title that was saved with the app timer keeps it. The Format is M:SS or H:MM:SS. The source and the format are look edits: on air they wait for the next Take, like any title edit with Edit Live off.
- Own clock controls. With Own clock chosen, the Inspector shows the time, Start or Pause, Reset and Set time (macOS) or Set (m:ss) (Windows). Reset goes back to the set time.
- Count down. With Own clock chosen, Count down is Duration (a time you type) or To time (a time of day: hours and minutes). To time counts to the next time the local clock reaches it, today or tomorrow. Start and going on air aim at that next time, and Reset shows the full time left, stopped. These controls are in the Title Designer Inspector and in the Studio Inspector of a Timer input, on both systems.
macOS and Windows differences
| macOS | Windows | |
|---|---|---|
| Menu bar | Insert, Edit and Layer menus | None. Use the toolbar, the + menu and the right click menu |
| Snap | Snap Guides toggle; Control off for a drag | Always on; hold Space off for a drag |
| Safe areas | Show Safe Areas toggle | No toggle |
| Rotate on the canvas | A round handle | No handle; use Rotation |
| Rotate a group | Yes | Yes |
Captions inputs
A captions input draws the live caption lines (the ones Live captions makes, see Captions) into a transparent frame of its own. It is an input like any other: put it in a scene to place and size it, or on an overlay. Program stays clean until you put it there. The lines are live and are never saved with the show. The look is saved with the show.
Add one with Captions in Add Input. It is named "Captions 1", then "Captions 2", and so on, and it counts against the rack like any input. It needs the live captions feature of your plan: without it the add is refused with the standard plan message. See Plans and limits.
On macOS the Captions section of the input inspector opens on the new input. On Windows a Captions card opens when you add it, and the input's menu has Captions... to open it again. Both have the same rows:
| Setting | What it does |
|---|---|
| Theme | White on Black, Yellow on Black or No Background. It reads Custom when you changed colours so that none of the three matches |
| Font, Weight | The font family and its weight |
| Size | The text size, 24 to 120 px, measured on a 1080 high picture |
| Text colour, Background colour | The colour of the text and of the pill behind each row |
| Background opacity | 0 to 100 %. At 0 there is no pill, and the rows are tighter |
| Rows | 1 or 2 rows on screen, the newest at the bottom |
| Position | Bottom Centre, Top Left or Bottom Left |
| Alignment | Auto, Left, Centre or Right. Auto follows the position: centred at Bottom Centre, left at the two left positions |
Every finished edit is one undo step (a slider counts when you let go, a colour when its picker closes). With Edit Live off, an edit to a captions input that is on air waits for the next Take, like a title. Duplicate and Remove input are the ordinary input commands.
Timeline
A Timeline input is a short programme laid out in time: clips on tracks that play back in step with Program. It is on the Mac and on Windows, and it needs the Ultra, Studio or Enterprise plan (the free trial has it too).
- Tracks. Clips sit on tracks named V1, V2 and so on. The bottom track is V1, and a clip on a higher track draws over the ones below. A track holds one clip at a time, so clips on one track never overlap.
- Overlap goes up. When a clip lands where its own track is already busy, it moves to the first track above that has room. If none has, Cliqer adds a new track on top.
- Fades. A clip can fade in and fade out. The fade is a gentle ease by default. Where a clip is shorter than both fades together, the lower of the two wins.
- Plays with Program, like media. The timeline starts when it goes to Program, pauses when it leaves Program, and starts again from the beginning the next time it goes to Program. A timeline can also loop at its end.
Each timeline tile has a transport row:
| Control | What it does |
|---|---|
| Play, Pause | Start or pause the timeline (tooltips Play and Pause) |
| Stop | Pause and go back to the start |
| Position bar | Shows each track's clips as thin lanes, the played part, and the time as m:ss.t / m:ss.t (position and length). Click or drag to seek |
If a clip should be playing but has no picture, because too many clips play at once or its file did not open, the bar marks it and Studio shows the warning Timeline Clip Late: "A clip in
Build the programme in the Timeline editor: double-click the tile to open it, then drag inputs onto tracks (on Windows, select an input and press Shift+Ctrl+Enter, or use Add Media…). A new timeline is empty until you add clips.
Under External Control, Timeline play, Timeline pause, Timeline stop and Timeline seek control the transport.
Categories and search
Categories are six colours you assign to inputs to group them. Pick a colour chip above the grid to show only that category.
- All shows everything. The six dots filter by category (tooltip "Category n: drop an input here to file it").
- The magnifier (Command+F) opens Search inputs, which filters by name.
- A count reads "n inputs", or the selected category.
- Tile size menu: Small, Medium, Large, Extra Large.
- In Basic mode the chips and search are hidden and the filter is ignored.
- Empty results say No Inputs in This Category or No Matches, with Show All Inputs.
- Seven swatches: the first shows all inputs; the others are Red, Green, Amber, Purple, Blue and Teal.
- The search toggle opens a box that filters by name. The caption reads "All inputs (n)".
- A Tile size drop-down: Small, Medium, Large, Extra Large.
- An Audio Mixer toggle (Ctrl+Alt+M) shows or hides the mixer panel.
- Empty results say "No input matches."
The GO key and Quick Play
Every tile has a GO key. It runs one action for that input without touching Preview. The default is Quick Play: Preview to Program with the Quick Play transition. You can change it per input to Cut, a numbered Transition, or an Overlay channel. This lets you build a row of buttons that each do the right thing for their source. See Transitions for the takes themselves.
Lock switching
A lock freezes the controls that change what is on air, so a stray click cannot cut away.
Lock icon in the bottom bar (Overlays and Tools), or Studio > Lock Switching (Shift+Command+K). Frozen: Preview, Program, Cut, Quick Play, transitions, the T-bar, FTB, GO, stingers, overlay keys, Loop, Live pause and Pause Inputs. A blocked action shows the note "Locked".
Lock switching controls in the Tools bar or Ctrl+Shift+K. Disabled while locked: Remove, GO, Cut, Loop, Live pause, audio, the transition buttons and the switching keys. Overlay toggles and the gear menu stay active.
Pause Inputs
Pause Inputs (toolbar on macOS, top bar on Windows) pauses every playing media input at once.
Remove an input
Use the X on the tile, Close (macOS) or Remove input (Windows) in the menu, or Remove Input in the macOS inspector. There is no confirmation.
An input that is on air leaves like any on-air input: it goes out with the transition it came in with, and only then are its tile and mixer strip removed. During that fade the input keeps its fader, mute and sound processing, so its sound falls with its picture. With Edit Live off, a setup input (a camera, a media file, a scene) that you delete on air leaves Preview at once and Program keeps it until the next Program change takes it off. A video call input does not wait for a take, see Video calls.
What is remembered after a restart
When Studio starts it restores your inputs (scenes included) with their settings, and your transition slots and other settings. It does not put anything on air: Program, Preview, overlays, Fade to Black, fullscreen outputs, Live pause, and the sends to the room and NDI all start off, and Edit Live starts off. Cameras and media reopen in the background.
Save a show to keep a particular setup as a file (.cliqer), and use the show menu to open it again. Double-click a .cliqer file to open it in Cliqer.
The Show menu in the toolbar: New Show, Open Show..., Save Show, Save Show As..., then Open Last Show. Save Show writes to the show's own file, and asks where to save when the show has none yet. The same commands are in the File menu. The show name appears in the status line.
The File menu in the title bar, while Studio is open: New Show (Ctrl+N), Open Show... (Ctrl+O), Open Last Show, Save Show (Ctrl+S) and Save Show As... (Ctrl+Shift+S). The Preset group in the top bar now holds Undo and Redo only. The installer makes Cliqer the app for .cliqer files: double-click one, or open it while Cliqer is already running, and that show opens in the running app.
A show keeps one library entry per media file, so a file that two inputs, clips or titles share is one file in the show, and a file you move keeps working. Deleting a file that is still used by an input, clip, title element, LUT or list is refused with a notice that says how many places use it.
Plan limits
How many inputs you can have, and which kinds, depends on your plan. Web page and title inputs, network streams, Syphon and Spout senders, Blackmagic cards, effects and PTZ each need a plan that includes them. When an add is refused Studio shows the plan message described in Studio. Numbers per plan are on Plans and limits.
Overview
Cliqer Studio is the live production window of the Cliqer v3 desktop app. Switch inputs, run transitions, mix audio and send the result to the room, NDI, recordings, streams and a virtual camera.
Timeline editor
Lay clips out in time on tracks in Studio: open the editor, add and move clips, trim, fade, dissolve, change speed, keyframe a layer, add titles, grade a clip with its own effects, snap and ripple, set cues and their follow actions, read the inspector and use the keys. On the Mac and on Windows, Ultra plan and up.